


Picture Hanging String: How to Choose, Tie, and Use It
You've straightened the framed print in your hallway again, but the top still leans away from the wall. Behind it, a length of wire disappears into hardware you haven't checked since the picture went up. Before replacing or tightening that wire, take the frame down and inspect what holds it.
Picture hanging string is only part of the installation. In a Denver home, office, or gallery, the useful question isn't just which wire to buy. It's whether the wire, frame hardware, wall fastener, and wall itself can support the complete piece safely, in the position you want.
Why the Right Picture Hanging String Matters
A stronger wire won't rescue a loose screw in the frame. Nor will an oversized wall hook make damaged drywall sound. Reliable hanging starts by following the load path, meaning the connected components that transfer the artwork's weight into the building.
Treat the installation as a system rather than a shopping list. Before choosing anything, turn the frame over, examine its construction, and identify the wall material where you intend to hang it. That inspection can change the entire hardware choice.
Follow the Load From Frame to Wall
String or wire: The suspension material needs a stated capacity and secure terminations, not just a reassuring appearance.
Frame-side hardware: D-rings, mirror hangers, and their screws must attach to material capable of carrying the piece.
Wall fastener: The hook, screw, or bracket must suit the intended load and installation method.
Wall substrate: Drywall, framing, masonry, and other assemblies require compatible fixings.
The weakest connection limits what you can safely hang. A heavy-duty wire attached to a screw that's barely holding in a deteriorated frame rail is still an unreliable installation. The same applies when a properly wired frame hangs from an anchor installed in the wrong wall material.
Practical rule: Upgrade the weak connection, not whichever component is easiest to replace.
An Engineering Problem, Not a Decorative Detail
Picture suspension has a long mechanical history. U.S. patent records identify inventions from 1887, 1895, and 1912, while a patent filed in 1978 described flexible wire between frame attachment points and a wall bracket intended to keep the picture level and substantially parallel to the wall, as documented in the picture-hanging system patent.
That history matters because the desired result hasn't changed: support the object, control its orientation, and avoid an unstable installation. A frame that looks straight from across the room hasn't necessarily passed those tests.
For DIY work, start with what you can verify. If the frame construction, hardware rating, or wall assembly is uncertain, pause before drilling. Guessing at hidden connections is a poor trade-off when glass, artwork, or people could be beneath the piece.
Choosing the Right String, Wire, and Gauge
At the hardware counter, rated picture wire and ordinary household string aren't interchangeable. Choose a product sold for picture suspension, with instructions and a capacity that apply to your installation. Twine, yarn, and dental floss aren't substitutes for documented hanging hardware.
Metal picture wire may be stranded, twisted, braided, or coated. Those descriptions help identify the product, but they don't establish its safe capacity by themselves. A thick-looking coating can also make visual comparisons misleading, so read the packaging rather than judging the roll by feel.
Picture Hanging String and Wire Quick Reference
Material | Typical Use | Working Load Range |
|---|---|---|
Coated picture wire | Framed pieces where a coated wire is preferred for handling | Use the product's stated working-load rating |
Uncoated stranded or braided picture wire | Framed artwork with compatible rings and terminations | Ordinary framed paintings commonly use hardware rated around 15 to 30 pounds, a guideline rather than a universal limit, in the gallery wiring guidance |
Purpose-made suspension cord | A hanging system specifically designed to accept cord | Follow the complete system's rated capacity |
Single-strand wire | Only applications expressly supported by the product instructions | Don't assign capacity from appearance or thickness |
Household string or improvised cord | Not recommended for framed-art suspension | No verified working range should be assumed |
Avoid treating that framed-painting range as a material-selection chart. It doesn't mean every coated wire suits a light frame or every galvanized wire suits a heavier one. The rating belongs to the particular product, and the installation still depends on the remaining connections.
What to Check Before Buying
Capacity language: Determine whether the label gives a working load or a breaking strength. They're not equivalent.
Termination instructions: Confirm that the product can be secured using your frame's hardware.
Frame compatibility: Choose attachment hardware that fits the available structural rail without requiring unsuitable screws.
System requirements: For rail-and-cable installations, use the components specified for that system.
For broader room-planning and placement considerations, Guynn Furniture & Mattress's homeowner's guide to hanging pictures is a useful companion to the hardware decision. Keep the aesthetic choice separate from the capacity check: a picture can be beautifully positioned and inadequately supported.
If you're considering a visible suspension arrangement rather than concealed rear wire, review the different setup considerations in this guide to picture hanging chain. Don't substitute chain for wire without checking how it connects at both ends.
Attaching String to D-Rings and Frames
A sound string connection cannot compensate for weak frame hardware. The load passes through four parts: string, D-rings and screws, wall fastener, and wall substrate. Start at the frame, where a poor attachment can fail before the string reaches its rated capacity.
Lay the piece face-down on a clean, padded surface that supports the frame without pressing on the artwork or glazing. Check the rails and corners. D-rings must attach to structural frame material, never to cardboard backing or a dust cover. If a rail is cracked, unusually thin, or deteriorated, stop and have the frame assessed or repaired. A longer screw does not make damaged wood sound.
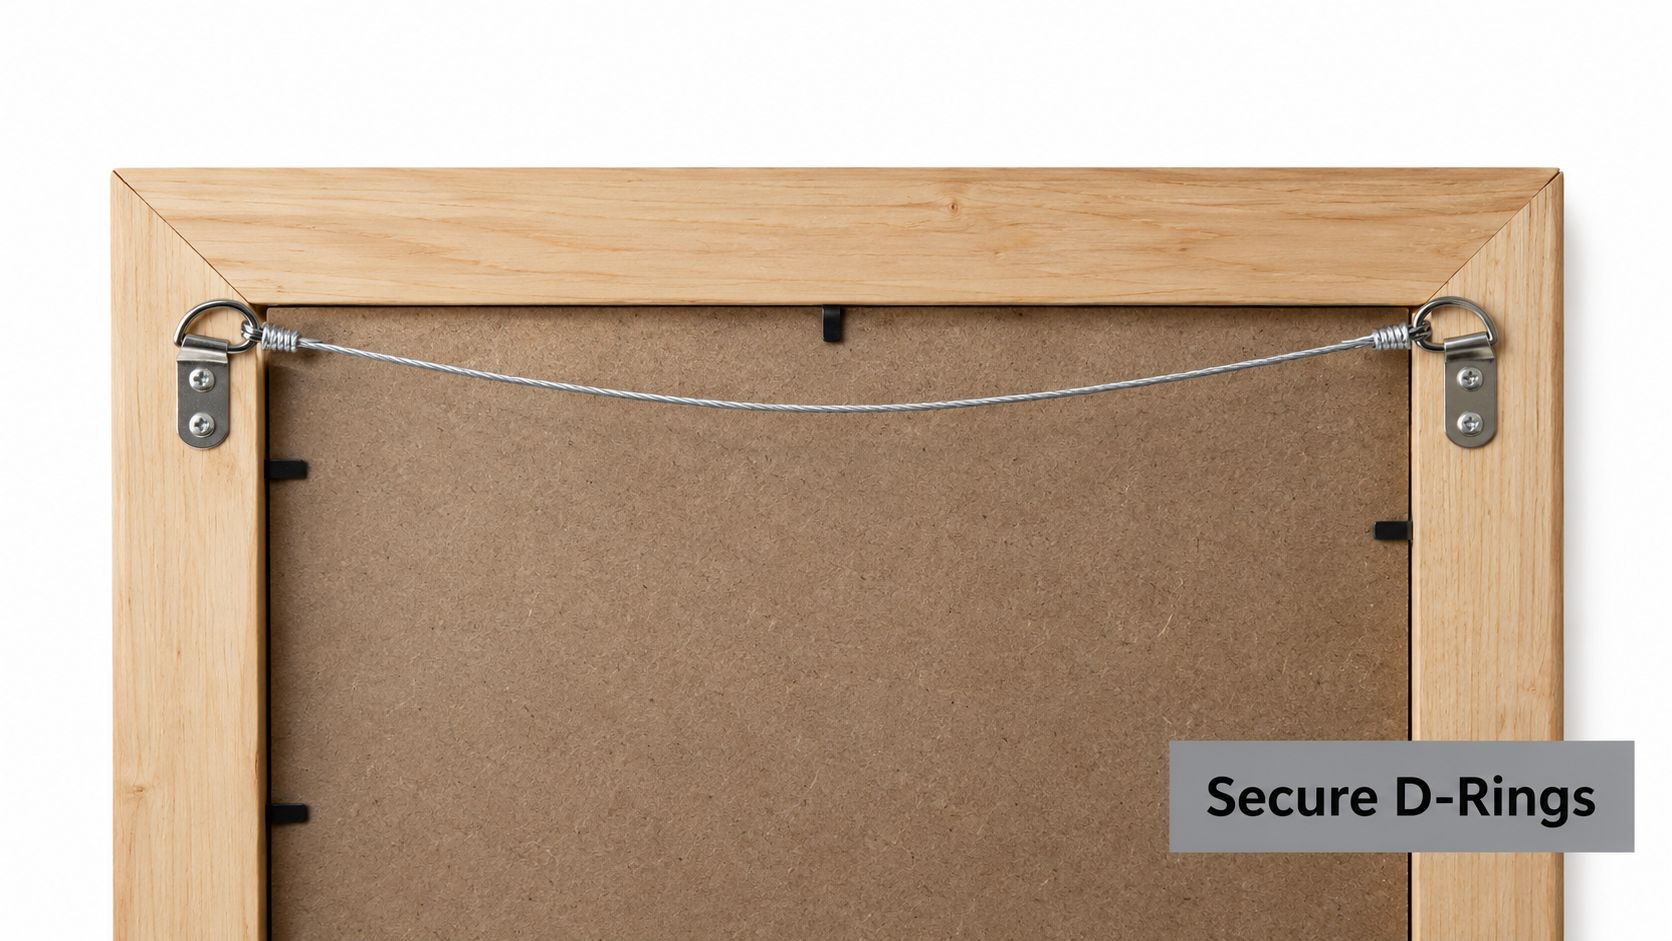
Position the two D-rings symmetrically in the upper portion of the frame, measuring from the same reference edge on both sides. Choose screws that suit both the hardware and frame thickness. Drill an appropriate pilot hole when required, and stop if a screw spins without tightening. A stripped hole is not a dependable connection.
The U.S. General Services Administration recommends mirror hangers or D-rings screwed into the frame, reserves screw eyes for small paintings, and identifies a single wire as suitable for works up to approximately 30 by 36 inches. For larger or wider works, it advises separate side loops, according to its care and maintenance guidance. Treat size as a screening point, not a weight rating. A compact frame with heavy glazing can put more demand on its connections than a larger, lightweight canvas. For guidance on frame-side hardware, see this guide to picture hanging D-rings.
The termination must match the suspension material. Pass the wire through the first ring, leaving enough tail for the product's specified finish. Return it around the standing wire and make close, repeated wraps as directed. Carry the wire to the opposite ring with enough slack for the intended hanging position, then secure that end and manage any sharp wire tip. Don't substitute a loose household knot for the manufacturer's termination instructions.
There is no universal knot recipe for every material sold as picture hanging string. Cord and wire can require different securing methods. Before lifting the frame, check that both connections are seated and remain in place under a careful test. A neat wrap that slides under light tension is still a failed termination. If you cannot finish it confidently, replace the material or have the frame wired professionally. The frame connection is only one part of the load path, so its strength does not establish how much the wall fastener and substrate can hold.
Matching Load Capacity to Frame Weight
Weigh the complete framed assembly, not just the artwork. Include the frame, glazing, backing, mounting materials, and installed hardware. Use a scale that can safely accommodate the object, or arrange professional weighing when the piece is too awkward to handle securely.
Buying by gauge goes wrong because gauge describes a physical characteristic, while capacity depends on the actual wire product and how it's used. Packaging terms such as heavy duty aren't a substitute for a documented rating.
Breaking Strength Isn't Working Load
A conservative engineering benchmark limits working load to approximately one-third to one-fifth of ultimate breaking strength, accounting for shock, vibration, fatigue, and imperfect terminations; under that benchmark, wire with a 100-pound breaking strength corresponds to approximately 20 to 33 pounds in service, as explained in the picture-wire load and installation guidance.
That calculation is a screening tool, not a certification of the finished installation. It doesn't establish the capacity of the D-rings, their screws, the frame rails, or the wall anchor. Nor should it override a manufacturer's lower working-load limit or restrictions on use.
A breaking-strength label tells you about failure under stated test conditions. It doesn't promise that the assembled picture-hanging system can safely carry that load.
Apply the Rating to the Actual Object
Consider a small mirror intended for a Denver condo hallway. This is an installation scenario, not a case history: weigh the entire mirror, check its approved attachment points, and compare that measured weight with documented working-load ratings. If the wire package provides only breaking strength, don't treat that figure as the allowed mirror weight.
A large mixed-media work intended for a corporate lobby needs a broader assessment. Its frame may have unusual construction, uneven weight distribution, or attachments that weren't designed for a wire spanning the back. In that situation, selecting stronger wire may be the wrong solution even if the wire calculation appears acceptable.
Before accepting a hardware combination, verify:
Measured load: You have the weight of the finished object, including everything that will remain attached.
Product documentation: You know what the rating describes and which installation conditions it assumes.
Connection suitability: The frame and wall attachments are appropriate for the selected system.
Handling requirements: You can lift, position, and seat the object without uncontrolled loading.
Keep the product label or specification with your installation notes. If you later replace the glazing, alter the frame, or move the work, reassess the weight and hardware rather than assuming the previous selection remains suitable.
Hanging the Piece Level and Close to the Wall
A frame can sit level and still project too far from the wall or move when touched. The result depends on the whole load path: the string, frame hardware, wall fastener, and wall substrate. Accurate placement starts with the frame in its intended position, then accounts for how its loaded string meets the hanger.
Hold the piece where it will hang, with help if needed. Check its alignment with furniture and nearby artwork, then mark the intended top edge. Measure this frame's geometry directly rather than borrowing a measurement from another picture.
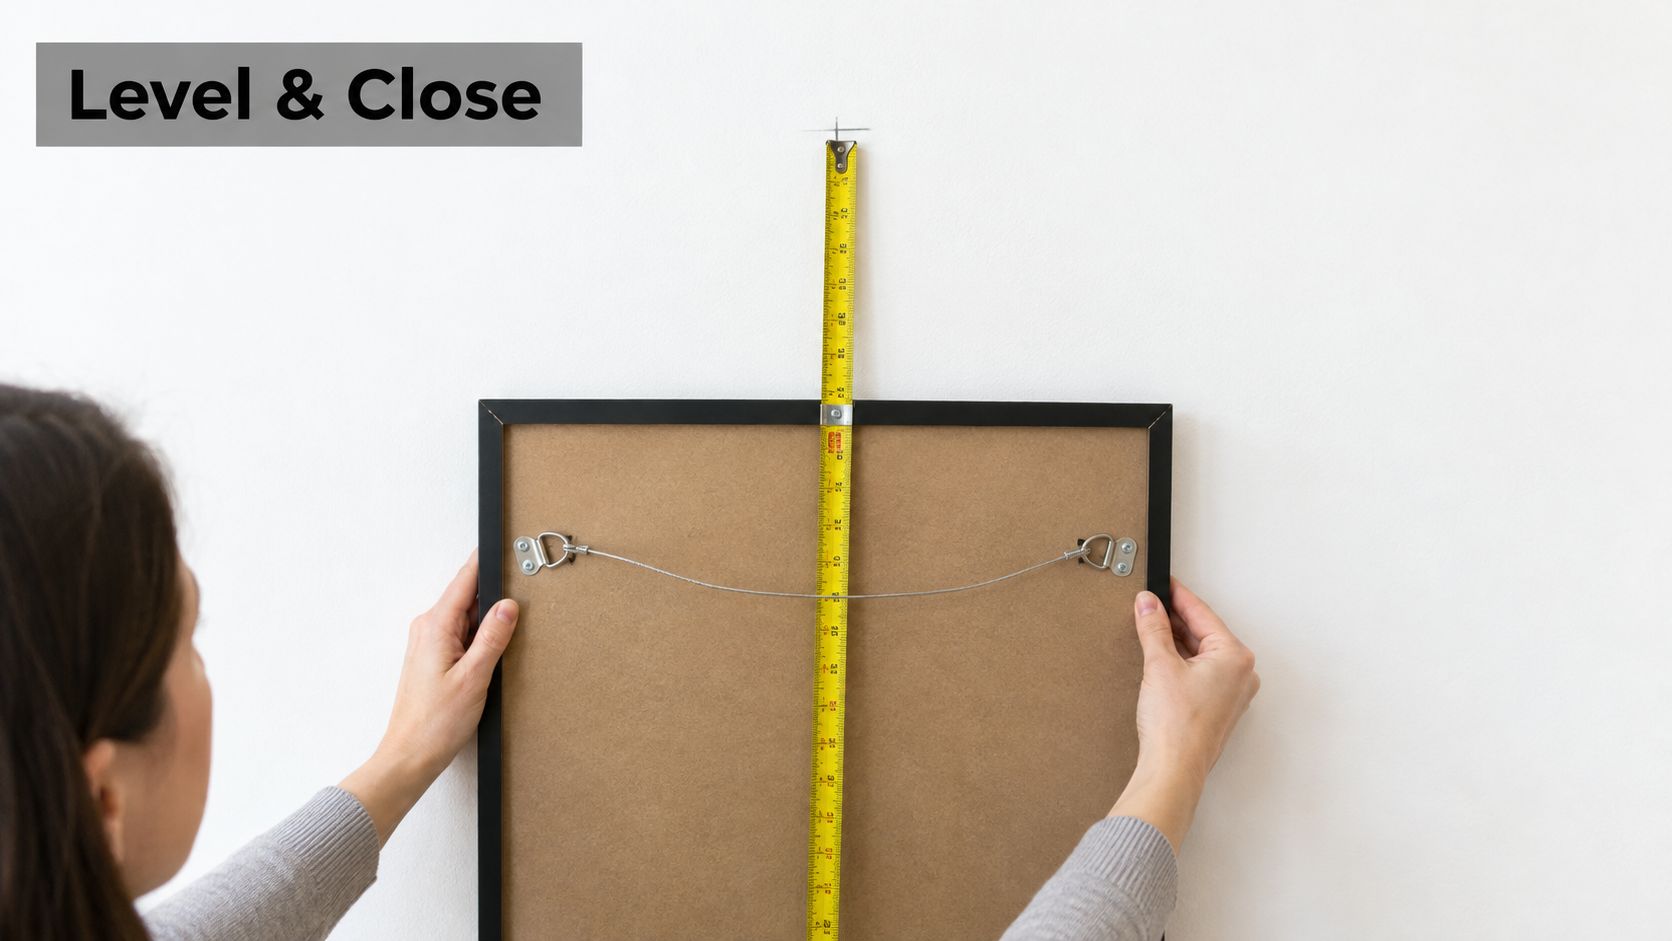
Measure the Wire in Its Loaded Position
Pull the wire upward to the spot where it will rest on the hanger, using gentle pressure to reproduce its hanging shape. Measure from the frame's top edge to that contact point, then transfer the same distance below your top-edge mark. That locates the hanger's supporting surface.
The hanger's contact point is not always its nail or screw hole. Check the actual hardware before drilling. For another measuring walkthrough, see Slone Brothers Furniture's guide to hanging your picture with accuracy.
Wire tension needs balance. Too much slack can let the frame project farther from the wall and shift. A drum-tight wire can strain weak frame hardware. Leave enough room for the wire to sit on the hanger without forcing the frame or loading its attachments unnecessarily.
A visual demonstration can clarify how rear hardware affects wall placement.
Check the Wall Fixing, Then Seat the Piece
Match the fastener to the wall itself. In drywall, use hardware approved for the wall assembly and intended load. A fixing designed for framing does not automatically have the same capacity in hollow board. For brick or concrete, use a compatible masonry anchor and the drill bit specified by its manufacturer, following its instructions for hole preparation and installation. If the wall construction is uncertain, investigate before drilling, including the possibility of utilities or unusual assemblies.
Keep the piece close to its padded support while checking the completed suspension. With assistance where needed, lift it only slightly and look for movement at the wire terminations. This controlled check does not verify the wall anchor.
Once the frame is on the wall, confirm that the wire rests fully on the hanger, rather than catching on a screw head or hook edge. Check the level, then inspect the side view. If the top stands too far off the wall, take the piece down and adjust the rear arrangement. Don't force it flat against the wall.
Handling Heavy, Wide, and High-Risk Installations
A wide frame can swing around one central hook, even when its string and fastener are rated for the load. An oversized mirror above a sofa raises a different concern: a failure could injure someone. Capacity is only one part of the load path: string, frame hardware, wall fastener, and wall substrate must all work together.
For heavy or high-risk pieces, check the weakest part of that path. A strong wire cannot compensate for loose frame attachments, and a highly rated wall anchor cannot hold securely if it is unsuitable for the wall. If the wall construction is uncertain, or the piece must be lifted to a stairwell or public area, pause before taking it off the floor. Arrange suitable access, lifting help, and wall assessment first.
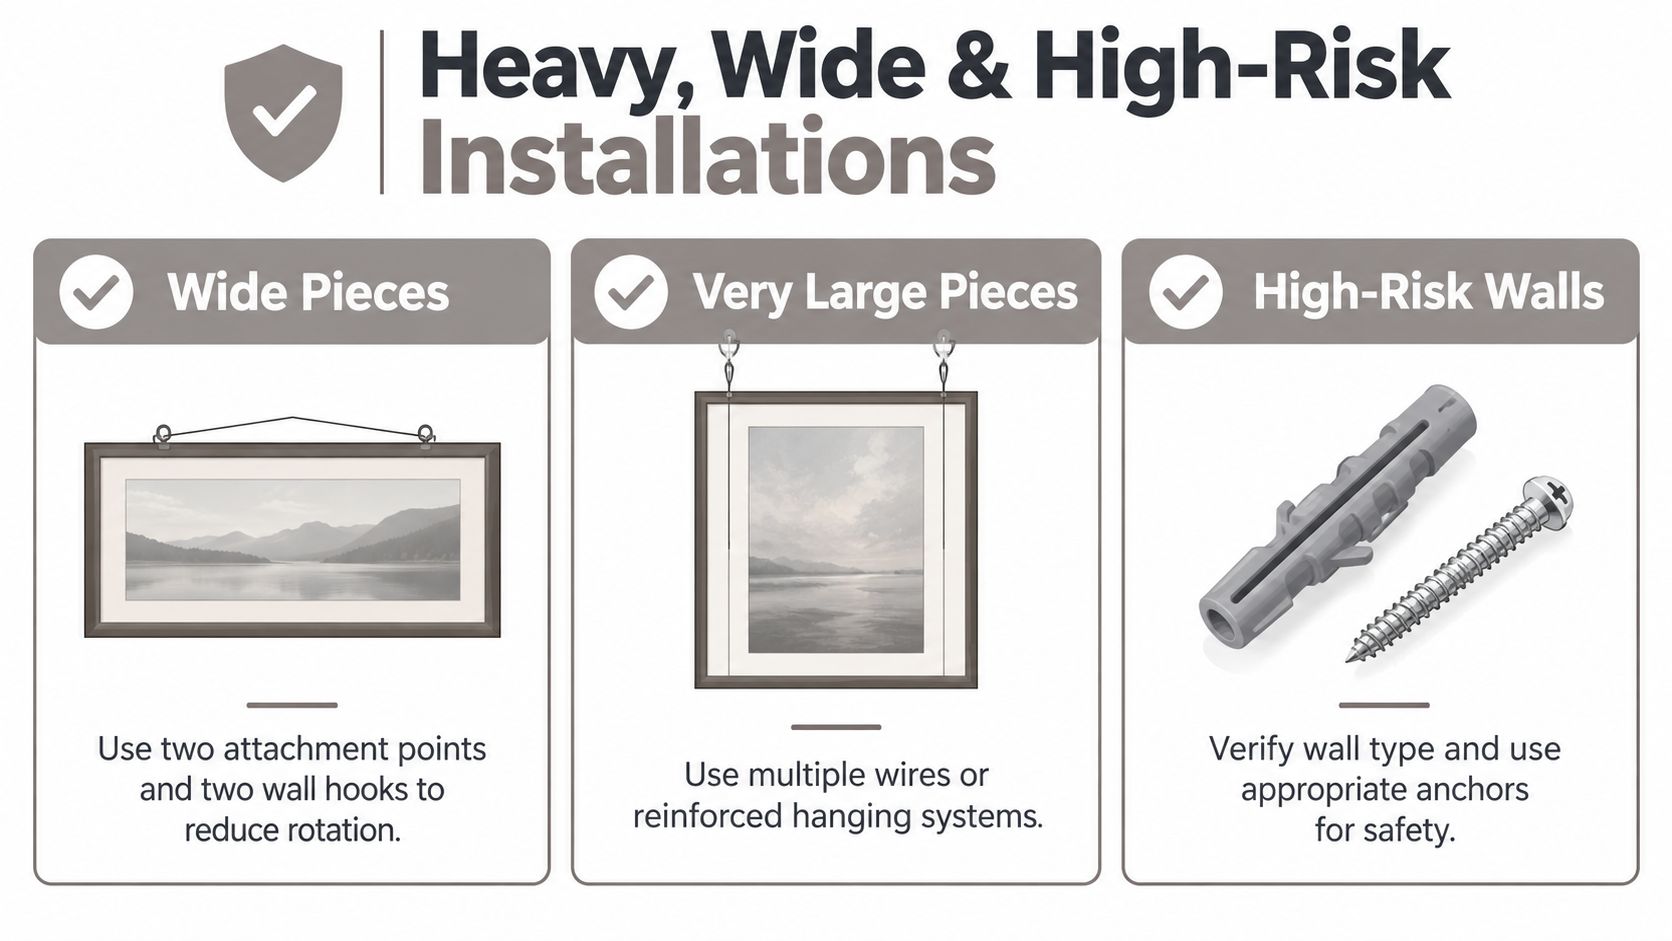
On a wide work, two attachment points and matching wall hangers can limit rotation. They do not guarantee equal load sharing, so don't add the hanger ratings together or assume each takes half the weight. Follow the hardware maker's instructions and account for the frame's dimensions and hanging geometry.
Very large or heavy pieces may call for brackets or an engineered mounting system instead of more wire. A cleat can also suit a frame and wall that can support it. See this guide to picture hanging cleats for an alternative to wire suspension.
The Littleton Museum installation guidelines address ring placement and wire tension for keeping works close to the wall. They also reject tape, ordinary string, and unsuitable suspension hardware.
Location changes the installation decision. Repeated vibration near doors, elevators, or mechanical equipment may call for a more restrained setup. Where visitors can reach the piece, security hangers or tamper-resistant fittings can help, but they still need sound support through every part of the load path.
For an oversized mirror, sculpture component, or high placement, plan how to lift and reach the work before installing hardware. If the frame needs modification, the substrate is uncertain, or failure could cause serious harm, hire a professional. A more controlled mounting system may offer less adjustability, but can be the safer trade-off.
Maintenance and Safety Checks Over Time
Picture hanging string shouldn't disappear from consideration once the frame looks right. Make inspections part of caring for the collection, and take the piece down safely when you need to examine concealed connections. Don't reach behind a heavy mirror while leaving it precariously supported.
Check the Whole Installation
Wire condition: Look for corrosion, kinks, broken strands, or flattened bends. Retire damaged wire rather than trying to straighten it for reuse.
Frame attachments: Check for loose rings, moving screws, cracked rails, or stripped holes.
Wall connection: Look for hanger movement, enlarged holes, or crumbling material around an anchor.
Finished position: Investigate a new lean or change in height rather than just straightening the frame.
Set a Routine You'll Actually Follow
For a home collection, I recommend checking when you clean or rearrange the room. Offices, galleries, and valuable private collections should maintain a documented inspection routine suited to their exposure, access, and risk. Add a check after relocation, nearby construction, or a noticeable change in the installation.
Moving is also a good opportunity to reassess hardware before rehanging. Pair that inspection with TLC Moving & Storage packing advice when preparing artwork for transport.
If the wire shows a defect, replace it before rehanging. Keeping questionable hardware to avoid a small repair isn't a sensible bargain.
From hardware selection to precise placement, Colorado Art Services offers professional picture hanging, mirror mounting, and heavy or high-placement art installation across the Denver Metro area and Front Range. Visit the team to discuss your piece, its weight, and your wall conditions, and arrange an installation that suits both the artwork and the space.
Comments