


Picture Hanging Cleat Guide for Heavy Art and Mirrors
You're usually staring at the same problem when you start looking up a picture hanging cleat. The piece is already in the room. It's too heavy to trust to a casual hook, too awkward to hold in one hand, and too valuable to learn by failure. A large mirror, a deep shadowbox, or a framed canvas can look manageable on the floor and become a different object the second you try to get it on the wall.
Most bad hangs begin with the wrong first question. People ask which hardware to buy. The better question is what kind of wall they're fastening into, because the wall and fastener pair will decide far more than the cleat material ever will.
Why Heavy Artwork Demands a Smarter Hanging System
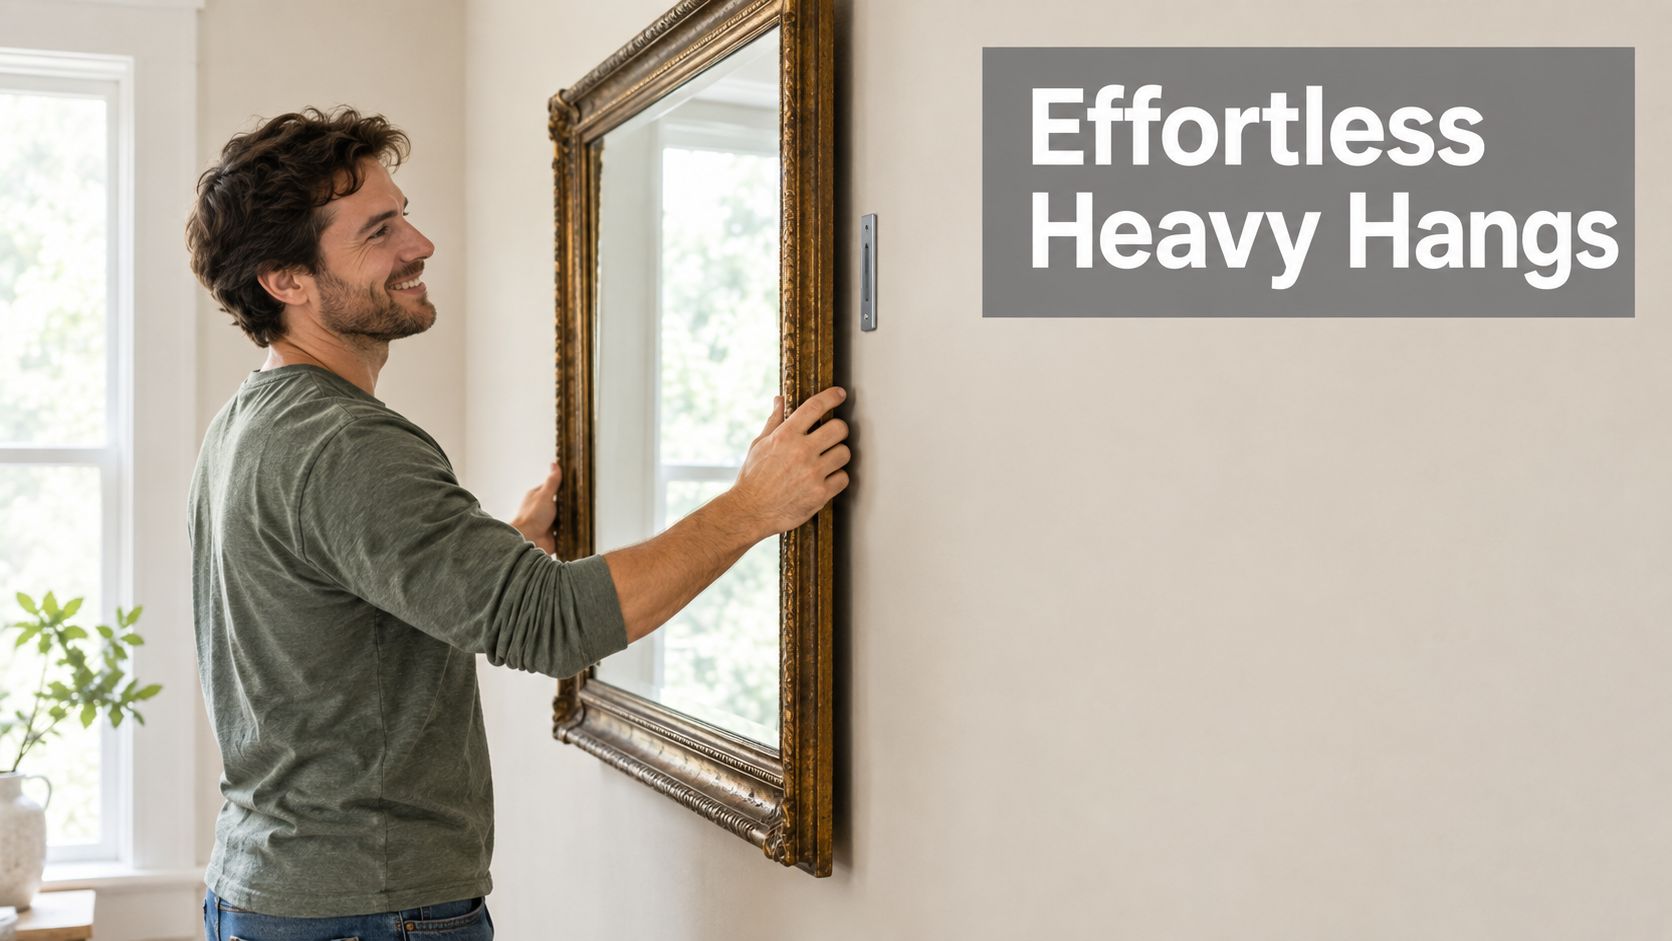
A heavy mirror leaning against a wall tells you everything you need to know about why standard hardware starts failing. You lift it, the weight shifts forward, the wire bows, the frame wants to roll away from the wall, and all that load funnels into a very small point. That's where trouble starts.
With heavier pieces, the failures are familiar. A D-ring tears out of soft wood. A wire crimps, then gives up. A nail in old plaster loosens as the wall surface crumbles around it. Sometimes nothing dramatic happens at first. The frame just starts leaning, drifting, or pitching forward until one day it doesn't stay up.
Where lighter hardware starts losing
A lot of common hanging methods were designed to suspend a piece, not control it. That distinction matters.
Wire-on-hook setups let the piece hang, but they also let it shift, sag, and tilt.
Single-point fasteners concentrate force into one small section of wall.
Older plaster walls may look solid from the front while the material behind the finish has already weakened.
Wide or deep frames act like levers, pulling outward instead of just down.
Heavy art rarely fails because the frame was “almost light enough.” It fails because the load path was wrong.
That's why a picture hanging cleat solves a different problem than a basic hook. It spreads the load across a longer section, keeps the piece closer to the wall, and transfers weight downward through the mounting line instead of asking one tiny point to do all the work.
The real decision is the wall system
The useful way to think about a cleat is not “strong hardware.” It's a wall-system choice. The cleat is only one part. The substrate, the fastener type, the spacing, and whether you've hit framing all matter more in practice.
A cleat fixes many of the failure modes people already know too well. It also comes with trade-offs. It wants precision. It wants level lines. It doesn't forgive sloppy drilling. And once it's engaged, it doesn't offer much casual nudging.
That trade is usually worth it for heavy art, framed mirrors, and larger display pieces.
How a Picture Hanging Cleat Actually Works
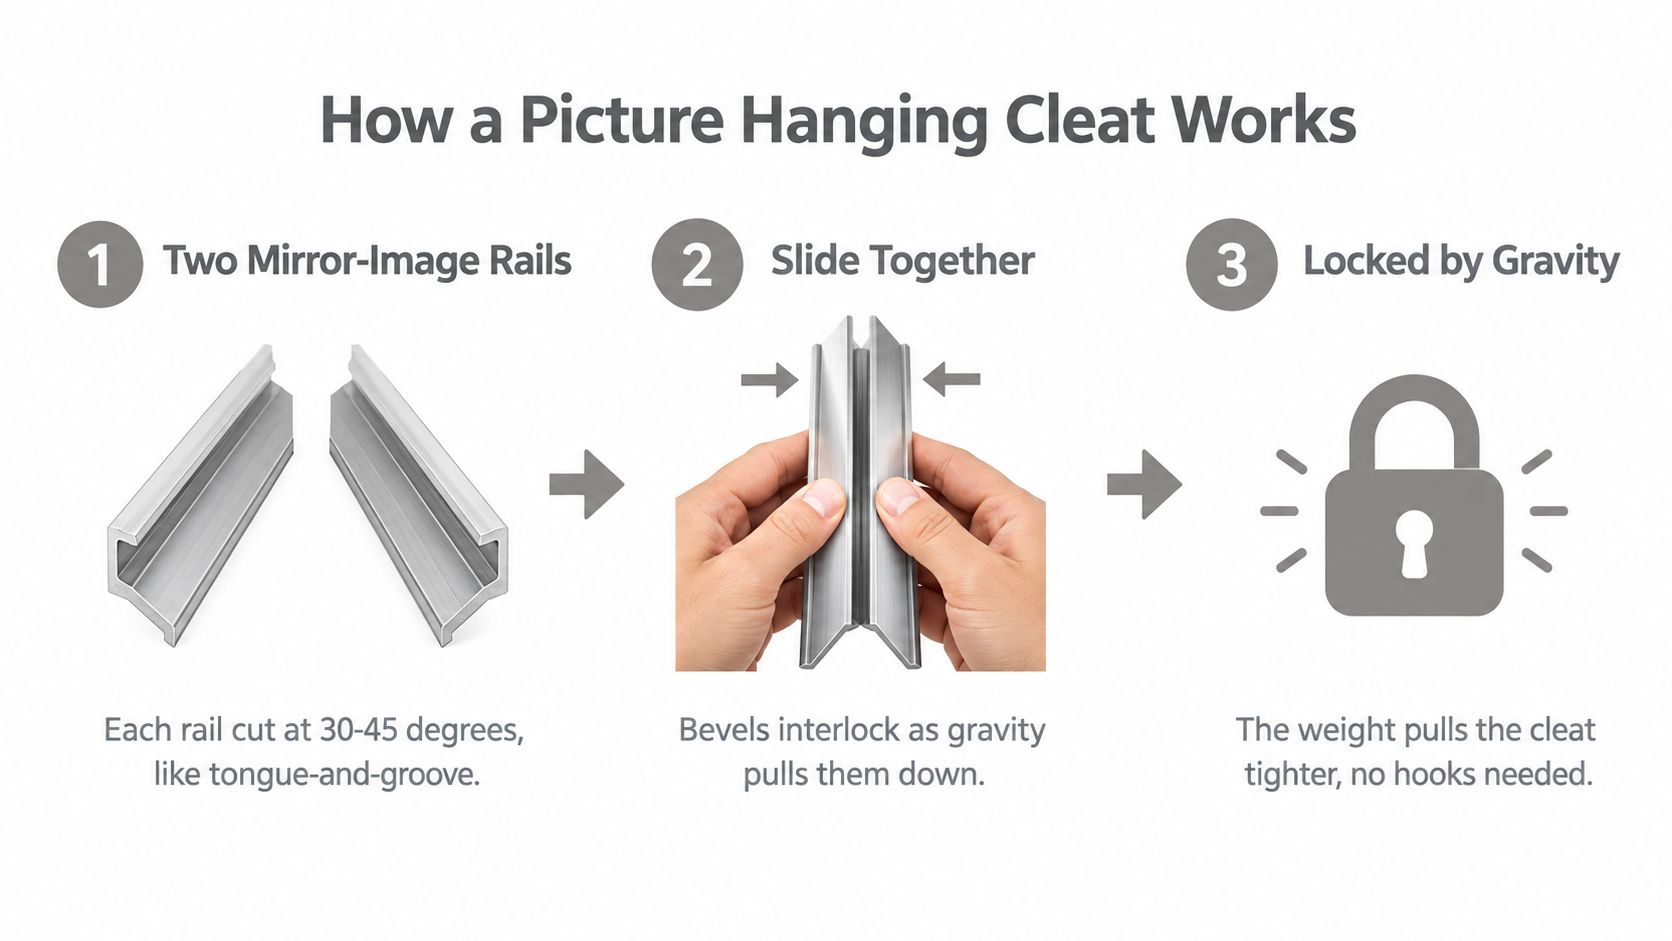
A picture hanging cleat is simple once you see the geometry. It's a pair of interlocking strips cut on an angle, most often 45 degrees, with one piece fixed to the wall and the matching piece fixed to the artwork. Gravity does the locking once the two bevels engage. That interlocking design and its history are outlined in this overview of the French cleat hanging method and its postwar standardization.
Two rails, opposite directions
A tongue-and-groove joint made for the wall. One rail faces up and out from the wall. The other faces down and in from the back of the frame.
When you lower the frame into place, the angled faces meet and seat together. The piece can lift off when needed, but once it's down and engaged, its own weight helps hold it in position.
What each side of the cleat is doing
The two halves don't do the same job.
Wall-side cleat This piece mounts flat to the wall. It spreads load laterally, which is one reason heavier pieces behave better on a cleat than on two isolated hooks.
Frame-side cleat This piece mounts to the frame, stretcher, or built-in hanging rail. It presents the matching bevel and transfers the object's weight into the wall-side strip.
The interlock itself Once seated, the bevels share the load along the rail instead of dumping it onto one tiny hardware point.
Practical rule: A cleat doesn't replace good fastening. It only gives good fastening a better way to carry the load.
Why this feels more stable on the wall
A wire-hung frame is free to move. A cleat-mounted frame is restrained by its own contact line. That's why mirrors and large frames usually sit flatter and stay there.
It's also why installers use cleats when tilt matters more than convenience. If you want a broader overview of hardware categories before choosing one, this guide to best picture hanging hardware is useful context.
The big catch is that the cleat itself is only half the assembly. The fasteners into the wall, and what that wall is made of, determine whether the whole setup acts secure or just looks secure.
Weight Ratings and What They Really Mean
The number on the package is not the number your wall can safely deliver. That's the first thing to understand.
Commercially sold cleat systems commonly advertise capacities from 100 pounds to 300 pounds or more, with examples including a 12-inch aluminum cleat kit rated to 100 pounds, a 30-inch picture and mirror cleat rated to 300 pounds, and some heavy-duty interlocking aluminum products marketed at a 500-pound maximum load in product listings such as this heavy-duty cleat example. Those numbers tell you what the hardware may handle under favorable conditions. They do not promise that your plaster wall, drywall anchor, or brick fastener will do the same.
Read the package as a ceiling, not a guarantee
In the field, I treat printed ratings as the upper boundary of the cleat hardware itself. Then I derate from there based on wall type, fastener pattern, and how cleanly the load reaches structure.
Properly installed into wood studs, French cleat systems can support roughly 100 to 220+ pounds because the load spreads across the cleat and into framing, as explained in this technical note on how a French cleat works in structural terms. That doesn't mean drywall alone gives you the same result. It doesn't.
Cleat weight ratings vs real-world safe load by substrate
Substrate | Printed Cleat Rating (per pair) | Typical Fastener | Real-World Safe Load | Failure Mode |
|---|---|---|---|---|
Wood studs | Often within the common advertised 100 to 300+ pound range when properly matched to the cleat | Structural screws into studs | Can approach the better end of the system when install quality is high | Fastener shear, bad spacing, missed stud |
Drywall only | Same printed cleat rating on the package | Drywall anchors or toggles | Usually much lower than the package number | Anchor pull-through, paper face failure |
Plaster over lath | Same printed cleat rating on the package | Anchors chosen for plaster condition | Highly dependent on wall condition | Surface blowout, weak keys behind plaster |
Brick or concrete | Same printed cleat rating on the package | Masonry fasteners | Can perform very well when properly drilled and anchored | Poor embedment, oversized hole, brittle mortar |
Hollow block | Same printed cleat rating on the package | Specialty masonry anchoring | Often less forgiving than solid concrete | Cavity wall failure, sidewall breakout |
For more on why drywall is often the limiting factor, this breakdown of drywall load capacity is worth reading before you trust the label on the box.
Cleats Compared to Other Hanging Methods
Not every frame needs a cleat. Some absolutely should have one. The right comparison isn't “strong versus weak.” It's stability versus flexibility.
What each method does well
Wire is forgiving during install. D-rings are simpler to rehang. Sawtooth hangers disappear behind small frames. Keyhole plates sit flush when the spacing is perfect. Cleats are different. They trade easy repositioning for control, support, and a flatter sit against the wall.
That makes them especially useful on mirrors, wide frames, and pieces that tend to drift when hung from a central point.
If the piece is large enough that you already know you'll be straightening it every time someone closes a door nearby, a cleat is usually the more honest solution.
Picture hanging methods side by side
Method | Max Practical Load | Tilt Resistance | Post-Install Adjust | Wall Damage Risk |
|---|---|---|---|---|
Picture hanging cleat | High, especially when mounted into structure | Excellent | Low | Moderate to high, depending on fastener pattern |
D-rings on two screws | Moderate to high | Good | Moderate | Moderate |
Wire on hooks | Lower for wide or deep pieces | Fair to poor | High | Low to moderate |
Sawtooth hanger | Best for light pieces | Fair | Moderate | Low |
Keyhole plates | Moderate when perfectly aligned | Very good | Very low | Moderate |
Where cleats win and where they don't
Cleats win on four jobs:
Heavy mirrors because they spread weight across the wall instead of loading two tiny points.
Large art because they resist tilt better than wire.
Flush presentation because the frame sits close to the wall.
Repeatable installs because one rail can support a clean, consistent mounting line.
They lose when you need to make small visual corrections after the fact, or when the piece is so light and shallow that the hardware is more system than the frame needs. If you're comparing mounting systems more broadly, this overview of an artwork hanging system helps clarify where cleats fit.
Matching the Right Cleat to Your Wall Type
Many shoppers make the wrong purchase. They shop for a cleat by weight rating and skip the wall question. In practice, wall type comes first.
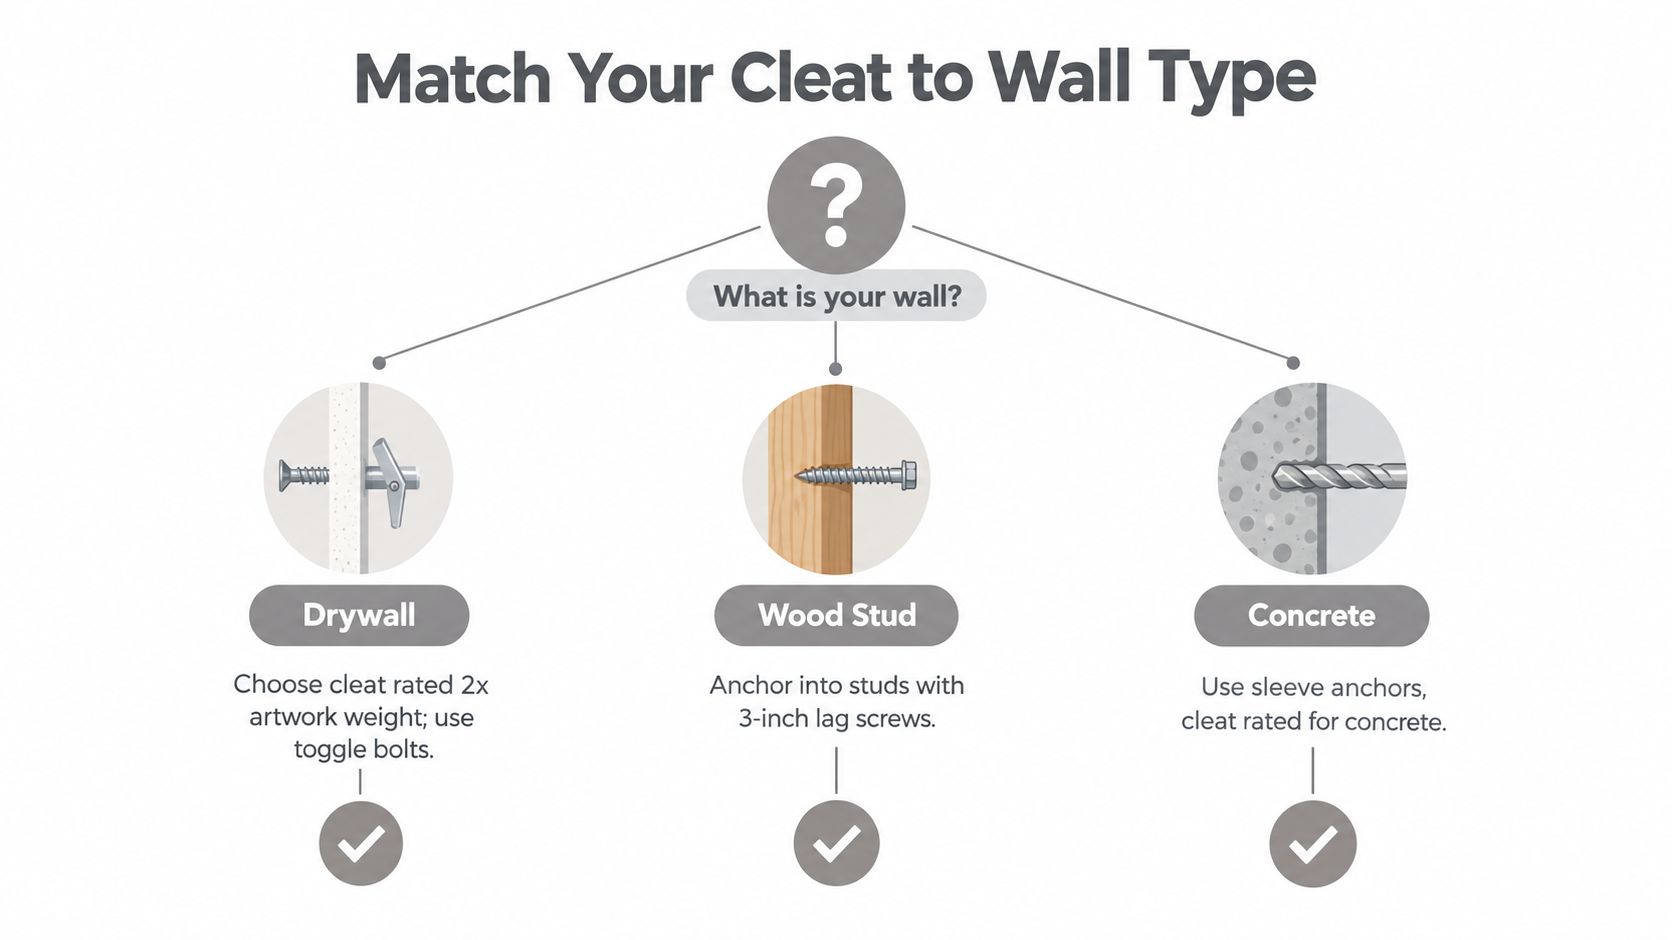
Guidance for hanging hardware often acknowledges drywall, wood, plaster, concrete, and brick, but the important part is the change in fastener strategy from one substrate to the next. That's the content gap noted in this discussion of installing picture frame hardware across wall types.
Drywall and studs
Drywall by itself is not the same thing as drywall with framing behind it. If you can span and fasten into wood studs, do that. It changes the whole install.
If stud placement doesn't line up with the artwork location, you need to think carefully about anchor type, wall condition, and total load. The cleat may still be the right hardware, but the wall has already become the deciding factor.
Best case: cleat fastened into framing
Workable with caution: cleat with appropriate heavy-duty anchors for the wall condition
Poor choice: relying on weak or undersized anchors for a heavy, valuable piece
Plaster, brick, and concrete
Plaster needs patience more than force. Pre-drilling matters because brittle surfaces can fracture before the anchor even goes in. Old plaster also hides surprises. The finish may feel solid while the material behind it has already lost strength.
Brick and concrete are more straightforward if you use the right bit and fastener. Solid masonry often makes an excellent base for a cleat. Hollow masonry is trickier because the cavity changes how anchors behave.
A simple decision path
Identify the wall first Drywall, plaster, brick, poured concrete, block, or wood backing all behave differently.
Check whether you can reach structure If you can hit studs or solid framing, your options improve fast.
Choose the cleat second Pick a cleat that suits the piece only after you know what the wall can support.
The cleat is the connector. The wall is the structure.
That's the mindset that prevents expensive mistakes.
Installation Practices That Protect the Piece and the Wall
A clean cleat install comes down to accuracy. These systems don't give you much slack later, so the time to get things right is before the frame ever goes on the wall.
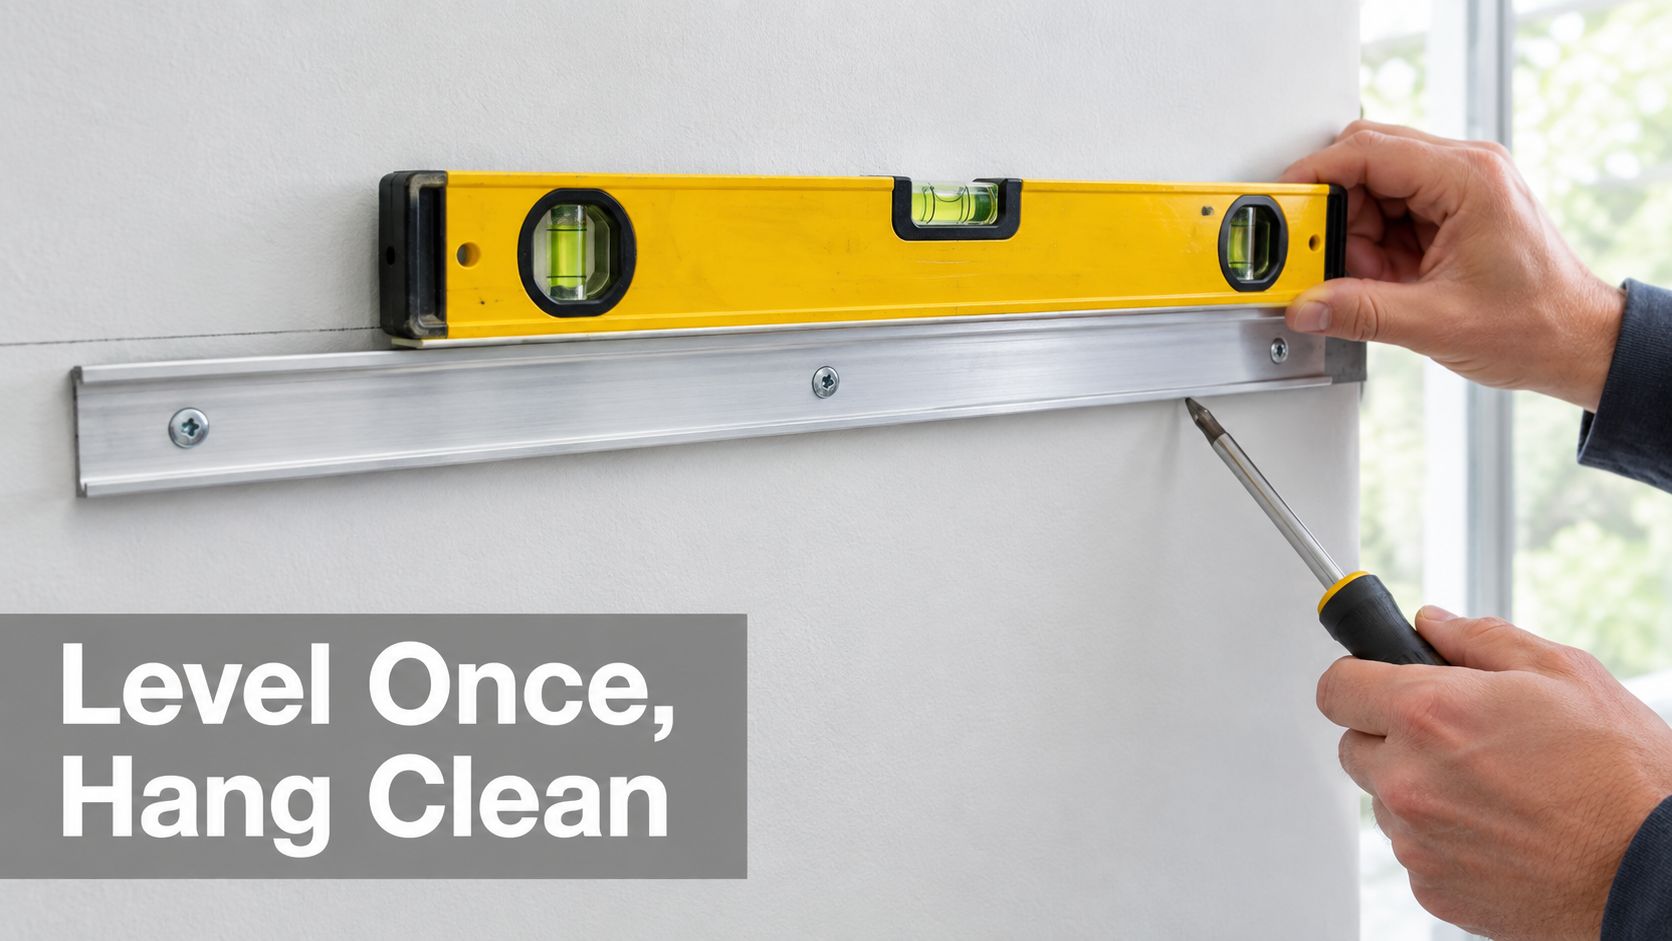
Technical installation guidance is very clear on one point. Both cleat halves need to be as level as possible, and the frame should be lowered slowly until the rails connect. That same guidance commonly specifies #6 x 1/2-inch screws for the frame rail and #8 x 1-inch screws or wall anchors for the wall side, which shows how much the system depends on screw choice and centered placement, not just the aluminum rail itself, according to these French cleat hanger instructions.
Start with layout, not lifting
The best habit is simple. Mark a full reference line first.
A short level can get you close, but a longer layout line keeps small errors from becoming visible across a wide piece. Cleats exaggerate crookedness because they hold the object rigidly. They don't hide it the way a wire sometimes can.
Fastener habits that prevent callbacks
A few install habits make a real difference:
Match the screw to the cleat hole so the rail seats properly and the head bears cleanly.
Center the frame-side cleat on a solid back rail or structural part of the frame.
Test-fit before final hanging so you're not discovering interference while holding a heavy piece in the air.
Lower the artwork slowly to let the bevels engage instead of slamming them together.
A cleat is forgiving once the weight is on it. It is not forgiving during layout.
Here's a visual walkthrough of the mechanics in action:
Protecting finish surfaces and valuable frames
The wall matters, but so does the object. Antique mouldings, older mirror frames, and brittle decorative finishes can be damaged by poor mounting locations or badly chosen screws on the frame side.
For heavier or high-value installations, some owners bring in a service that handles layout and mounting as a complete install rather than a hardware swap. Colorado Art Services is one example in the Denver area for heavy-piece mounting, mirror hanging, and precise wall placement when the piece, wall, or location leaves little room for error.
When a Cleat Is Not the Right Choice
Cleats get recommended so often for heavy work that people start treating them like the default answer. They're not.
Their biggest weakness is lack of micro-adjustment. Once the two halves engage, the position is largely set. If the frame needs to dodge an outlet, clear a vent, split the difference between two windows, or line up with a fussy architectural detail, a fixed cleat can turn a simple visual adjustment into a remount.
Cases where another method makes more sense
A cleat is often the wrong move in a few common situations:
Rental walls where a multi-hole fastening pattern creates more repair than the lease allows
Very light frames where the hardware adds unnecessary bulk
Gallery walls in flux where layouts change often
Fragile antique frames that don't like concentrated mounting stress on the back
Awkward frame geometry where the bevel can't seat cleanly
The trade-off people underestimate
What many DIY users want after hanging is a little nudge left, a slight twist clockwise, or a tiny height correction. Cleats don't offer much of that. Existing guidance often understates this problem, even though alignment precision and limited re-leveling are common pain points, as noted in this discussion of French cleat adjustment and removability concerns.
If adjustability matters more than maximum stability, a two-point D-ring setup or a rail-based display system may fit the room better.
A Quick Decision Checklist Before You Buy
Before you buy a picture hanging cleat, run the piece and the wall through this checklist. It saves time, extra holes, and a lot of avoidable patching.
Six questions worth answering first
What does the fully assembled piece weigh Don't guess. Include frame, glazing, backing, and attached hardware.
What is the wall made of Drywall, plaster, brick, concrete, and wood-backed surfaces each need a different fastening plan.
Do you need adjustability after hanging If the answer is yes, a cleat may frustrate you.
Does the back of the piece accept a cleat cleanly Some frames have good structural rails. Some don't.
Is the chosen location clear of obstacles Check for studs, but also for wiring, plumbing, vents, and trim conflicts.
Can the fastener plan match the actual wall If the answer is uncertain, pause there. That's usually the issue.
The buying decision in one sentence
Buy the cleat only after you know the wall can support the fastening method you're planning. If that sounds backwards, it isn't. It's how you avoid trusting a strong piece of hardware to a weak mounting surface.
For heavy mirrors, oversized artwork, and valuable framed pieces, that one shift in thinking matters more than brand, finish, or package label.
Colorado Art Services handles the kinds of installations where cleat choice, wall condition, and exact placement all have to work together, including heavy mirrors, large-format art, and difficult residential or commercial walls across the Denver area. If you want the piece level, secure, and mounted with the right fastener strategy for the substrate, visit Colorado Art Services.
Comments