


Picture Hanging D Rings: A Complete Installation Guide
Picture hanging D-rings are the industry standard for medium-to-large frames because they provide a secure, level alternative to single-point hooks, allowing wire tension to distribute weight symmetrically. Install them about one-third of the way down from the frame's top edge, with both rings mirrored at equal heights and hardware rated for at least 1.5 times the total framed weight.
You're probably looking at a frame leaning against the wall, a tape measure in hand, wondering whether two small metal fittings can really keep it straight. They can, but only when the rings, screws, wire, and wall fasteners work as one system. Most crooked or failed hangs come from rushed placement, mismatched capacity, or wall marks made by eye.
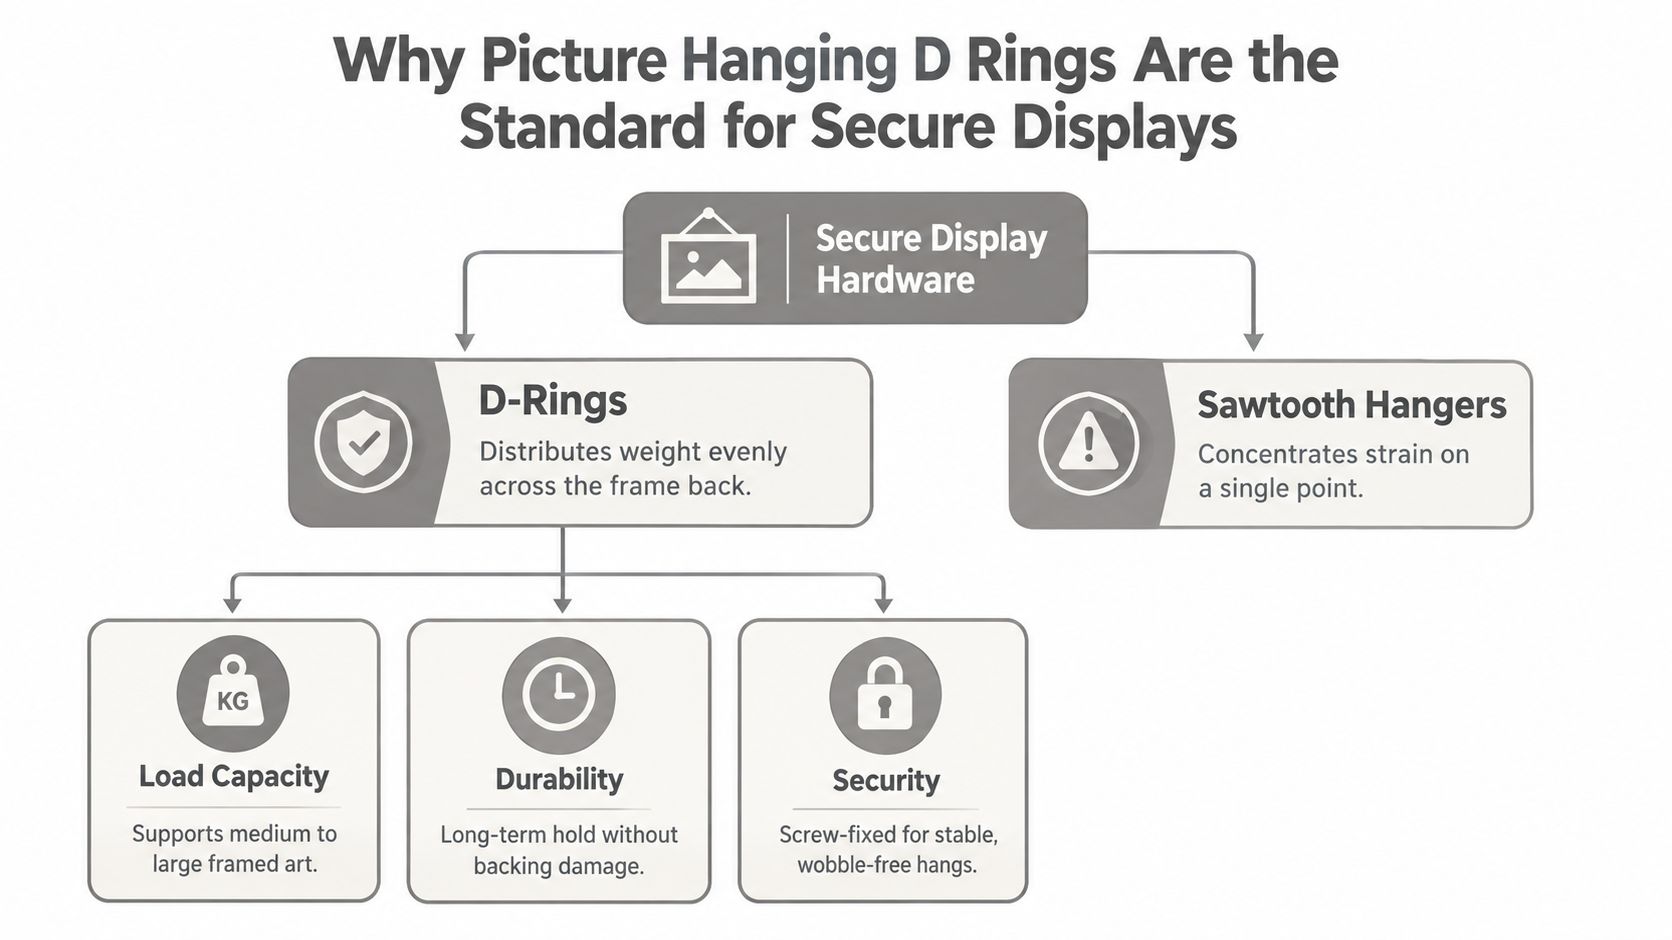
Why Picture Hanging D Rings Are the Standard for Secure Displays
A frame can look secure on the floor yet shift or tip once it reaches the wall. Picture hanging D-rings reduce that risk by creating two attachment points on the rear rails. Each fitting has a D-shaped or triangular loop for picture wire, a wall hook, or a direct hanging connection.
The paired layout gives the installer better control than a single nail or sawtooth hanger. Weight can travel through both sides of the frame, while wire tension can be adjusted to keep the artwork level. D-rings suit medium and larger framed pieces, provided the frame rail is sound and the screws are appropriate for its material.
They're produced in single-hole, double-hole, and three-hole configurations, with shapes and finishes suited to different frame constructions. Custom Picture Frames' hardware guide describes paired D-rings used with wire or direct hooks as a standard approach for framed art.
The geometry matters more than the fitting
A sawtooth hanger concentrates force along one short section of the backing. It can serve a light, compact frame, but it offers less control over side-to-side movement and leveling. Two D-rings spread the attachment points across the frame, giving the wire or hooks a more stable load path.
Direct hanging from both rings provides tighter control when the wall hardware lines up accurately. Wire makes positioning easier and allows later adjustment, though it also introduces movement. The rings, wire, wall hooks, and fasteners must therefore work within the same capacity range.
Practical rule: D-rings do not strengthen a weak frame. They provide a better load path only when attached firmly to sound material.
Placement is part of that load path. The one-third principle, covered in detail in Correct Placement and Installation on Your Frame, helps position the load so the frame sits naturally against the wall. Mirrored ring placement also matters. Rings set at different heights can make the frame twist, even when the wall hook is level.
Choose fittings that sit flat against the rear rail and leave clearance for wire or hooks to move without rubbing the artwork. On open-backed frames, finish and hardware visibility matter as well. The right fitting is the one that matches the frame construction and supports a stable, adjustable hang.
Choosing the Right D-Ring Size and Weight Rating
A frame that feels light before glazing can become a very different load once glass, mat board, mounting board, and artwork are installed. Select the D-ring for the complete framed weight, not the empty frame.
Use hardware rated for at least 1.5 times the total framed weight, following Lowe's picture-hanging instructions. The extra capacity allows for movement, imperfect installation, and changing forces on the wall. A package rating should be treated as a limit to stay well below, not a target to reach.
Compare the common configurations
D-Ring Type | Typical Capacity | Best Use Case |
|---|---|---|
Single-hole D-ring | 5 to 15 lb for medium frames | Light to medium framed art with a sound frame rail |
Double-hole D-ring | Around 40 lb | Medium or heavier frames requiring more screw support |
Heavy-duty D-ring | Up to 25 to 50 lb, depending on the product | Larger frames and heavier framed pieces |
Three-hole D-ring | Product-dependent, with multiple screw points | Frames whose rails can accept added attachment support |
Capacity ranges are based on Custom Picture Frames' guidance. These figures are typical, not universal guarantees. Wall fasteners, screw depth, rail material, ring orientation, and installation quality can all lower real-world capacity.
Match the fitting to the frame
The rail must have enough sound material for the screws to hold securely. A shallow or narrow rail may not accept a large plate without contacting the backing. A deep frame may require a D-ring that positions the loop far enough from the wall for the wire to seat cleanly. Confirm that the supplied screw will not pass through the rail or reach the artwork.
Ring size also affects clearance. The plate should sit flat against the rear rail, while the loop should leave room for the wire or hook to move without rubbing the frame or artwork. On open-backed frames, choose a finish and orientation that do not distract from the presentation.
For valuable, heavy, or unusually deep work, a two-hole or three-hole D-ring can distribute force across more screw points. That advantage depends on solid wood behind every screw. A larger fitting attached to weak material does not create a safer hang.
Use this guide to choosing picture hanging hardware to compare D-rings with hooks, anchors, cleats, and other options. The practical choice is the fitting and wall system that match the frame's actual weight, rail construction, and required safety margin.
Correct Placement and Installation on Your Frame
Placement is where many installations fail before the frame ever reaches the wall. Put one D-ring higher than the other, and the wire pulls unevenly. Put both too close to the top edge, and the frame can tip forward or sit under unnecessary stress.
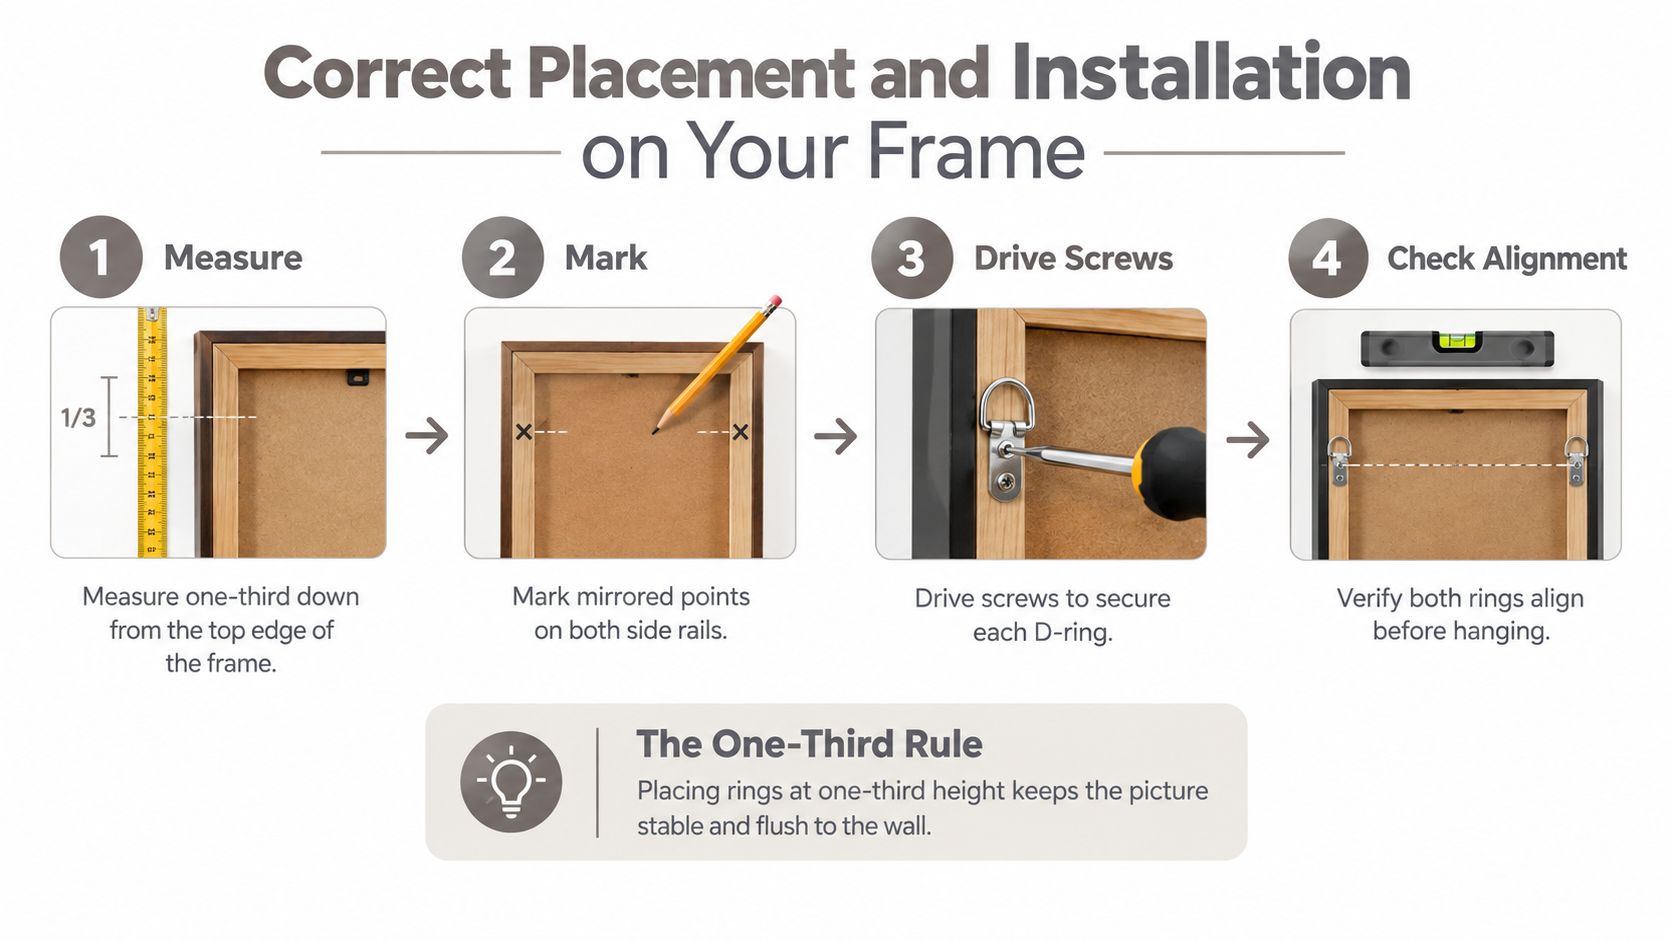
The reliable starting point is approximately one-third of the frame height down from the top edge. This position helps lower the effective hanging point and keeps the frame more stable against the wall. Jackson's installation guidance identifies this as a standard placement approach for stable support.
Measure before marking
Lay the frame face down on a clean, padded surface. Measure from the top edge down to the intended D-ring position, then transfer that same measurement to both side rails. Don't measure one side and estimate the other.
The rings must be mirrored at equal distances from the top edge. Their heights need to match, and their horizontal positions should make sense for the frame's construction. Symmetry keeps the load vector balanced. Uneven placement can create tilt and place more stress on one attachment point.
Drill pilot holes slightly smaller than the screw diameter before driving the screws. This is especially important in narrow or dry timber, where forcing a screw directly into the rail can split the wood. The pilot hole should guide the screw without removing the material needed for the threads to grip.
Secure the fittings
Place each D-ring flat against the frame rail, with both rings facing the same direction. Drive the screws straight into the pilot holes and tighten them until the plate is secure. Don't overtighten, because crushed wood or stripped threads won't hold as well as sound material.
If you're using wire, attach it only after checking both rings. Thread the wire through one loop, wrap it back securely, and repeat on the opposite side. Leave enough working slack for the wire to rise naturally onto the wall hook, but avoid creating a deep loop that changes the frame's angle.
The following video demonstrates the basic D-ring and wire workflow:
Before lifting the frame, press each fitting gently and confirm that neither ring moves independently from the rail. That small check catches loose screws while the artwork is still safely on the work surface.
Transferring Measurements for a Perfect Wall Layout
A correctly installed frame can still hang badly if the wall fasteners are misplaced. The professional solution is to transfer the actual D-ring positions to the wall instead of guessing from the frame's outside dimensions.
Start by measuring from the frame's top edge down to the center of each D-ring. Record the left and right offsets separately, even if you expect them to match. Then place a strip of painter's tape across a level and transfer both ring center points onto the tape.
Use the level as a template
Mark the desired center point on the wall. Hold the taped level against the wall and align its center mark with that wall mark. The transferred ring points now show where the wall fasteners need to go.
This method accounts for the actual hardware position, not an assumed position based on the moulding. It also preserves the relationship between the two hanging points, so the frame is more likely to land centered and level on the first attempt.
Mark both wall fasteners while the level remains aligned. If the frame uses wire, remember that the wire will rise onto the wall hook, so the final frame position may sit differently from the raw D-ring height. Test the hook position with the frame's actual wire tension rather than relying on a visual estimate.
Choose the wall connection deliberately
Drive the fasteners into studs whenever the layout permits. A screw set into structural framing gives the most dependable support. If studs aren't available, choose wall anchors designed for the specific substrate and the framed load.
Drywall, plaster, brick, and concrete don't behave the same way. Plaster may require slower drilling to avoid cracking, while masonry needs the correct bit and masonry-rated fastener. A general wall anchor isn't a universal solution.
If you need to locate framing behind drywall, use this guide to finding studs in drywall. Once the fasteners are installed, hang the frame carefully and check the level from normal viewing distance, not just from the ladder.
Common Mistakes and Pro Tips for Long-Lasting Hangs
The most common errors are simple: one ring is higher, the screw is too short, the wire is poorly secured, or the wall anchor doesn't suit the substrate. Each mistake can remain hidden until the frame shifts or the hardware loosens.
What causes trouble
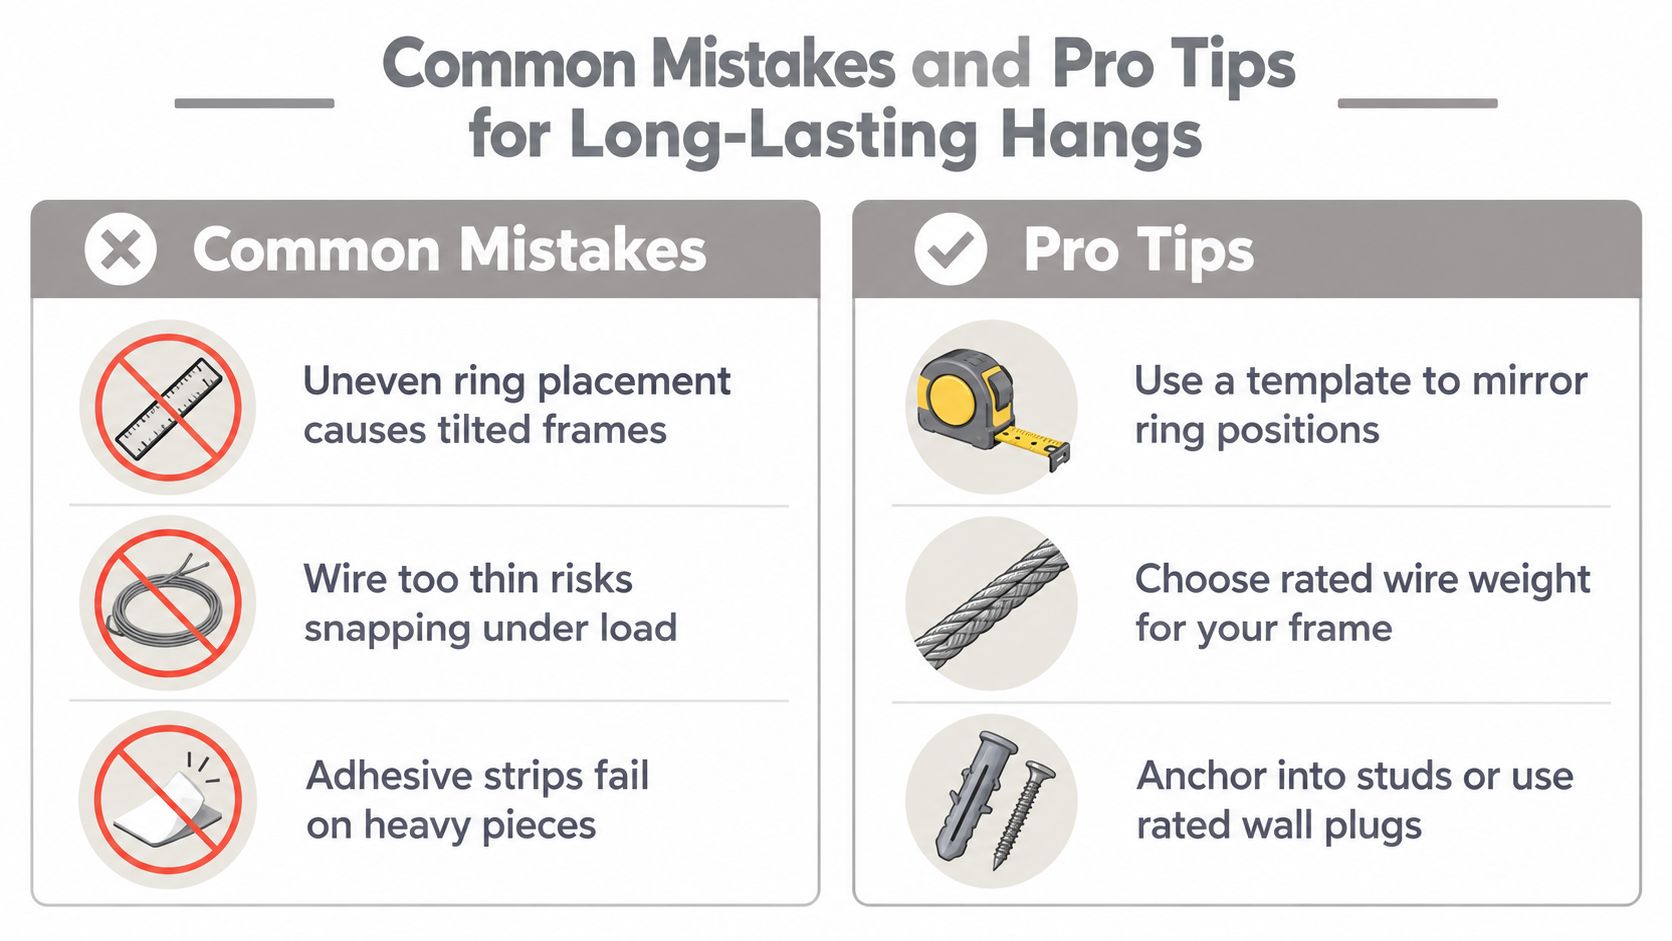
Uneven ring placement: Even a small difference in height makes the wire pull asymmetrically and encourages a tilted frame.
Insufficient screw engagement: A screw that barely bites into the frame rail can loosen under repeated movement.
Unsuitable wire: Wire should be rated for the complete framed load, not selected only because it's convenient to bend.
Adhesive-only mounting: Adhesive strips aren't a substitute for mechanical support on heavy or valuable pieces.
Wrong wall anchor: A fastener designed for one substrate may perform poorly in another.
Check the wall type before drilling. The frame and the wall are separate parts of the same load system, and both need suitable hardware.
Small checks that prevent large repairs
Use a spirit level after the frame is hung, then apply gentle pressure to the lower corners. If it rocks, slips, or returns to a different position, don't hide the movement with a bumper or adjustment. Find the loose connection first.
Recheck the visible hardware after the installation has settled, particularly in a high-traffic area or a room with humidity fluctuations. Tighten only as needed, and replace any damaged wire, stripped screw, or distorted ring rather than continuing to load it.
When D-Rings Are Not Enough for Heavier and Commercial Projects
D-rings are an excellent choice for many residential frames, but they're not automatically the right primary system for oversized artwork, large mirrors, or demanding commercial displays. A very wide or heavy piece can place substantial load on the frame and wall, even when the D-rings themselves have a suitable product rating.
Professional guidance increasingly treats heavy hanging as a risk-management problem. One recent guide recommends hardware rated 25 to 50% above the artwork weight and identifies stud mounting as the most secure option. Mixtiles' heavy-art guidance also emphasizes choosing the system around the wall type, checking the installation after it has been loaded, and using multiple anchors or studs for larger pieces.
Know when to change systems
A French cleat spreads the load across a longer horizontal section and controls forward tilt more effectively than a wire on a wide frame. Toggle bolts can help where studs aren't available in hollow walls, while rail systems make sense for collections that change frequently. These systems aren't interchangeable, and each still depends on correct substrate-specific installation.
For large or valuable pieces, review this guide to picture hanging cleats before defaulting to D-rings. If the frame is awkward to lift, the wall is uncertain, or the consequences of failure are serious, use a professional installer rather than experimenting over finished flooring or furniture.
Final Checklist for a Professional Picture Hanging Result
A professional result comes from controlled preparation, not speed. Before you put the frame on the wall, verify the frame hardware, the wire, the wall fasteners, and the layout as separate points in one complete system.
Final inspection
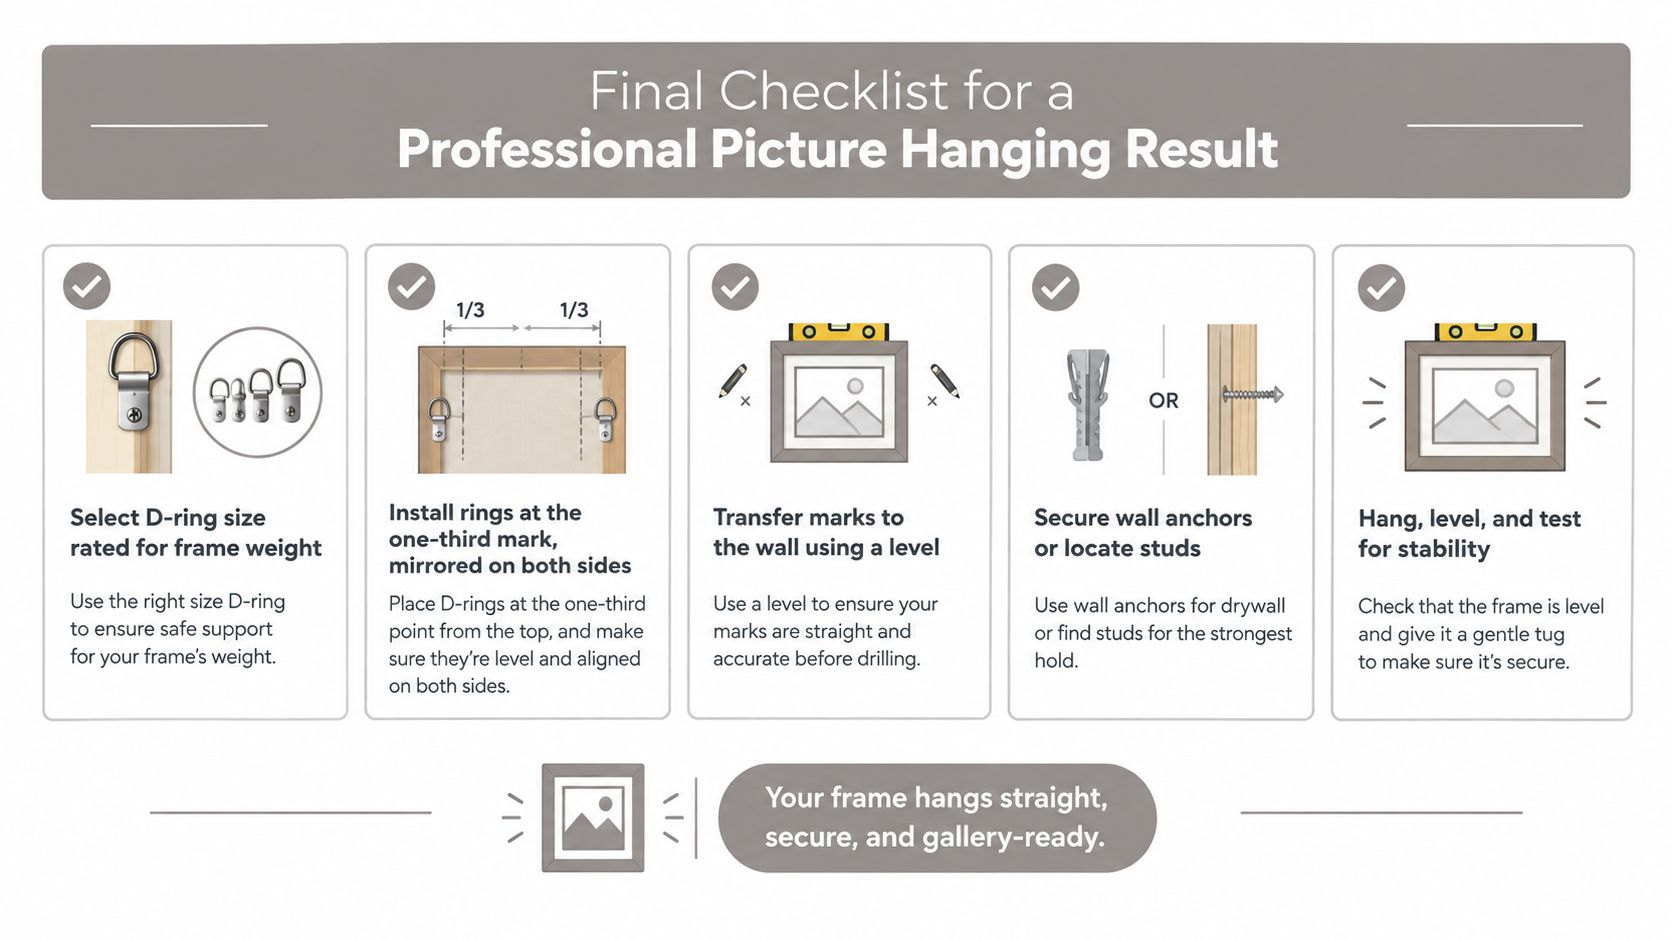
Confirm the capacity: Include the frame, glazing, mat, backing, and artwork in the total weight, then select hardware with a meaningful safety margin.
Check the one-third position: Both D-rings should sit about one-third down from the top edge, with matching heights.
Inspect the screws: Confirm that each screw is appropriate for the frame material, fully seated, and not stripping the wood.
Test the wire: Check that both ends are securely wrapped, the wire is seated in each D-ring, and there are no damaged strands.
Verify the wall marks: Use a level and transferred ring measurements instead of estimating from the frame's outside edge.
Confirm the anchors: Prefer studs where available. Otherwise, use anchors rated for the wall material and the complete load.
Test the finished hang: Step back, check the level, and apply light pressure to confirm the frame doesn't shift.
Ask yourself whether the frame sits flush, whether the wire is resting correctly on the hooks, and whether both sides carry the load evenly. If the answer to any of those questions is uncertain, lower the frame and correct the installation before leaving it in place.
Colorado Art Services handles residential and commercial art installation, including precise placement, heavy-piece mounting, mirror and sculpture hanging, display layouts, and art storage across the Denver Metro area and Front Range. Visit Colorado Art Services to arrange help with D-ring installations or a larger hanging project where wall conditions, artwork value, and a clean final layout all matter.
Comments