


9 Picture Hanging Displays for Any Space
You've arranged the collection on the floor, and every frame seems to work. Once the pieces meet the wall, the balance changes. A doorway interrupts the sequence, the sofa leaves an awkward gap, the staircase pulls the eye upward, and afternoon sunlight makes one print disappear while another catches glare.
The strongest picture hanging displays start with the wall, not the artwork. Choose the system according to wall scale, viewing distance, traffic flow, artwork weight, lighting, and the story the arrangement should tell. This guide compares nine approaches, moving from controlled, single-focus compositions to flexible, sequential, and commercial installations.
Before making a hole, measure the usable wall, mark paper or tape templates, establish a centerline, check spacing, test sightlines from the room's main access points, and plan the lighting. A picture rail can also reduce repeated wall penetrations and make later changes easier, as shown in these practical display rail tips. For heavy pieces, high placements, complex layouts, mirrors, sculpture, or precise residential and commercial installations, Colorado Art Services can help turn the plan into a secure finished display.
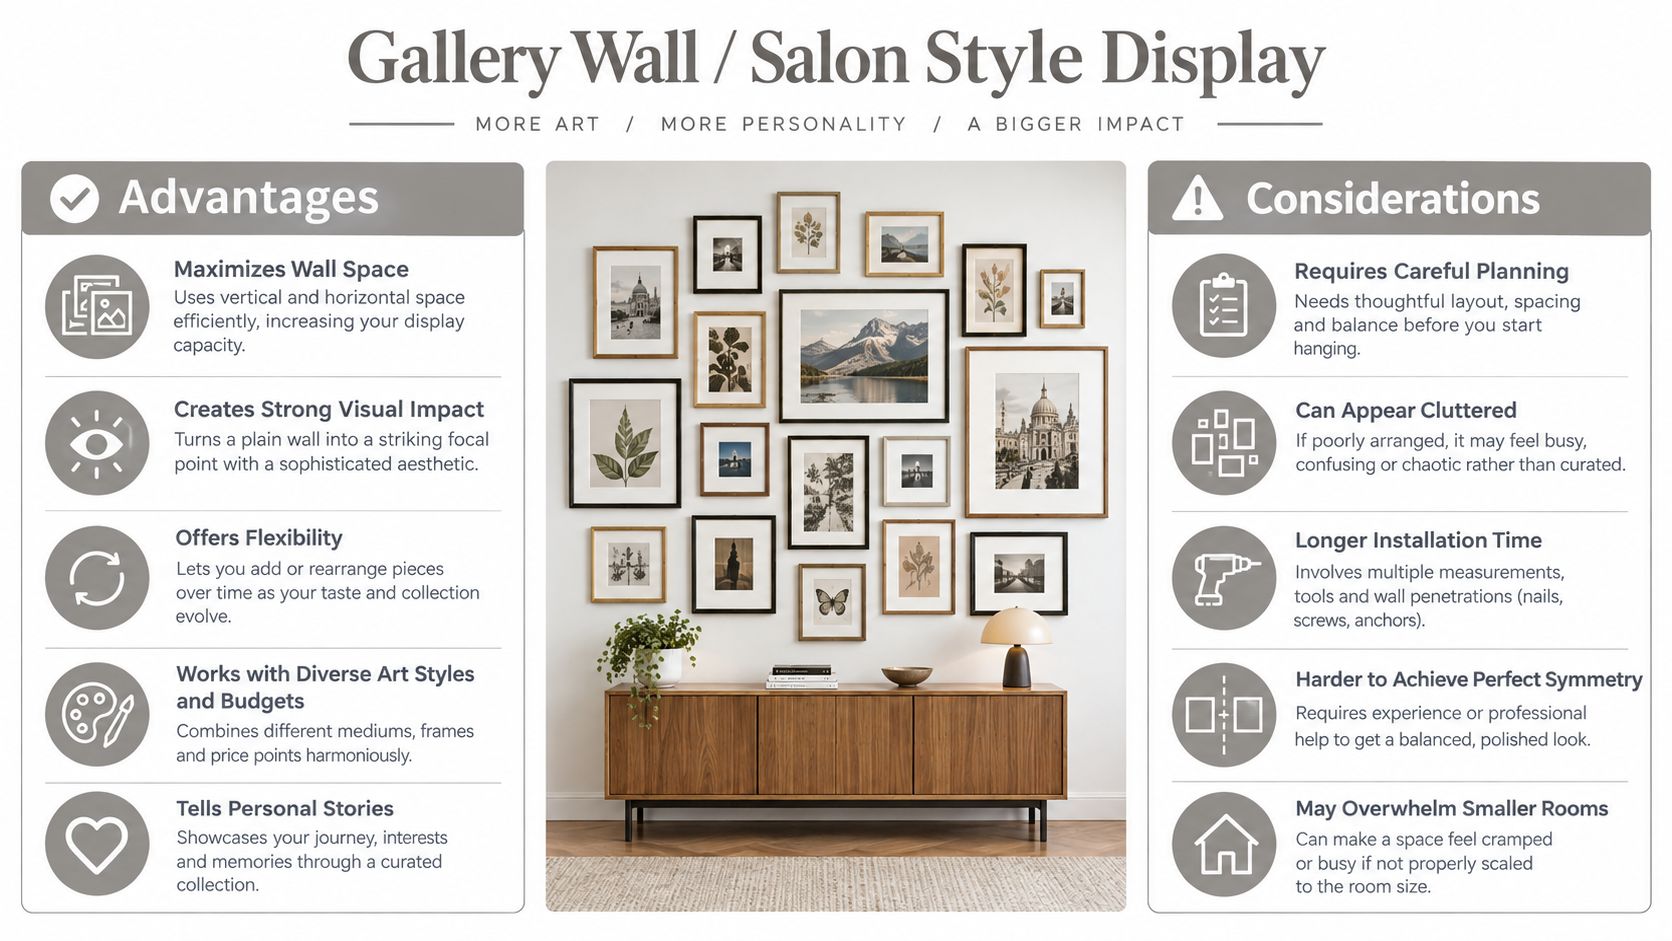
1. Gallery Wall and Salon Style Display
A gallery wall suits a collection that doesn't share a single size, frame, or medium. Photographs, paintings, drawings, textiles, and found objects can occupy one visual field, provided the arrangement has a clear outer boundary and an internal rhythm. The result can feel collected rather than matched, which makes it useful in a Denver loft, a corporate lobby, a hotel suite, or a private home with pieces acquired over time.
The format has a long precedent. The European salon hang developed in response to limited exhibition space, with paintings arranged densely from near floor level toward the ceiling. The history of the gallery wall and salon hang explains how that arrangement created a coherent field from many individual works.
Plan the composition before touching the wall
Lay every piece on the floor, then test several versions. Start with the largest work as an anchor, place related colors or subjects nearby, and keep the visual weight distributed across the group. A symmetrical cluster feels formal. An asymmetrical cluster feels more relaxed, but it still needs balance.
Use paper templates or painter's tape to test the complete perimeter. Keep spacing deliberate, usually within a narrow, consistent range rather than allowing each gap to become an improvisation. Treat the collection as one oversized composition, not as separate pictures that happen to share a wall.
A consistent centerline near 60 inches above the floor provides a useful repeatable reference, while the gallery lighting design guide can help coordinate illumination with frame placement. Don't install valuable works directly where sunlight, dampness, or unstable wall conditions can accelerate damage.
Practical rule: Photograph the floor layout and the taped wall layout before installation. The record makes future changes, cleaning, and rehanging far less frustrating.
2. Grid Display System
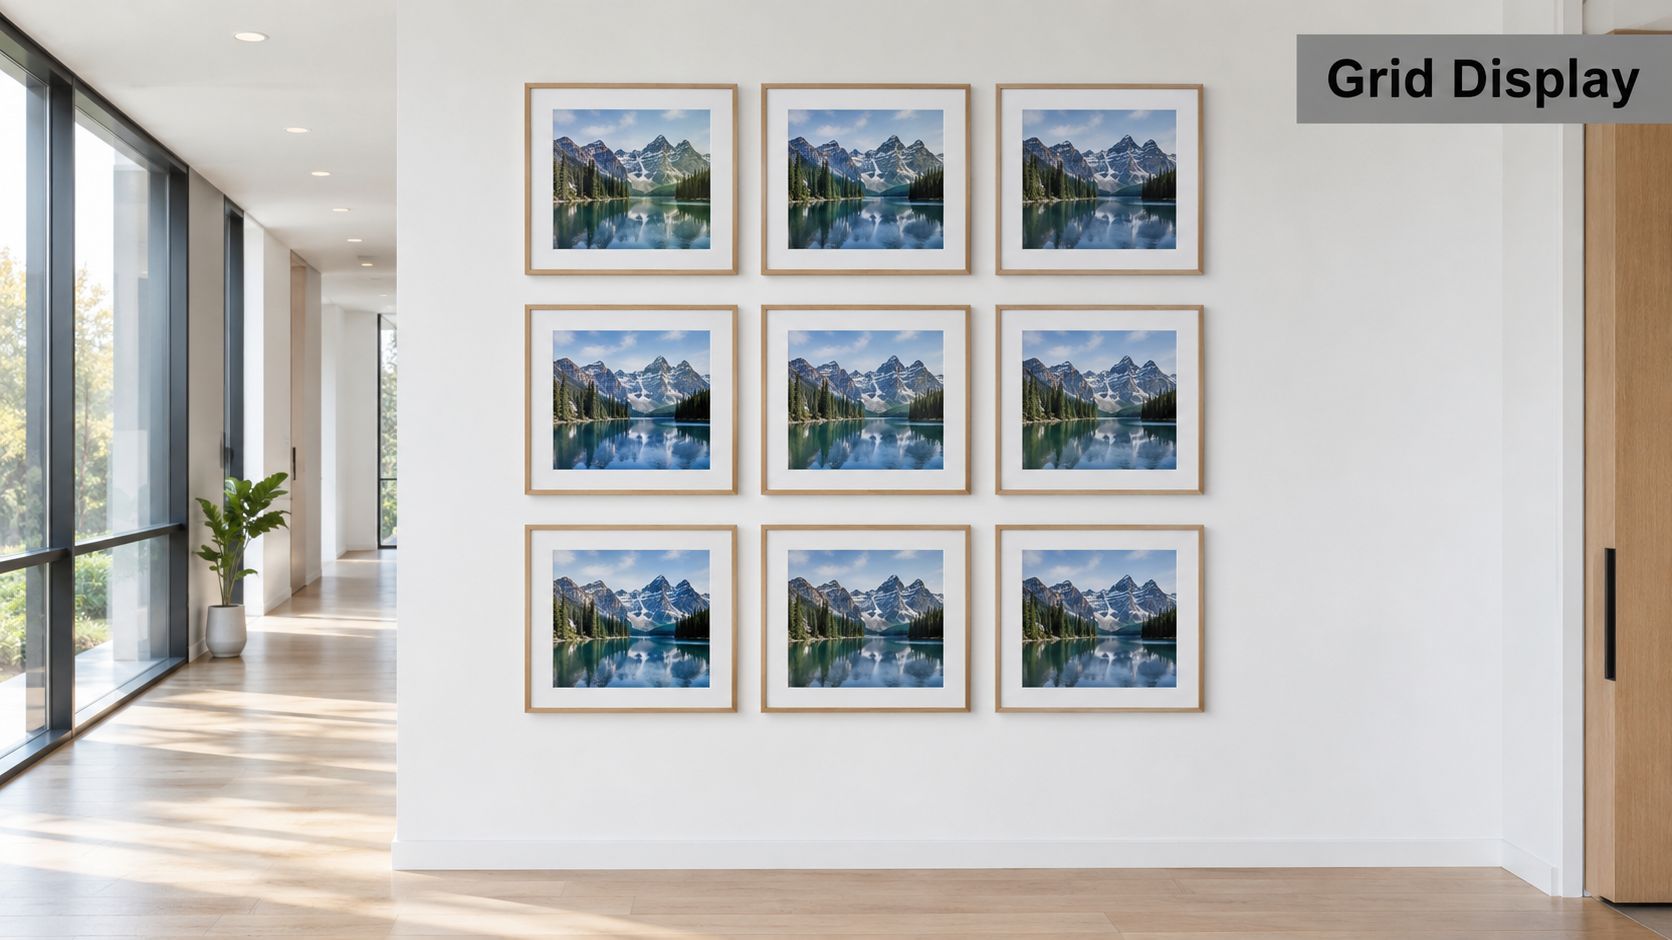
A grid depends on precision. Identical frames, repeated mat sizes, and evenly aligned rows create a visual rhythm that works especially well for photography series, corporate corridors, hotel hallways, and modern residential interiors. The content can vary, but the structure must remain controlled.
This is the right system when the collection needs to communicate order. It's less forgiving than a salon wall because a small alignment error repeats across the entire installation. A single frame that sits slightly high can disturb the row beside it and the column beneath it.
Build the layout as an installation drawing
Measure the usable wall first, then record every frame width, height, and hanging point. A useful gallery planning benchmark allows approximately 4 feet of total wall length per artwork, with the exact spacing calculated from the available wall and the combined widths of the pieces in the row. The gallery layout design resource can support this type of measured planning.
Mark the center of the overall display, not just the center of the wall. Install from that reference point outward, checking both horizontal and vertical alignment with a laser level. Painter's tape can mark each hardware location before you commit to anchors.
Keep the frame language consistent: Similar finishes and mat proportions make the repeated geometry feel intentional.
Check the wall substrate: Studs, masonry, drywall, and finished paneling each require different hardware.
Control the viewing experience: A tight grid reads as one pattern, while wider gaps give every image more independence.
Step back often: Check the display from the doorway, seating area, and corridor, not only from directly in front.
3. Single Statement and Feature Artwork Installation
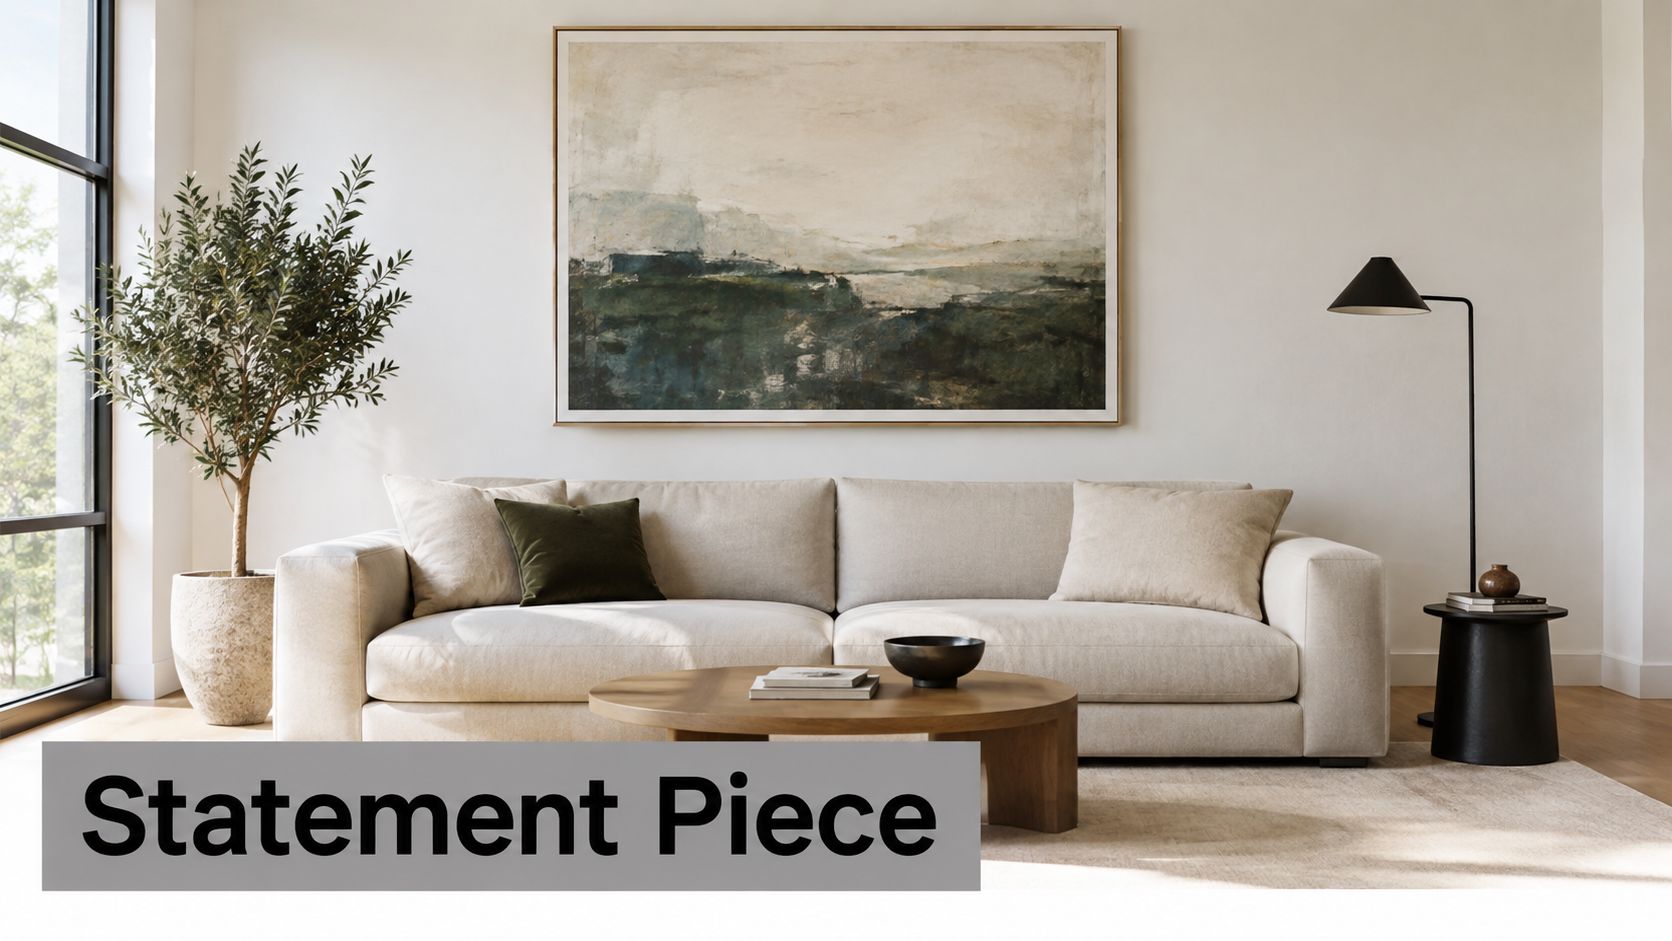
One large artwork can anchor a room more effectively than a group of smaller pieces. This approach suits a contemporary living room, an executive office, a hotel lobby, or a high-ceilinged home where a single work needs to carry the architecture.
The trade-off is exposure. A statement piece has nowhere to hide, so scale, frame quality, wall condition, lighting, and alignment all become visible. The wrong work can look undersized and disconnected. The right work establishes the room's visual center immediately.
Make the wall and the artwork relate
Use the room's furniture and architectural features as anchors. A fireplace, sofa, credenza, window, or main entry axis can determine the artwork's horizontal position. Check the sightline from multiple approaches, particularly when the room opens into another space.
A centerline near 57 to 60 inches from the floor is a practical starting point, but furniture and viewing distance can require adjustment. Leave enough breathing room around the work, and plan the clearance above any furniture before the hardware is selected. The guidance on where to hang large artwork is useful when the piece must relate to both architecture and furnishings.
Spotlights and wall washers should be planned before installation. Light that arrives from a sharp angle can emphasize canvas texture, while light aimed directly at glazing can create distracting reflections. For works on paper, photographs, and other sensitive materials, conservation decisions may favor filtered glazing, lower light, or rotation instead of brighter illumination.
If the work is heavy, unusually framed, or placed above a vulnerable surface, professional help becomes worthwhile before lifting begins. Hardware must support the actual frame and wall condition, not an assumed weight.
4. Symmetrical Diptych and Triptych Arrangement
A diptych or triptych gives you several artworks with the discipline of a single composition. Matching panels can frame a bed, dining area, sofa, reception desk, or formal living room. The central axis matters more than any individual panel, so start by locating the center of the furniture or architectural feature below.
Use identical frames and hanging hardware when the works are designed as a set. If the panels differ slightly in size, the arrangement can still work, but the discrepancy must look intentional rather than accidental.
Let the center control the installation
Mark the midpoint of the wall space first. Place the innermost edges of the panels around that point, then work outward. A diptych typically needs a narrow, even separation, while a triptych may use the same gap between every panel or a stronger central emphasis.
The entire composition should sit at a comfortable viewing height. A centerline around 57 to 60 inches can serve as a starting point, then shift according to seating, furniture height, and the room's dominant sightlines. Above a sofa, the group should relate visually to the sofa rather than float near the ceiling.
A laser level helps verify the top and bottom edges from more than one angle. Don't trust a single measurement taken from a sloping floor or an uneven ceiling. Record the gap and hardware positions so a panel can be removed for repair without rebuilding the composition from memory.
This system works poorly when unrelated frames, inconsistent margins, or irregular panel sizes are forced into symmetry. If the collection is quite varied, a salon wall will usually make the differences feel purposeful instead.
5. Oversized Mirror and Artwork Combination Display
Mirrors add reflection, depth, and a second view of the room, but they also introduce glare and safety concerns. Pairing one with artwork can make a narrow entry, dark dining room, hospitality space, or bathroom feel more layered. The display succeeds when the mirror reflects something worth seeing, not a cluttered corner, bright fixture, or busy circulation route.
Test the reflection before drilling. Move a temporary mirror or reflective board through several positions and inspect it from the room's normal approaches. A mirror facing a window may increase brightness, but it can also reflect harsh daylight directly toward seated viewers.
Coordinate reflection, depth, and hardware
Artwork and mirrors don't need to sit on the same plane. Slight differences in depth can create a deliberate layered effect, while matching frame finishes can tie the arrangement together. Avoid placing the artwork where its glazing catches the mirror's reflected light source.
Large mirrors require specialized hanging hardware and careful handling. The frame, backing, wall type, and fixing points all affect the installation method. Professional installation is sensible when the mirror is oversized, positioned above furniture, mounted in a high-traffic area, or combined with sculpture.
Light changes throughout the day and across seasons, so assess the display in morning, afternoon, and evening conditions where possible. If the mirror makes the room brighter but the artwork receives damaging direct exposure, the arrangement needs a conservation adjustment. The best result may involve filtered glazing, repositioned lighting, or a different wall.
6. Floating and Minimalist Shelf Arrangement Display
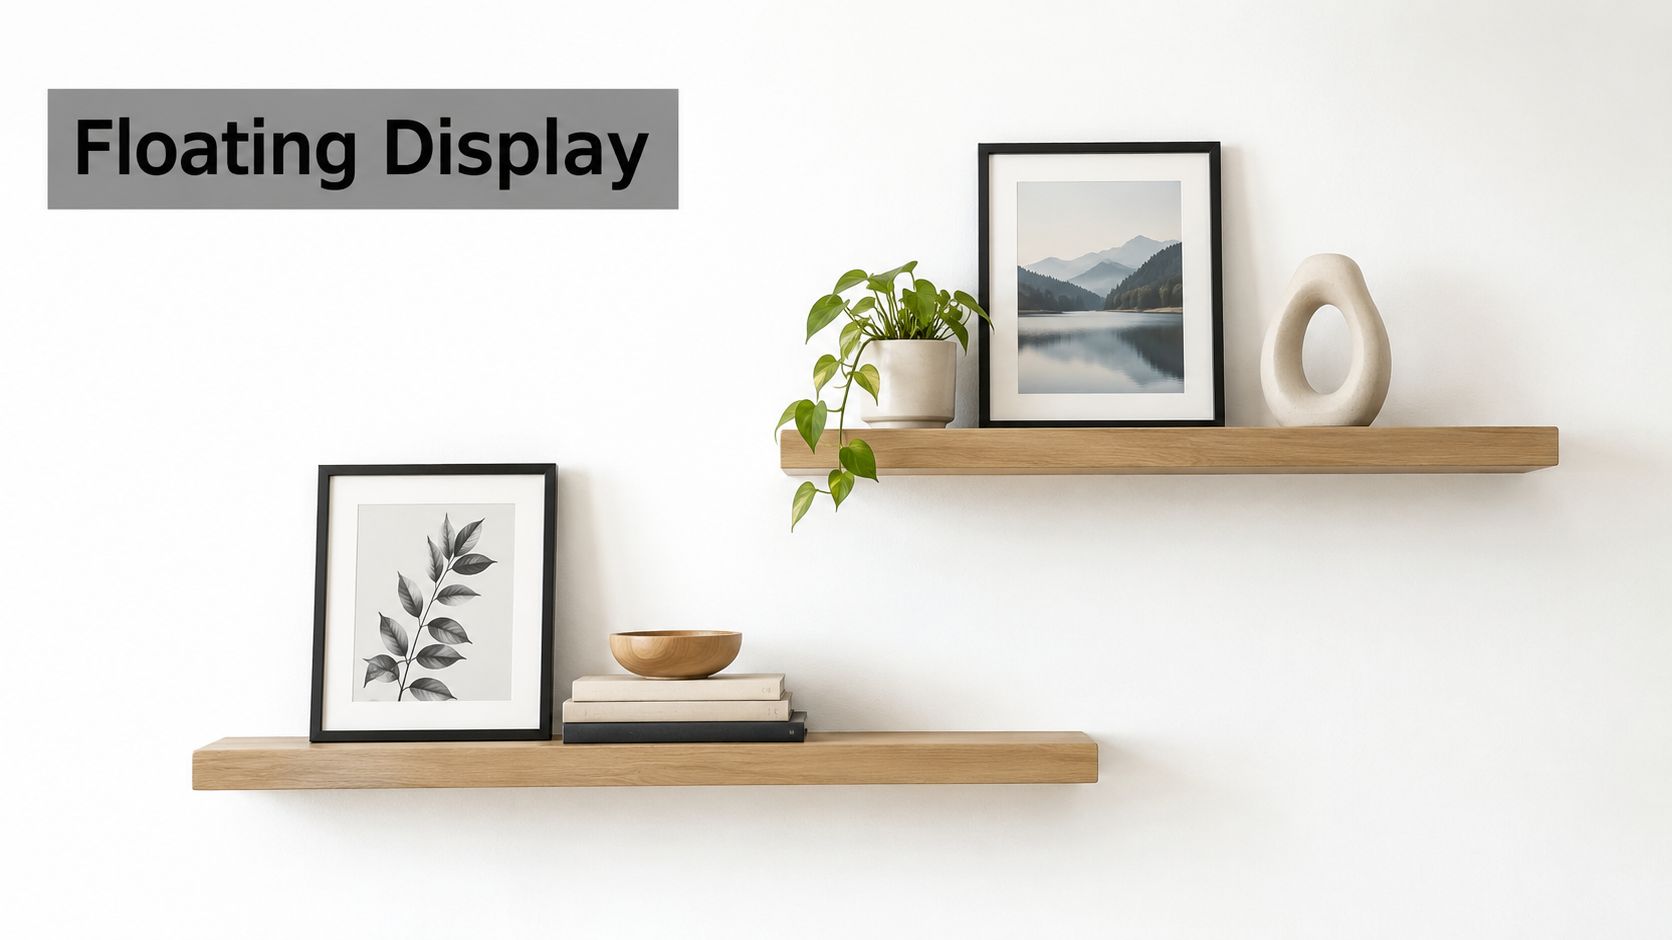
A picture ledge or floating shelf turns a flat wall into a shallow three-dimensional display. Leaning framed works allows quick changes, while books, ceramics, small sculpture, and plants introduce depth. This system suits a home office, creative studio, boutique retail space, or apartment where the collection needs to evolve without repeated nail holes.
Shelves are flexible, but they aren't automatically safer. The shelf, brackets, fixings, and wall must carry the combined load of every object, including the largest frame leaning at the back. A shallow ledge with concealed hardware can look clean, but concealed hardware still needs proper structural support.
Build layers without overcrowding
Begin with one substantial anchor piece. Add smaller frames in front or beside it, then introduce objects that vary in height and texture. A restrained palette of frame finishes, wood tones, or accent colors prevents the arrangement from becoming a storage shelf.
Staggering shelf heights can help separate visual layers, but the spacing should respond to the wall and the objects. Leave clear breathing room at the ends and between groups. Objects placed too tightly lose their individual silhouettes and make dusting, access, and future changes difficult.
Secure the shelves into suitable support: Locate studs where possible and use hardware rated for the shelf and its contents.
Keep heavy objects low: Don't place unstable ceramics or dense sculpture above a bed, desk, or busy passage.
Use the ledge as a curated system: Rotate pieces deliberately instead of filling every available inch.
Check forward pressure: Frames that lean too far can slide or tip when someone brushes the shelf.
7. Large-Format and Canvas Wall Installation
Large-format canvases, murals, and oversized prints define expansive rooms, double-height walls, lofts, corporate lobbies, and hotel feature spaces. Their scale can solve a proportion problem that several small frames can't. It can also create one of the more demanding installation conditions because the work is difficult to handle, align, and secure without marking finished surfaces.
Assess the wall before ordering the piece. Confirm its construction, locate usable studs or structural support, check access routes, and measure doorways, elevators, stair turns, and installation clearances. The artwork may fit the wall but fail to reach it safely through the building.
Treat installation as a coordinated project
The supplier's specifications should guide hardware selection. Heavy-duty anchors may be appropriate in one wall and unsuitable in another. Oversized frames can also flex during lifting, so the installation team needs a handling plan rather than a single ladder and a level.
Lighting deserves equal attention. A large canvas under a narrow beam can show uneven brightness across its surface. Wall washing often gives a more even result, but the fixture position must account for texture, glazing, and the viewing distance.
Professional threshold: If the piece is heavy, fragile, high above the floor, or impossible to maneuver safely with two people, bring in an experienced installer before delivery.
A professional team can coordinate pickup, delivery, wall assessment, lifting, mounting, lighting access, and final documentation. That matters in finished homes and commercial spaces where a failed attempt can damage both the artwork and the surrounding construction.
The following video provides a visual reference for large-format handling and placement.
8. Staircase and Corridor Sequential Display
A staircase or corridor can carry a visual narrative through movement. Family photographs, architectural studies, educational material, or a themed collection can unfold as people walk rather than presenting everything from one stationary viewpoint.
The challenge is geometry. A staircase wall has an implied angle, changing sightlines, and nearby handrails or landings. A corridor has traffic, doors, corners, lighting transitions, and equipment that may compete with the artwork.
Design for the moving viewer
Sketch the full sequence before installation. Photograph the wall, mark the stair angle or corridor centerline, and place templates at the intended positions. Similar frame finishes can unify different images, while consistent gaps prevent the installation from looking accidental.
View the sequence from the bottom, middle, and top of the stairs. In a corridor, stand at each approach and check whether open doors, signage, furniture, or lighting fixtures interrupt the story. Works should never reduce required circulation or obstruct safety equipment.
Use secure hardware in high-traffic areas. Museum installation guidance recommends attaching two D-rings to the frame itself, not cardboard backing, with the rings placed partway down the sides and the wire tightly secured so the work sits close to the wall. The same guidance sets screening thresholds of 100 pounds and 60 inches in any direction for standard two- and three-dimensional works unless curatorial approval is obtained, as described in this museum installation guidance.
Staircases, high placements, and commercial corridors are strong candidates for professional installation. The installer can coordinate access, fall protection, wall conditions, secure attachment, and the sequence's final alignment.
9. Rotating Seasonal and Temporary Exhibition Display
A rotating display makes sense when the artwork changes often. Private collectors, corporate art programs, boutique hotels, galleries, and model properties may need to replace works without repeatedly patching and repainting walls. Picture rails, track systems, wire infrastructure, and modular panels can turn a fixed installation into a reusable framework.
This system trades some visual simplicity for flexibility. The hardware becomes part of the design, so choose a rail or track finish that works with the architecture. The hanging method also needs enough adjustment range to accommodate different frame heights and weights without leaving the arrangement visually inconsistent.
Create a repeatable rotation process
Document every installation with photographs and measurements. Record the artwork location, hanging point, frame dimensions, lighting position, and any special handling notes. That record lets a team reinstall a successful display without relying on memory.
Plan storage at the same time as the exhibition schedule. Works waiting for rotation need protection from dampness, unstable temperatures, direct sunlight, and careless stacking. For sensitive paper materials, conservation guidance from the Northeast Document Conservation Center emphasizes controlled light exposure, archival framing and mounting, secure attachment, and avoiding damp or poorly insulated exterior walls.
Use lighting that can adapt to changing artwork sizes and surfaces. Track fixtures make repositioning easier, but they still need careful aiming. Brightening a wall for a new exhibition may create unacceptable exposure for a photograph or work on paper.
A modular system is worthwhile when repeated removal and reinstallation would otherwise create damage, labor, or alignment problems. For occasional changes, a simpler rail may be enough. The right choice depends on rotation frequency, artwork sensitivity, wall construction, and who will manage each change.
Comparison of 9 Picture Hanging Displays
Display Type | Implementation Complexity | Resource Requirements | Expected Outcomes | Ideal Use Cases | Key Advantages |
|---|---|---|---|---|---|
Gallery Wall / Salon Style Display | Moderate–High, requires detailed layout and multiple hang points | Many frames/hardware, measuring tools, possible professional installation | Cohesive, high-impact focal wall that tells a collection story | Residential living rooms, eclectic collections, feature walls | Maximizes display capacity; flexible; strong visual interest |
Grid Display System | High, exact measurements and precise alignment required | Uniform frames, laser level/templates, continuous wall space | Clean, orderly, highly symmetrical visual rhythm | Corporate spaces, photography series, modern galleries | Extremely precise and scalable; photogenic, professional look |
Single Statement / Feature Artwork Installation | Low–Moderate, single placement but demands precision | High-quality artwork, museum-grade hardware, focused lighting | Dominant focal point; minimalist, museum-quality presentation | Luxury homes, executive offices, high-ceilinged rooms | Maximum visual impact with minimal clutter; simple composition |
Symmetrical Diptych / Triptych Arrangement | Moderate, fewer pieces but alignment critical | Matching frames/hardware, measuring tools | Formal, balanced composition with coordinated narrative | Above sofas, formal dining rooms, gallery triptychs | Balanced symmetry; cohesive multi-panel storytelling |
Oversized Mirror and Artwork Combination Display | High, heavy lifting and glare/angle management | Large mirror, heavy-duty anchors, professional installers, lighting | Increased perceived space and light; layered visual depth | Small/dark rooms, entryways, luxury interiors, spas | Brightens and expands space; functional and decorative |
Floating / Minimalist Shelf Arrangement Display | Moderate, shelf installation plus styling skill | Floating shelves, anchors, mixed objects, regular styling | Layered 3D displays that are easy to refresh and rotate | Small spaces, home offices, retail displays, apartments | Flexible, easy to update; combines objects and art for depth |
Large-Format and Canvas Wall Installation | Very High, specialized equipment, structural assessment needed | Oversized canvas/prints, heavy-duty anchors, pro installers, lighting | Dramatic, immersive focal installation that defines a room | Lofts, lobbies, double-height walls, contemporary interiors | Transformative scale and presence; museum-level impact |
Staircase and Corridor Sequential Display | High, complex sightlines and angled alignments | Multiple frames, laser level, adjustable lighting, safety planning | Narrative flow and progressive viewing experience | Stairwells, long corridors, multi-story residences and offices | Turns transitional spaces into curated galleries; guides viewers |
Rotating Seasonal and Temporary Exhibition Display | Moderate, initial setup complex; ongoing reconfiguration | Modular hanging systems, track lighting, storage and maintenance | Regularly refreshed exhibitions; adaptable programming | Collectors rotating inventory, corporate art programs, pop-ups | Minimizes wall damage; highly adaptable; supports frequent updates |
Turn the Layout Into a Finished Installation
Choose the system according to the job the wall needs to perform. A grid gives a photography series or repeated collection dependable order. A salon wall accommodates varied frames, sizes, and mediums. A statement piece or large-format installation creates architectural impact, while a diptych or triptych supplies formal balance around a strong centerline.
Use mirrors when reflection and depth improve the room, but test glare and sightlines before installation. Choose shelves when you want a flexible three-dimensional display that can change without constant wall repairs. Use a staircase or corridor for movement and narrative, and choose a rail or modular system when artwork will rotate regularly.
Before committing to hardware, review the practical conditions:
Scale: Does the display relate to the wall, furniture, ceiling height, and viewing distance?
Spacing: Are gaps consistent where consistency is part of the design, and intentionally varied where the arrangement is collected?
Centerlines: Have you measured the composition as a whole rather than aligning each piece in isolation?
Sightlines: Does the display work from doorways, seating areas, corridors, stair landings, and other normal approaches?
Lighting: Will the fixtures create glare, uneven brightness, or excessive exposure for sensitive materials?
Wall conditions: Is the surface dry, structurally suitable, and free from problems that could affect the artwork?
Hardware: Are the anchors, D-rings, wire, rails, brackets, and fixings rated for the actual work and wall?
Access routes: Can the artwork reach the room through doors, stairs, elevators, and finished spaces without damage?
Conservation should remain part of the design decision. The best display isn't always the brightest or most crowded one. For photographs, textiles, works on paper, and mixed-media pieces, filtered glazing, lower light, rotation, or relocation may protect the work better than stronger accent lighting. The Library of Congress guidance for exhibiting collections also emphasizes reducing ultraviolet and infrared exposure, avoiding direct sunlight, and securing displayed objects.
Professional installation becomes worthwhile for oversized or heavy work, mirrors, sculpture, high placements, staircases, commercial corridors, multi-room programs, fragile or valuable pieces, and any project requiring repeated removal and reinstallation. It's also sensible when the wall substrate is uncertain, the layout must align precisely across a long space, or a failed attempt could damage finished interiors.
Plan the complete layout before making wall penetrations. Mark the composition, test the lighting, confirm the hardware, and document the final result. For precise placement, secure mounting, local art moving, storage, and residential or commercial installation support, contact Colorado Art Services before the first frame leaves the floor.
Donor recognition display tips can also help when a display needs to communicate names, milestones, or institutional history without sacrificing legibility and visual order.
Colorado Art Services plans and installs picture hanging displays for homes, offices, galleries, and commercial spaces, including grids, large-format work, mirrors, sculpture, and heavy pieces. Visit Colorado Art Services to discuss your wall layout, secure mounting, art moving, storage, and a finished installation designed for the space.
Comments