


Hanging Pictures on Fabric Walls: Safe Methods That Work
You're standing in a finished office, living room or gallery with a framed print in one hand and a drill in the other, and the wall in front of you isn't painted drywall. It's fabric. It gives slightly when you press it, there's no obvious place to put a screw, and you know that one misplaced hole will not disappear with filler and a touch of paint the way it would on plaster.
That's exactly when to stop. Hanging pictures on fabric walls works well when you treat the fabric as a finish, find the structure behind it, and choose hardware that puts the load there instead. It goes wrong when you treat the face like drywall, trust an adhesive strip with a glazed frame, or drill an acoustic panel without checking what that does to its rating and warranty. The checks below come before the first hole, not after you've made it.
Check the Substrate and Weight Before You Drill
Fabric walls are not one product. Upholstery pulled over drywall holds fasteners differently than a tackable panel, and both behave differently than a fabric wrapped acoustic absorber with a soft fiber core. Find the panel label, spec sheet, or facilities file first. You want construction, thickness, backing, and fire classification, plus what sits behind the face.
Then locate structure before you mark anything. Sweep with a stud finder for studs, blocking, or engineered support rails, and compare those hits to panel seams and edges where fixings are more likely to be accepted. Open fabric between supports is not a hanging point. When no structure lands where the picture needs to go, change the placement or change the hardware.
Weigh the piece exactly as it will hang. Frame, glazing, backing board, mat, and hanging hardware go on the scale together. A framed print with glass often weighs far more than expected, and a deep frame stands proud of the wall. This creates greater pull at the top fixings even when total weight looks modest.
Press, Listen and Look for Services
Press across the panel with a flat palm. Feel for compression, looseness, or soft spots that signal the core will crush rather than grip. A face that gives easily under hand pressure will not carry a concentrated screw load. Check edges for lifting fabric. Listen for shifting or hollow movement behind the face.
Map concealed services and clearances at the same time. Electrical runs, data lines, sprinkler pipe, and the panel's own concealed clips can sit directly behind the fabric. Drilling blind turns hanging into repair work. In commercial space, request the services drawing from facilities rather than guessing.
Treat any acoustical panel as a non structural finish until the substrate and the manufacturer approved attachment method are confirmed. Mounting details affect acoustic and fire performance, so some systems call for Z bars on furring strips because the absorber itself cannot carry the rail. Get the panel model, the fully assembled weight, and a rough map of framing or rails in hand before shopping for hardware. With those three facts you can match the anchor to the substrate and load instead of buying a generic picture kit and hoping it holds.
Choose the Attachment System for Your Wall
Two screws in the right structure will hold more than six fixings in acoustic fiber. The fabric face gives you no strength, so each mount has to pass through it to something that carries load. That is a manufacturer rail, furring, studs, blocking, or a cleat that spreads weight across them. Adhesive pads that stick only to fibers fail that test for anything with glass, a frame, or value.
Acoustic systems vary widely in construction. Some use fiberglass, mineral wool, PET, or framed substrates with concealed hardware, and each type sets different limits for load and reversibility. The Artful Home artwork care guidance makes the same point for fiber works when it calls for limited handling, air circulation, soft lighting, and artist specific mounting. A shallow unframed print and a deep glazed frame impose different pull and shear on the wall, so they need different hardware.
Adhesive strips sit at the very light end, and I would not use them on fabric you want to preserve. They grip fibers instead of structure, they can lift or stain the weave on removal, and heat or humidity loosens the bond without warning. Hook and loop earns a place for very light pieces only when the panel maker allows it. Some commercial fabric systems permit lightweight display with hook and loop or hooks, but that approval is system specific. Where allowed, run full width strips to spread load and test peel on a hidden edge first.
Lightest Options and Their Limits
Museum guidance for textiles follows the same logic of broad support. The George Washington University Museum guidance on displaying textiles states that hook and loop mounting is the preferred technique for many textiles because it distributes weight, but warns it cannot carry a textile too heavy or fragile to support itself. Those pieces may need a chemically inert aluminum honeycomb panel faced with mounting fabric, while smaller works may use fabric covered archival matboard. Pressure mounting for pieces too fragile to stitch is a conservator level system, not a home workaround.
For unframed fiber art, a sleeve on a rod or wooden slat keeps punctures out of the work. Stitch or attach the sleeve to the back using the artist method, let the rod carry the full width evenly, and fix only the rod brackets to structure. Leveling happens at the brackets, which avoids tugging the textile itself out of square.
Wall or panel type | Recommended mount | Suitable artwork | Reversibility |
|---|---|---|---|
Acoustic panel with engineered rail | Manufacturer rail or Z bar into the rail | Framed prints within the rated load | Good, panel stays intact |
Acoustic panel fixed to furring strips | Z bar anchored into furring | Medium framed works, checked against the panel load | Fair, leaves fixing points to patch |
Fabric wall over studs or blocking | Screws into framing or a load spreading cleat | Heavy frames and mirrors | Low, leaves holes |
Fabric wall, lightweight unframed piece | Hook and loop strip within manufacturer rating | Light prints and textiles | High, removable |
Textile artwork without a backing | Sleeve on rod or wooden batten | Fiber art and tapestries | High, no punctures |
Panel construction unknown | Do not drill until identified | None until substrate is confirmed | No damage if you wait |
Structural Options for Heavier Work
Z bars and Z clips work on acoustic panels only when anchored into a manufacturer rail or into furring, never into absorber alone. One leaf fixes to structure, the mating leaf fixes to the frame, and the interlock spreads load along the bar length. The frame also sits flat, which reduces the pulling force on screws from soft cores at the top edge. Allow lift clearance above the frame so you can engage and remove it without dragging across fabric.
For heavy frames and mirrors over studs or blocking, screws into solid timber or a continuous cleat are the dependable route. A cleat spans between studs and creates a level fixing line at picture height, so placement does not depend on where a single stud lands. Predrill through fabric with light pressure so threads do not snag and run the weave, and size screw length for panel thickness plus full bite into timber.
Very large textiles are handled with continuous batten and hook and loop supports aligned and connected on the floor before raising. The full width carries the weight evenly during the lift, which beats two hooks and guesswork at any scale.
Compare panel construction, assembled weight, frame depth, and access to backing before you buy hardware, and review how different art hanging systems distribute load when choosing between rail, cleat, and direct fixings. Larger pieces reward longer support lines and smaller loads per fixing.
If the fabric alone would have to hold the picture, it's the wrong mount.
How to Hang a Picture on a Fabric Wall Step by Step
Good installation is mostly preparation. The drilling takes minutes, but confirming the system, marking structure and checking weight determine whether the picture stays level without distorting the wall. Work through the steps in order and don't skip ahead because the mark on the wall looks right.
The sequence below is summarized in this visual guide before you start.
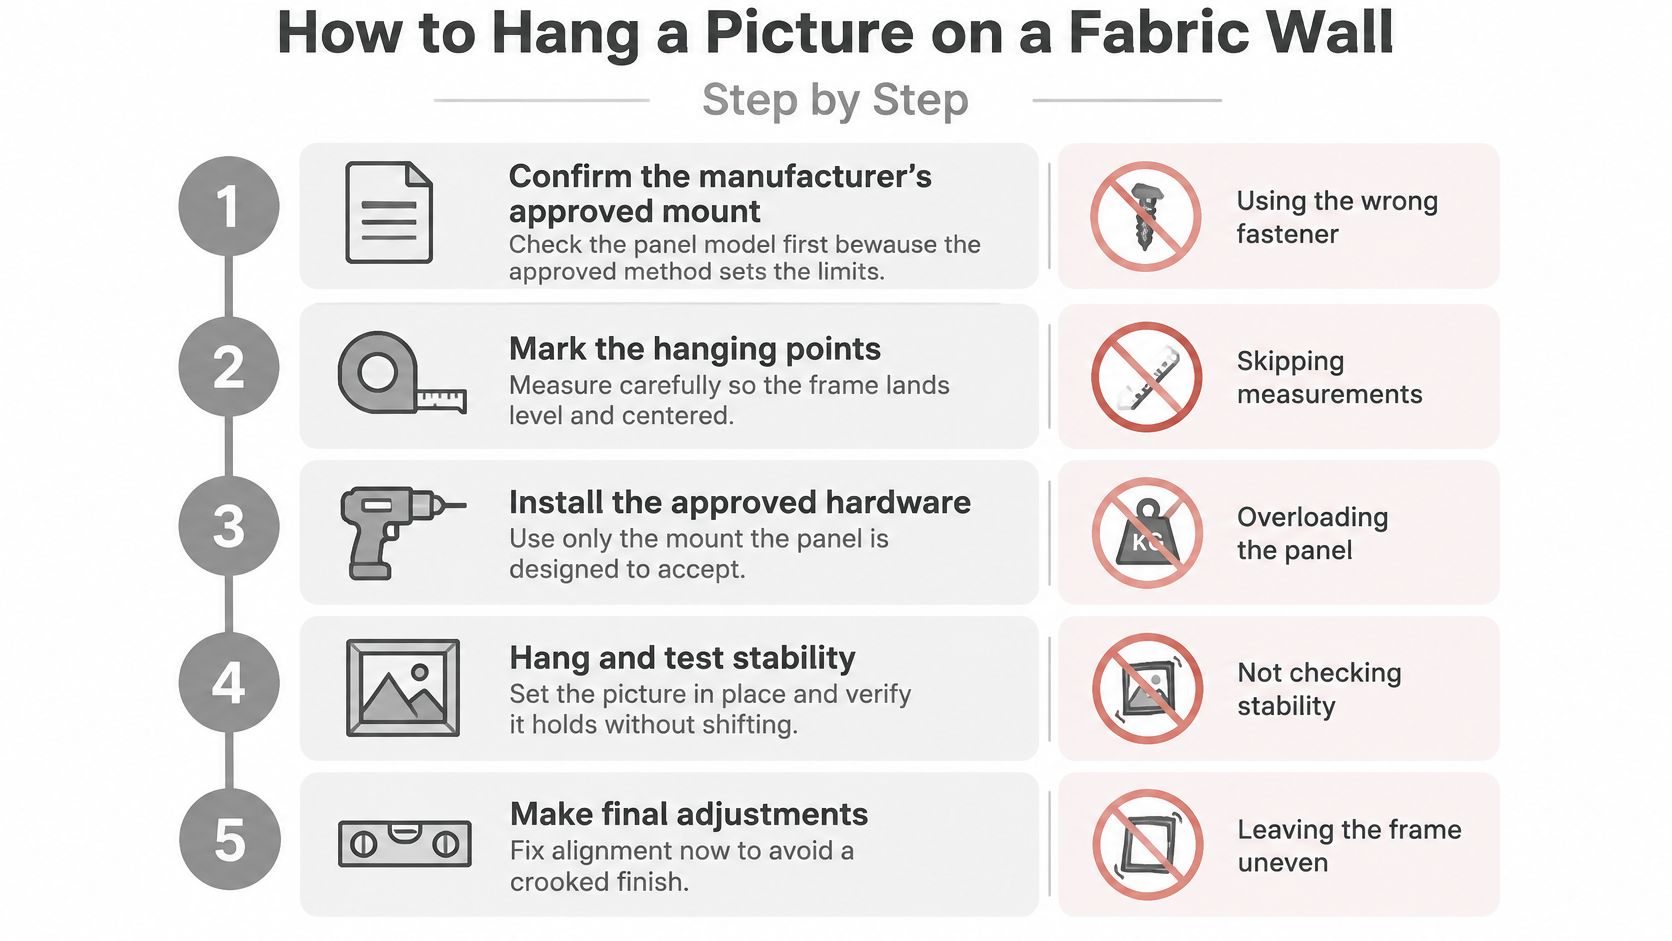
Confirm the manufacturer's approved mount. Check the panel model first because the approved method sets the limits for load, fastener type and placement. If the instructions name a rail or Z bar system, use that system rather than substituting a drywall anchor.
Mark the attachment line over structure. Transfer your stud, blocking or rail map onto painter's tape on the fabric, never pencil directly on the face. Measure from a fixed reference and check center and height twice, since moving a hole in fabric isn't a simple patch.
Weigh and compare against the rating. Put the assembled piece on a scale and compare it with the rated load for your chosen fixing. If you're close to the limit, move up to a cleat or rail instead of hoping the rating has spare capacity.
Install the cleat, rail or Z bar into framing. Use the fasteners the system specifies and drill a pilot hole sized to the fastener so you don't tear fibers or split furring. To choose the right wall fixings for the substrate you're fixing into, focus on the structure behind the fabric, not the fabric you're passing through.
Add a secondary restraint for tall or heavy frames. Fit an anti tip clip or a hidden wire anchored to structure so the frame can't tip forward if it's knocked. The restraint carries no load in normal use, but it prevents a small bump becoming a fall.
Hang, level and inspect the fabric. Lift the picture onto the mount with a second person for anything wide or glazed, check level with a laser or spirit level, and confirm the fabric isn't pulled, puckered or compressed around fixings. Adjust on the mount rather than forcing the frame sideways.
Recheck after settling. Load the picture gently, step back, then recheck level and fabric after 24 hours, because slight settling often shows up then. Correct small movement early before fixings bed into a soft core.
The common slips are predictable. People drill without marking framing, use drywall anchors in a fabric panel where there's nothing for the anchor to expand against, and place top fixings too far from support so the frame leans and loads the fabric. Each one is avoidable with the map and weight you prepared earlier.
Watching the hardware engage correctly can help if you've never used a Z bar or cleat before.
Secure hang check: The picture sits level with no sag, the fabric stays flat and undistorted, and there's no visible strain, puckering or pull at any fixing point.
Temporary vs Permanent Hanging and Removal
Decide on reversibility first. A rental office, a rotating display or a piece you expect to move needs a mount you can remove cleanly, while a long term collection can justify a permanent rail or cleat that leaves holes but carries more. Choosing after you've drilled usually means you chose permanent by accident.
This comparison sets out the trade off before you commit to either route.
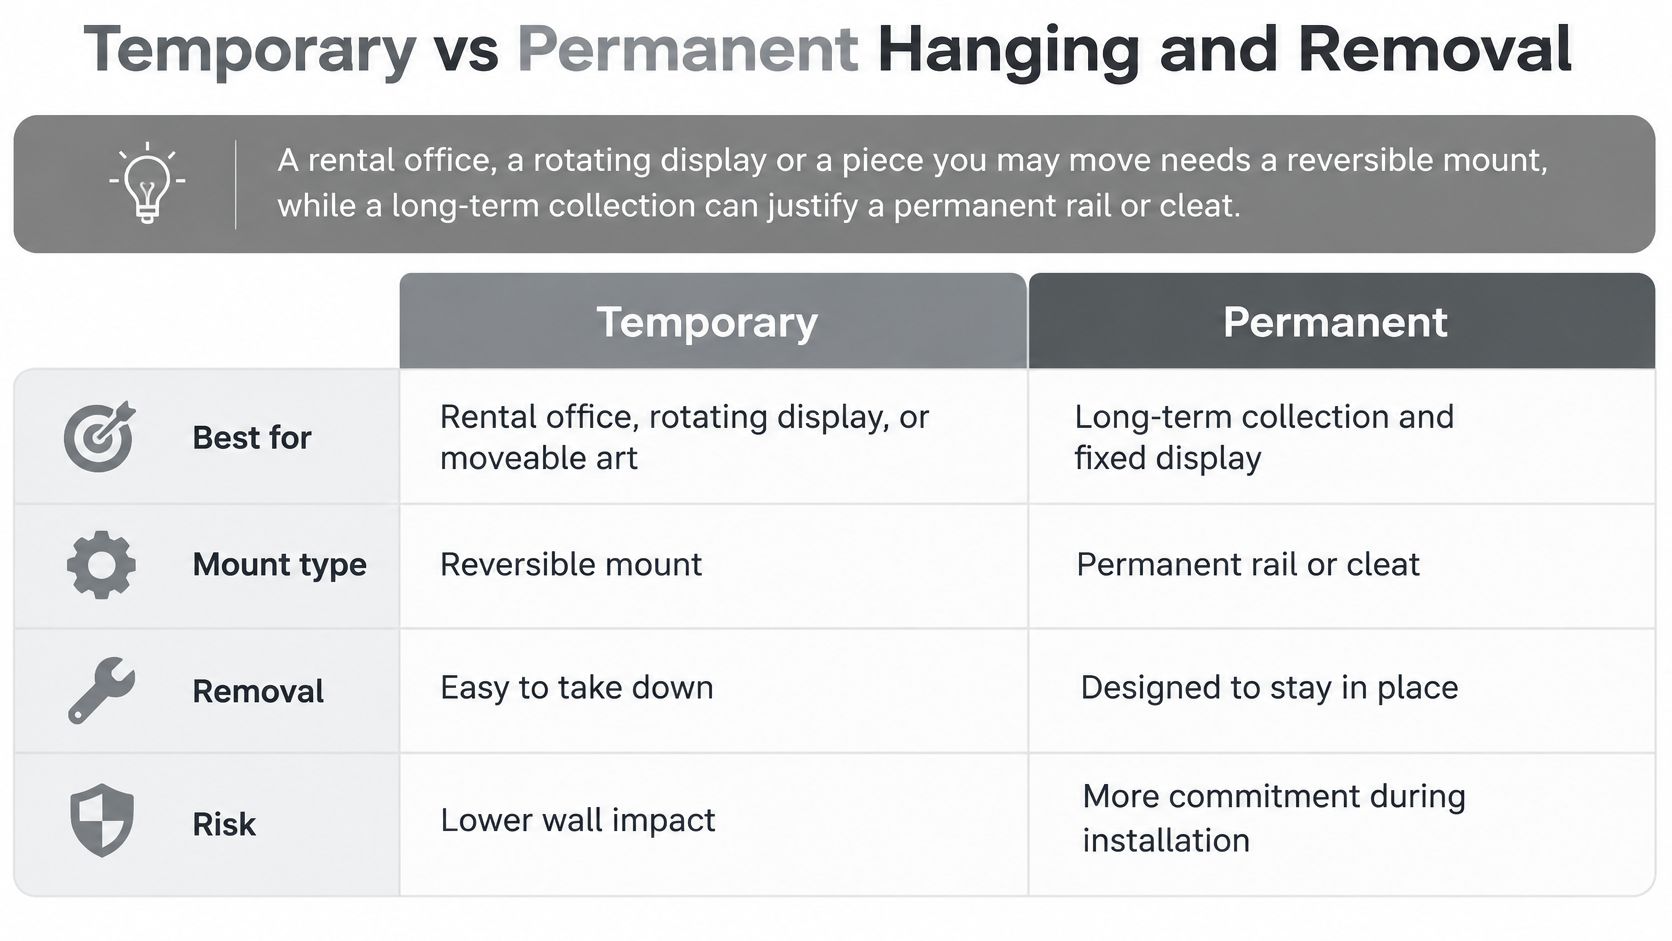
Criterion | Temporary | Permanent |
|---|---|---|
Fixing method | Hook and loop strip or removable hook | Screws into stud, cleat or rail |
Load | Light pieces within the strip rating | Heavier frames when anchored to structure |
Damage on removal | Minimal, check for adhesive residue or fabric snag | Holes that need filler and touch up |
Acoustic impact | Usually none if the core is not compressed | Can alter the panel if drilled through the core |
Best use | Rental offices and rotating displays | Long term collections and heavy pieces |
Removal needs the same care as installation. For hook and loop, peel slowly along the strip rather than pulling straight out, supporting the surrounding fabric with your other hand so you don't snag the weave. Brush the area lightly afterward and check in raking light for compression marks. If you plan to use strips for a rotating display, review how to apply and remove picture hanging strips without tearing the surface and test one strip first.
For Z bars and screws, lift the frame clear, remove hardware in reverse order, and fill holes with a filler matched to the panel color. Check for uneven color where the frame shielded fabric from light, since a perfect fill can still show as a clean rectangle on faded fabric. Don't steam or wet the fabric to lift compression marks without a test patch in a hidden area, because moisture can stain, shrink or loosen adhesive behind the face.
Permanent textile mounts in conservation show what good load distribution looks like. The Metropolitan Museum of Art history of conservation documents a three part mount for medium to large vertical textiles using a fabric covered board, a lower metal support at approximately a 10 degree angle, and wall cleats at the top, in a department established as independent in 1973. Rolling systems for long textiles also let an object move from storage to display without being re rolled, reducing handling and deformation. Decide your removal method before the first hole, and you'll pick the right side of the table.
Protecting Acoustic Performance, Fire Ratings and Warranty
A fabric acoustic wall isn't just decoration. It's a tested assembly, and changing how it's mounted or what you attach to it can change how it performs. Treating it like upholstered drywall risks three separate problems that have nothing to do with whether the picture stays up.
Sound Performance Changes With the Assembly
Acoustic panels absorb sound through their core and, in many systems, the air gap behind them. A fixing that compresses the core, closes that gap or covers a large area with a solid backed frame can alter absorption in that zone. One frame rarely ruins a room, but a dense grid of glazed frames over a treatment wall can reflect sound the panel was installed to absorb. Keep fixings within the panel pattern where possible and avoid crushing the core with over tightened screws.
Fire Ratings Apply to Components, Not Assumptions
Saying a wall is Class A and stopping there leaves the key question unanswered. ASTM E84 evaluates surface flame spread and smoke development for installed wall or panel materials, while NFPA 701 addresses flame propagation for certain hanging textiles and films, and Class A is commonly associated with flame spread values of 0 to 25, according to the OrangePiel acoustic panels NFPA 701 certification. A compliant panel core does not automatically make an added fabric, print, felt backing or textile artwork compliant, and the textile face can become the failure point when the panel is rated but the fabric is not separately tested.
Requirements also vary by occupancy. Residential, office, healthcare, education, hospitality, assembly and high rise settings aren't interchangeable, and commercial work may also need to satisfy NFPA 101 and regional building codes. Don't assume decorative artwork or removable hardware is exempt. Document the exact product, thickness, backing and mounting method so a building official, facilities manager or insurer can verify the assembly you installed.
Warranty and a Practical Scenario
Many panel warranties assume the manufacturer's mounting system. Drilling outside that system, adding unapproved hardware or hanging loads the panel wasn't rated for can void cover even if nothing fails immediately. Say an office already has a grid of framed prints on a fabric panel and wants to add three heavier frames. I'd stop at written manufacturer approval first, because the facilities manager needs to show the new loads and fixings stay inside the tested configuration.
Request three documents before you drill in any commercial space.
Test report: For the exact assembly, including fabric, core, thickness and mounting method.
Mounting instructions: The approved rails, fasteners and load limits for your panel model.
Warranty terms: The conditions that keep cover valid after you add artwork.
Confirm the Mount and Get Help Before You Drill
You're ready to hang it yourself when nothing on your checklist is blank. That means you have the panel model number, the assembled weight and a wall map showing studs, blocking or rails, plus hardware rated for that combination. If any of those three is still a guess, you're not ready, and drilling won't answer the question cleanly.
Bring in a professional when the panel construction is unclear, when the piece is heavy or going high, when ladders or scaffolding are required, or when a commercial building can't produce fire or warranty documents. Those aren't failures of DIY skill. They're situations where the risk sits in the wall assembly and the paperwork, not in your ability to use a level.
We have over 15 years of experience in picture hanging and art handling throughout the greater Denver metropolitan area, and we offer a free estimate for art hanging, display and installation services. Our contact form asks how many art pieces need installing, whether ladders or scaffolding are required, whether the install requires drilling into any hard surfaces, and the dimensions of the largest art piece. You can answer all four directly from the checklist you've already built, which makes the first conversation specific instead of speculative.
Do this today: Photograph the panel label and measure and weigh your largest assembled piece, frame and glazing included.
If your checklist shows an unknown panel, a heavy glazed frame or a commercial wall with missing documents, don't make the first hole to find out. Visit Colorado Art Services to request a free estimate, tell us how many pieces you have and the size of the largest one, and we'll confirm a mount that reaches structure without risking your fabric wall.
Comments