


Mirror Placement Living Room: Height, Size and Mounting
You've moved the sofa, cleared the console, and found a mirror that looks right against the wall. Then you sit down and see the television reflected behind you, or the afternoon window becomes a bright rectangle at eye level. Before you drill, there's another question: what's behind that wall, and can it support the mirror?
Good living room mirror placement balances the view, the proportions, and the mounting system. Start with a taped outline, test the reflection during normal use, and choose hardware only after you know the mirror's weight and wall construction.
Mirror Size and Height Benchmarks to Start From
Start with the mirror's center near eye level and a deliberate gap above the furniture. A position that looks balanced from the doorway can reflect mostly ceiling from the sofa, so mark the outline with paper and check it from both places before drilling.
The center-height and console-gap benchmarks below follow Wirecutter's placement guidance. House Digest suggests that a mirror above a mantel or console should generally be 6–12 inches narrower than the furniture beneath it.
Starting measurements for living room mirrors
Placement | Measure | Starting value | Adjust when |
|---|---|---|---|
Mirror center above floor | Center height | 60 in (152 cm) | Shift 2 to 3 in for eye level and seating |
Mirror above a console | Gap from console top to frame | 6 to 8 in (15 to 20 cm) | Widen the gap for tall lamps or decor |
Mirror above a mantel or console | Mirror width versus furniture below | 6 to 12 in narrower than the furniture | Use the smaller difference when the piece below is visually light |
Mirror opposite daylight | Reflected field | Test from seated and standing positions | Move if a TV, glare or clutter appears |
Above a sofa, judge the width against the furniture's outer edges rather than applying the mantel and console figure as a formula. A mirror that sits well inside those edges keeps the arrangement connected; one that nearly matches the sofa creates a broader, more deliberate composition. Lamp shades, curtain lines and nearby trim can shift that balance even when the tape marks are centered.
Keep the frame within the furniture grouping unless you're deliberately designing a wall-wide composition. Equal side margins make a useful starting point, but lamps, curtains, and nearby trim can change the visual balance.
Large reflective surfaces can make interiors appear more spacious and brighter, according to a scholarly chapter on perception and illusion in interior design. Treat that as perceived depth rather than additional floor area.
Check the actual frame
When comparing a candidate such as the Lana mirror, use Enky's Lana mirror product details to check the listed dimensions against your template. Include the frame, not just the reflective opening. A wider or taller piece may improve the reflected view while also requiring a more deliberate mounting plan.
Tonight, tape paper at the planned center and outline the frame. Sit in the main seat, then stand at the entrance. You now have a starting height, furniture gap, width, and a room-scale test to refine before drilling.
How to Pick the Wall and Reflection Target
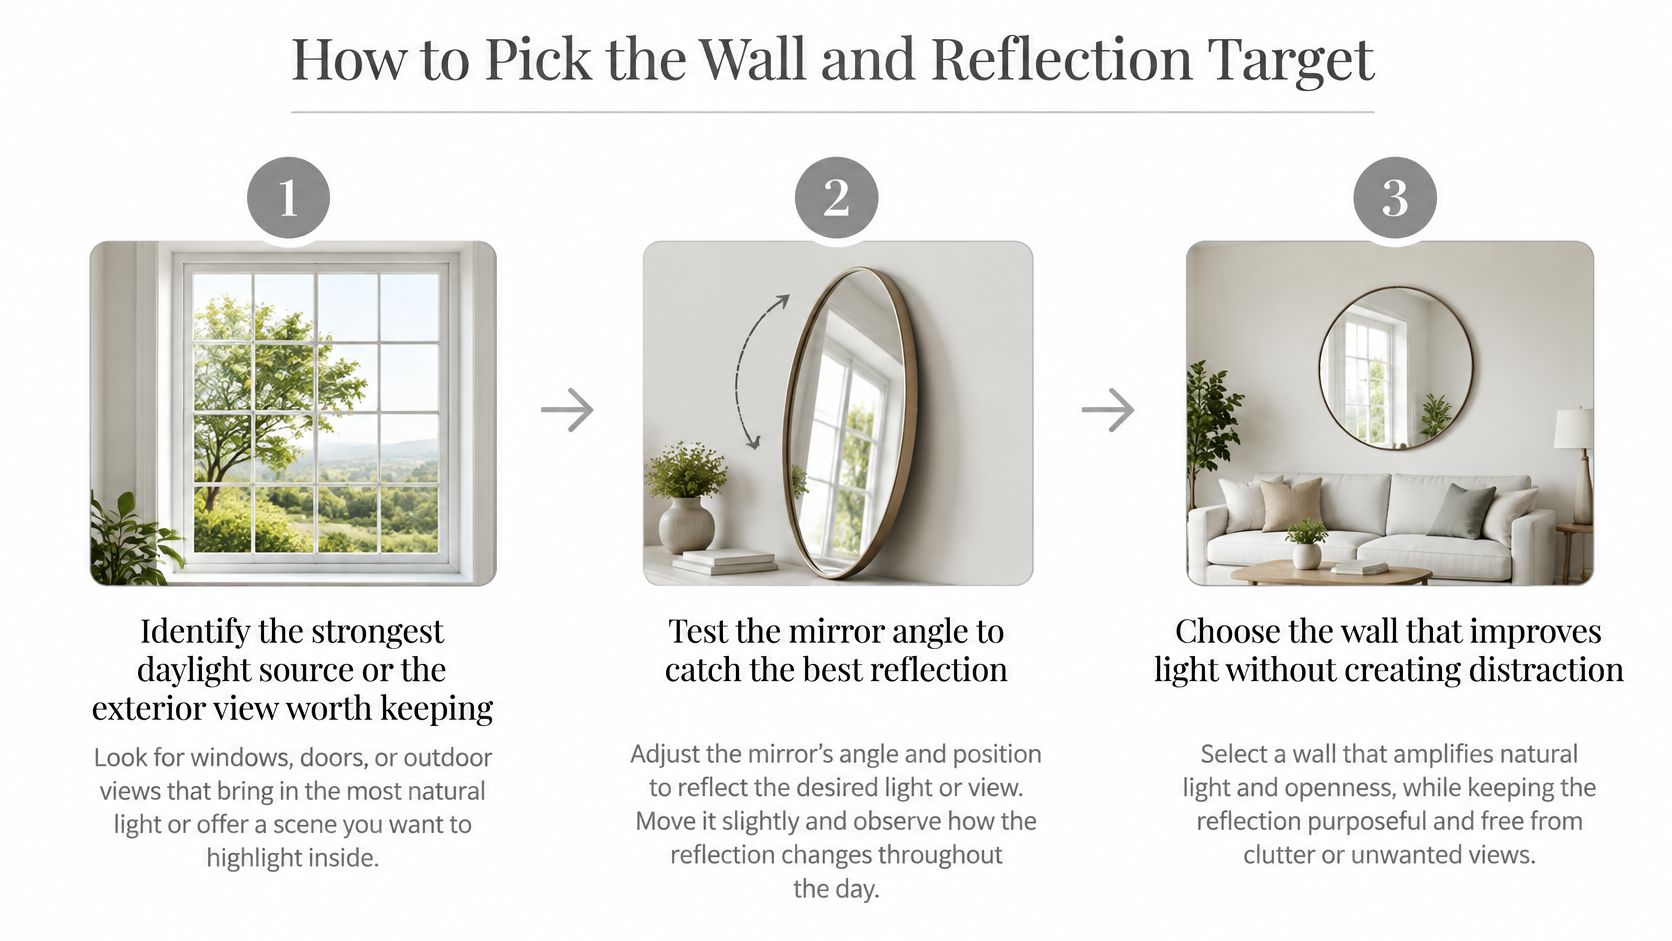
Choose the reflection before choosing the empty wall. A mirror facing an attractive long view can add depth; the same mirror facing a crowded storage area just gives you another view of the storage.
Wirecutter's mirror-placement guidance supports testing opposite or perpendicular to a useful light source, then checking the reflected field from the seating area. It also gives the starting benchmarks of 60 inches (152 cm) for center height, an adjustment of 2–3 inches, and a 6–8-inch (15–20 cm) console gap.
Follow the reflection through the room
Identify the view worth keeping. Look for a window framing greenery, an open connection to another room, or an architectural feature you enjoy. The brightest window isn't necessarily the best target if it overlooks bins, parked vehicles, or a busy path.
Test the wall and angle. Compare the wall opposite the target with the adjoining wall at a right angle. Use painter's tape for the outline, then have helpers hold the mirror securely in position if its size and weight permit; tape must never support the glass.
Inspect from where people sit and enter. Check the main sofa, reading chair, and doorway rather than judging only from directly in front of the mirror. Move the proposed position if the reflection captures screen activity, exposed cables, or people repeatedly walking through the background.
Don't let symmetry choose the wrong view
Opposite a window isn't an automatic rule. A slightly offset mirror reflecting artwork and indirect daylight can be more useful than a perfectly centered mirror reflecting a bright opening.
Say the console is centered on the wall, but the window sits toward the corner. Centering the mirror over the console may capture the window's edge and a cluttered adjoining room. Shifting the furniture grouping together can preserve its balance while improving the reflected composition.
A narrow hallway wall beside the living room can work when it reflects an inviting room rather than a close-up of another wall. At a corner, compare the adjoining surfaces before considering an angled installation. Changing walls is often cleaner than introducing projecting hardware and exposed mirror edges.
Practical rule: Judge the mirror from the seat you use most, not just from the spot where you'll hang it.
For a complementary way to assess calm, movement, and repeated views, the feng shui mirror placement guide offers another layout lens. Keep the final decision practical: mark the wall that gives you a worthwhile reflection without making everyday activity more distracting.
Avoiding Glare and Distracting Reflections
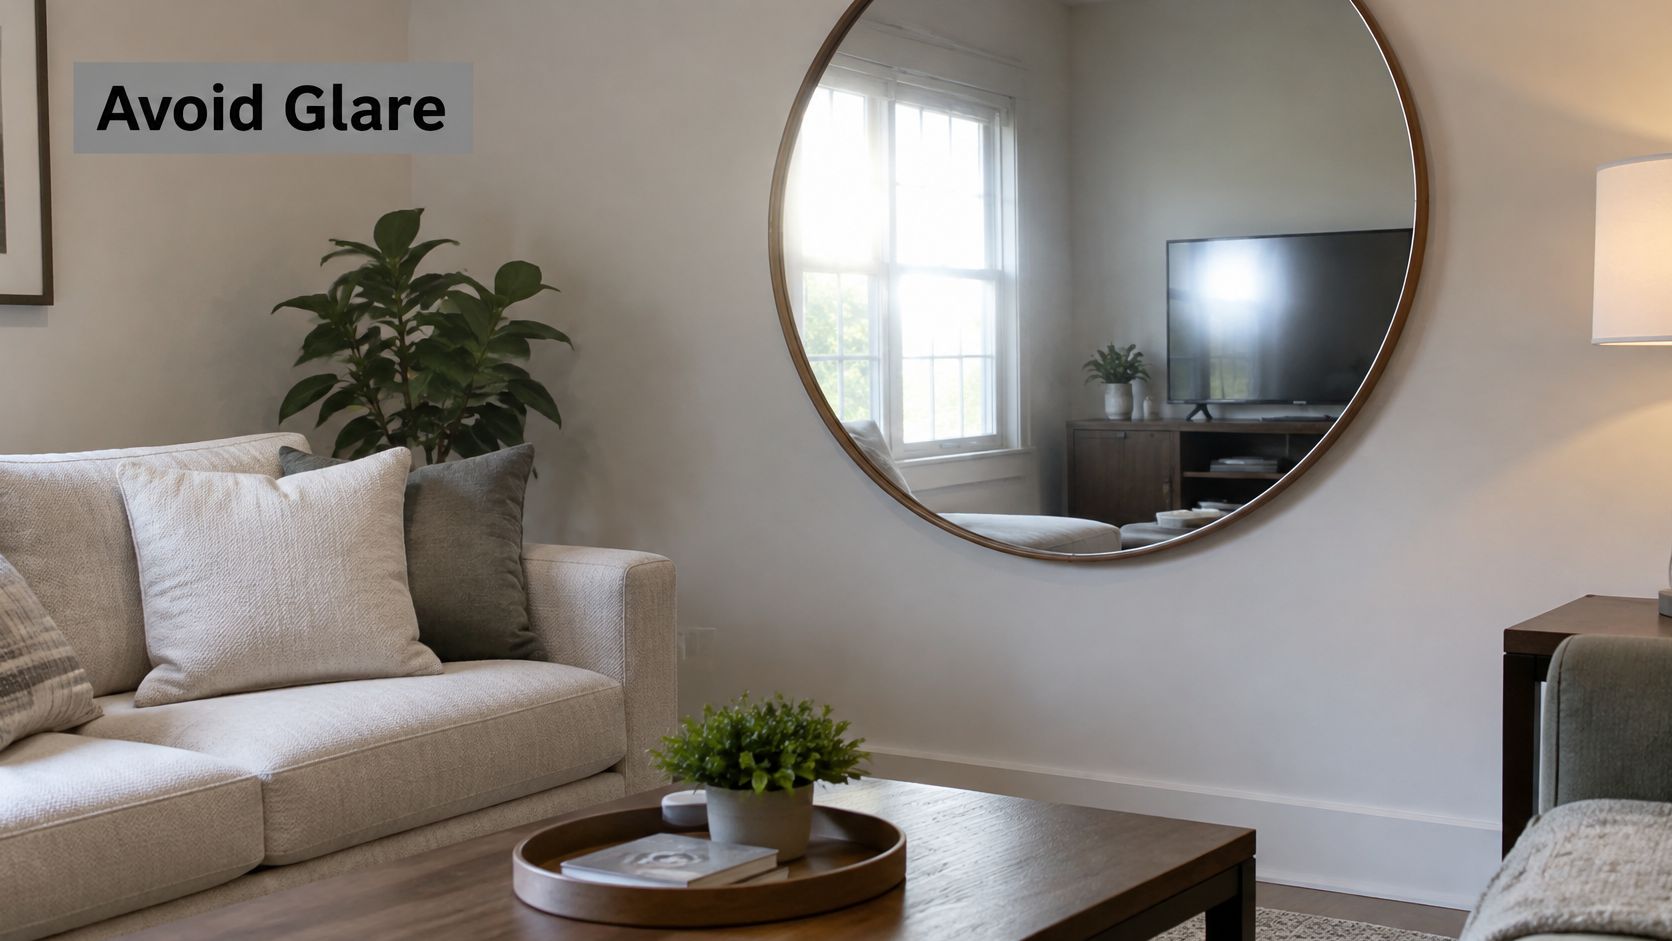
A mirror that bounces a bright window, bare bulb, or television into the seating area hasn't improved the room just because it looks brighter. Soft daylight and direct sunlight aren't interchangeable. One can provide a comfortable reflected glow; the other can create a concentrated bright patch in your normal sightline.
Fix the light before abandoning the wall
Adjust the proposed orientation. Test a small change while helpers support the mirror. Don't improvise a permanent tilt with loose spacers or partially engaged hooks.
Soften the source. Add sheers for harsh window light, or replace an exposed bulb arrangement with a shaded or diffused fixture.
Move the mirror if needed. If the bright reflection still lands in the main viewing position, choose another location rather than accepting daily discomfort.
Homestyler's mirror-wall guidance recommends controlling intense window and bulb reflections and favors warmer evening lighting around 2700–3000 K. Warm light can still glare if you see the bulb directly, so check fixture placement as well as color temperature.
For a combined artwork-and-mirror wall, coordinate the fixtures using these art installation lighting considerations. In an open-plan room, also check whether the mirror exposes kitchen worktops or a busy circulation route.
If a corner television constrains the layout, Woodstock Furniture & Mattress Outlet's guide can help you find the right corner TV setup before fixing the mirror position.
A comfortable reflection beats a bright one.
Repeat the seated and standing check in morning light, strong daytime light, and during evening television use. Commit only when the reflection works during the hours you occupy the room.
Mirror Weight by Size and What It Means
A 3-by-5-foot mirror made with standard 1/4-inch glass weighs about 50 pounds before its frame and hardware, according to the Expert Glass Repair installation guide. Its estimate of 3.3 pounds per square foot provides a useful glass-only calculation, but it doesn't replace weighing the finished piece.
Estimated mirror weight by size
The calculated entries below use that glass-weight estimate. The same guide reports the lighter estimate shown for the medium-size mirror and notes that large decorative pieces can exceed the listed heavyweight benchmark.
Mirror size | Glass area | Estimated weight | Hanging approach |
|---|---|---|---|
24 x 36 in | 6 sq ft | About 20 lb of glass | Stud-anchored hardware, since over 15 lb |
36 x 48 in | 12 sq ft | About 40 lb glass-only; 25 to 30 lb reported | Stud-anchored hardware rated above full weight |
3 x 5 ft | 15 sq ft | About 50 lb before frame | Assisted lifting and a distributed system such as a cleat |
Larger decorative mirror | Calculate from actual glass dimensions | May exceed 100 lb | Continuous support such as a J-channel where suitable |
The difference between the calculated and reported medium-size weights is a reason to verify the actual mirror, not average the estimates. Thinner glass or a differently specified product could account for a lighter piece, but you can't determine construction from dimensions alone.
A substantial wood frame, metal backing, or attached mounting rail adds load. Conversely, a wide mirror with lightweight framing may weigh less than a smaller, heavily ornamented piece.
Load check: Buy hardware for the complete mirror assembly, not the estimated glass alone.
Uneven wall support matters too. Pulling a mirror against a bowed surface can introduce stress rather than create a better fit. Check wall flatness with a straightedge, and don't tighten fittings to force distorted glass or framing into position.
Review mirror hanging accessories for the distinction between hooks, clips, channels, and cleats. They aren't interchangeable, and the mirror's own attachment points must be compatible with the selected system.
For a preliminary estimate, multiply glass width by height in feet, apply the glass-weight factor, then add the frame and attached fittings. Use the manufacturer's stated total weight or a safe weighing method to confirm the load before selecting hardware.
How to Mount a Heavy Mirror Without Risking the Glass
The weakest connection determines whether the installation is secure. That connection might be the wall anchor, the screw, the frame attachment, or a fitting that isn't fully engaged. A strong wall fixing won't compensate for a loose hanger on the mirror.
Prepare the complete mounting system
Record actual weight and dimensions. Inspect the frame and factory hangers for looseness, damage, or missing fasteners. Stop if the attachment points aren't suitable for the planned mounting method.
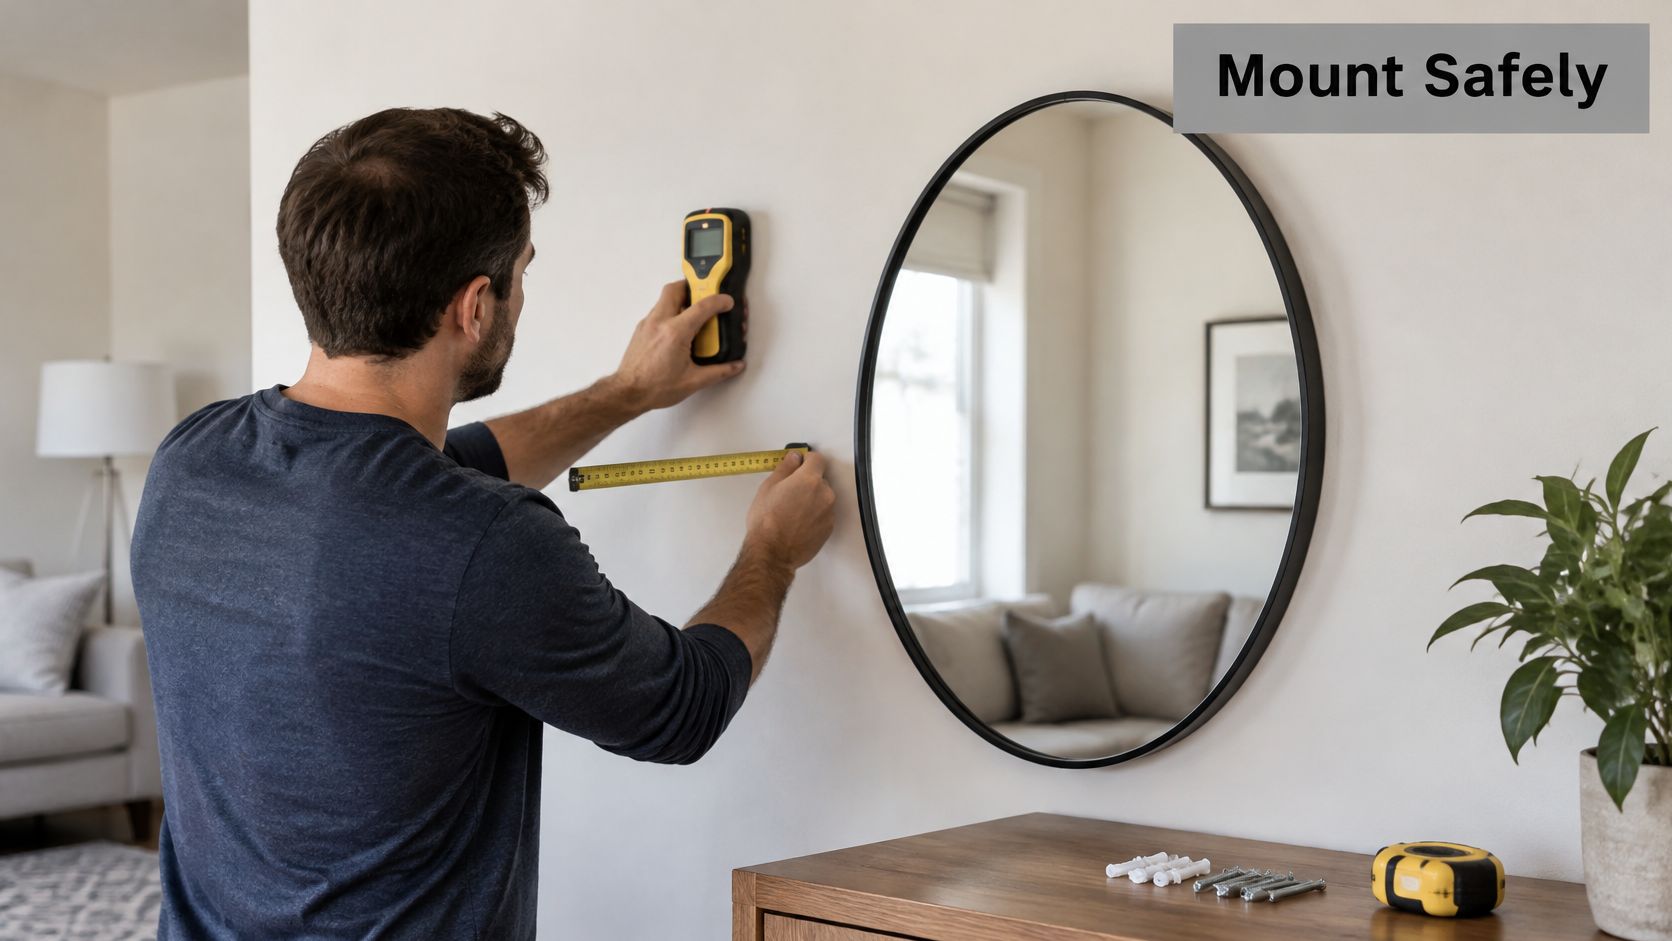
Identify the wall construction. Use a stud finder and verify the fixing location rather than assuming every signal is usable framing. For plaster or masonry, establish the substrate and its condition before choosing a drill bit or anchor.
Transfer the hanger positions accurately. Use a tape measure and level to mark the support locations. Account for the distance between the top of the frame and the engaged hanger, not merely the loose fitting's position.
Choose rated, compatible hardware. Homestyler's mirror feature-wall guidance recommends a minimum 1.5-times weight margin, assisted lifting above roughly 15 kg (33 lb) or about 1 m wide, and about 36 inches (91 cm) of clear passage. Its heavier-installation options include French cleats and Z-clips rather than picture wire.
Plan the lift before lifting. Clear the route, protect the resting surface, and agree who guides each side. Don't lift by decorative trim or put pressure on an exposed glass edge.
Seat, inspect, and secure the mirror. Confirm every fitting is engaged before releasing support. Check level, fit against the intended supports, and locking screws where supplied; tighten without pulling the glass into a bend.
Hardware and wall approach by mirror weight
These are selection starting points, not substitutes for the hardware manufacturer's wall-specific rating. Don't assume separate hanger ratings can be added together.
Mirror weight | Wall type | Hardware | Key check |
|---|---|---|---|
Under 15 lb | Stud or drywall | Picture hanger rated above full weight | Confirm the package rating for that wall |
15–33 lb | Stud | Stud-anchored hardware rated 1.5 times the weight | Two marked, level support points |
15–33 lb | No stud | Wall anchors rated for the measured load | Anchor choice follows mass, not size |
Over 33 lb or about 1 m wide | Stud or masonry | French cleat or Z-clips | Two installers for lifting |
Any weight | Masonry | Masonry anchors rated for full weight | Confirm sound substrate, embedment, and anchor compatibility |
For marking and alignment techniques, Gorins Furniture & Mattress explains how to position and hang picture frames. Use those layout principles, but don't transfer a picture-hanging hardware choice to heavy glass without checking its suitability.
Near doors and play areas, consider impact exposure as well as static weight. Specify appropriate safety glazing or compatible safety film with a glass professional, protect exposed edges, and keep the passage unobstructed. Film doesn't replace secure mounting.
The finished mirror should be level, fully supported, and clear of door swings and walking routes. If it rocks, slips, or needs improvised packing to stay aligned, unload it and correct the installation.
Confirm the Layout Before You Drill
Drilling should be the final commitment, not the first placement test. Use these questions as a go or no-go check while the template is still on the wall.
Is the placement confirmed? Mark the center, furniture gap, and frame outline. Check the reflected view during the time you use the room most, including the lighting and television settings you normally have on.
Is the support confirmed? Have the complete weight, identified wall construction, compatible hangers, and level fixing marks ready. A bag of anchors without a wall-specific load rating isn't a mounting plan.
Is the installation manageable? Decide whether you can reach, lift, engage, and inspect the mirror safely. Include the removal process in that decision, because an incorrectly seated mirror may need to come down immediately.
A light mirror on a known stud at an accessible height can be a reasonable DIY job. A heavy piece, uncertain masonry, a tall fireplace wall, or a position that constricts the walkway calls for professional assessment. Don't treat extra helpers as a substitute for understanding the wall.
If any answer is no, pause. We offer Mirror Hanging and can assess placement and mounting needs before you commit to the location.
You should finish with a clear decision: install today because the layout and support are resolved, or arrange a site visit because a specific uncertainty remains. An unmarked wall is easier to correct than damaged glass.
At Colorado Art Services, we offer mirror hanging, heavy-piece hanging, and placement and layout help for living rooms. Request a free estimate and share your mirror's dimensions, weight, wall photos, and proposed location so we can discuss the installation and a site visit before you drill.
Comments