


How to Use Picture Hanging Strips Without Wall Damage
You've found the right frame, held it against the wall, and decided you don't want a nail hole in the rental, office, or newly finished room. Picture hanging strips can solve that problem neatly, but only when the wall, frame, adhesive, and timing all cooperate. The usual failures come from treating them like instant glue.
After years of installing art with both adhesive systems and conventional hardware, I use a simple test. The frame must fit the strip's weight rating, the surfaces must be clean and suitable, and the adhesive must receive its full curing time. If the piece is valuable, heavy, or intended to stay in place for years, a nail, screw, cleat, or professional mounting system may be the more responsible choice. If you're still moving or storing the artwork, TLC Moving & Storage's step-by-step guide to packing framed art is useful before installation begins.
Introduction to Damage Free Hanging With Strips
You have a clean, painted wall, a framed print ready to hang, and no interest in drilling a hole. Picture hanging strips can be a practical alternative in that situation, especially in rentals, offices, and finished rooms. Their reliability depends on the wall condition, the frame's actual weight, and the time allowed for the adhesive to bond.
Command products began as a damage-free hanging solution and later expanded into utility hooks, cord clips, poster strips, and related products. Picture Hanging Strips became part of the brand in 2005, while the brand launched in 1996. These milestones are documented in 3M's Command brand history.
That background helps explain the proper use of strips. They are a standardized alternative to nails and screws, not a way to bypass installation checks. A smooth, dry, sound surface gives the adhesive a fair chance. Textured paint, loose finish, damp walls, dust, or a frame loaded at the edge of its rating can cause failure.
What strips do well
Strips suit lightweight to moderately weighted frames on suitable surfaces. They avoid a conventional fastener hole, and paired strips can make a gallery wall easier to align than a single nail placed by eye. For ordinary artwork in a dry room, they can provide a clean, removable installation.
Humidity changes the margin. In a damp room, use a more conservative load plan, and consider cutting the printed weight rating in half rather than treating the package limit as a working target. Valuable art, heavy frames, or pieces that must remain secure for years deserve hardware such as a nail, screw, cleat, or professional mounting system.
The practical mindset: strips remove drilling from the job. They do not remove the need to check weight, inspect the wall, prepare the surfaces, and allow the bond to develop.
Weigh the frame, choose a suitable strip, clean and dry both surfaces, position the frame carefully, apply firm pressure, and let the adhesive cure before loading it. Remove strips by stretching the tab downward, not by pulling outward. For artwork still being moved or stored, TLC Moving & Storage's step-by-step guide to packing framed art is useful before installation begins.
How to Choose the Right Strips for Weight and Wall Type
Start with the frame weight, not its apparent size. A large poster frame may be light, while a compact frame with glass, a thick wood profile, or a heavy backing board can put much more load on the strips. Weigh the frame with a household scale when possible. Treat the package rating as an upper limit, not a working target.
3M lists these capacities for its picture-hanging strip sizes: Small supports 1 pound per set, Medium supports 3 pounds per set, Large supports 4 pounds per set, and Narrow supports 3 pounds per set. Some larger configurations support loads up to 20 pounds, with a maximum frame size of 24 by 36 inches.
A quick selection table
Strip Size | Weight Per Set | Sets Needed for Example Weights |
|---|---|---|
Small | 1 pound | One set for a frame up to 1 pound |
Medium | 3 pounds | One set for a frame up to 3 pounds |
Large | 4 pounds | One set for a frame up to 4 pounds |
Narrow | 3 pounds | One set for a frame up to 3 pounds |
Use the table as a starting point. A frame close to the listed limit needs more margin, especially in a humid room. Halve the stated rating for a damp installation rather than treating the printed capacity as a safe target. Adding more sets does not correct a weak wall surface or a frame with too little flat contact area.
Wall condition determines whether the rating means much in practice. Smooth, sound painted drywall is easier to assess than textured paint, loose wallpaper, rough masonry, or a damp surface. Tile also requires caution. Cooking residue, slick glaze, and grout lines can prevent consistent contact.
Check the wall before choosing the strip system. For context on fastener choices and drywall limitations, read this guide to how much weight drywall can hold.
Use a screw, anchor, cleat, or professional mounting method for a mirror, heavy art, fragile glazing, or valuable work that must stay secure for years. Strips make sense for ordinary, moderately weighted artwork in a dry room with a sound surface. A repaired wall hole costs less than damaged artwork.
Preparing Your Wall and Frame for a Strong Bond
Adhesive preparation starts with removing contamination, not with making the wall merely look clean. 3M's guidance calls for rubbing alcohol only on the bonding area. Avoid household cleaners and water because they can leave surfactants, oils, or moisture behind, and those residues interfere with the adhesive's contact with the surface. The official picture hanging strip instructions provide the same surface-preparation direction.
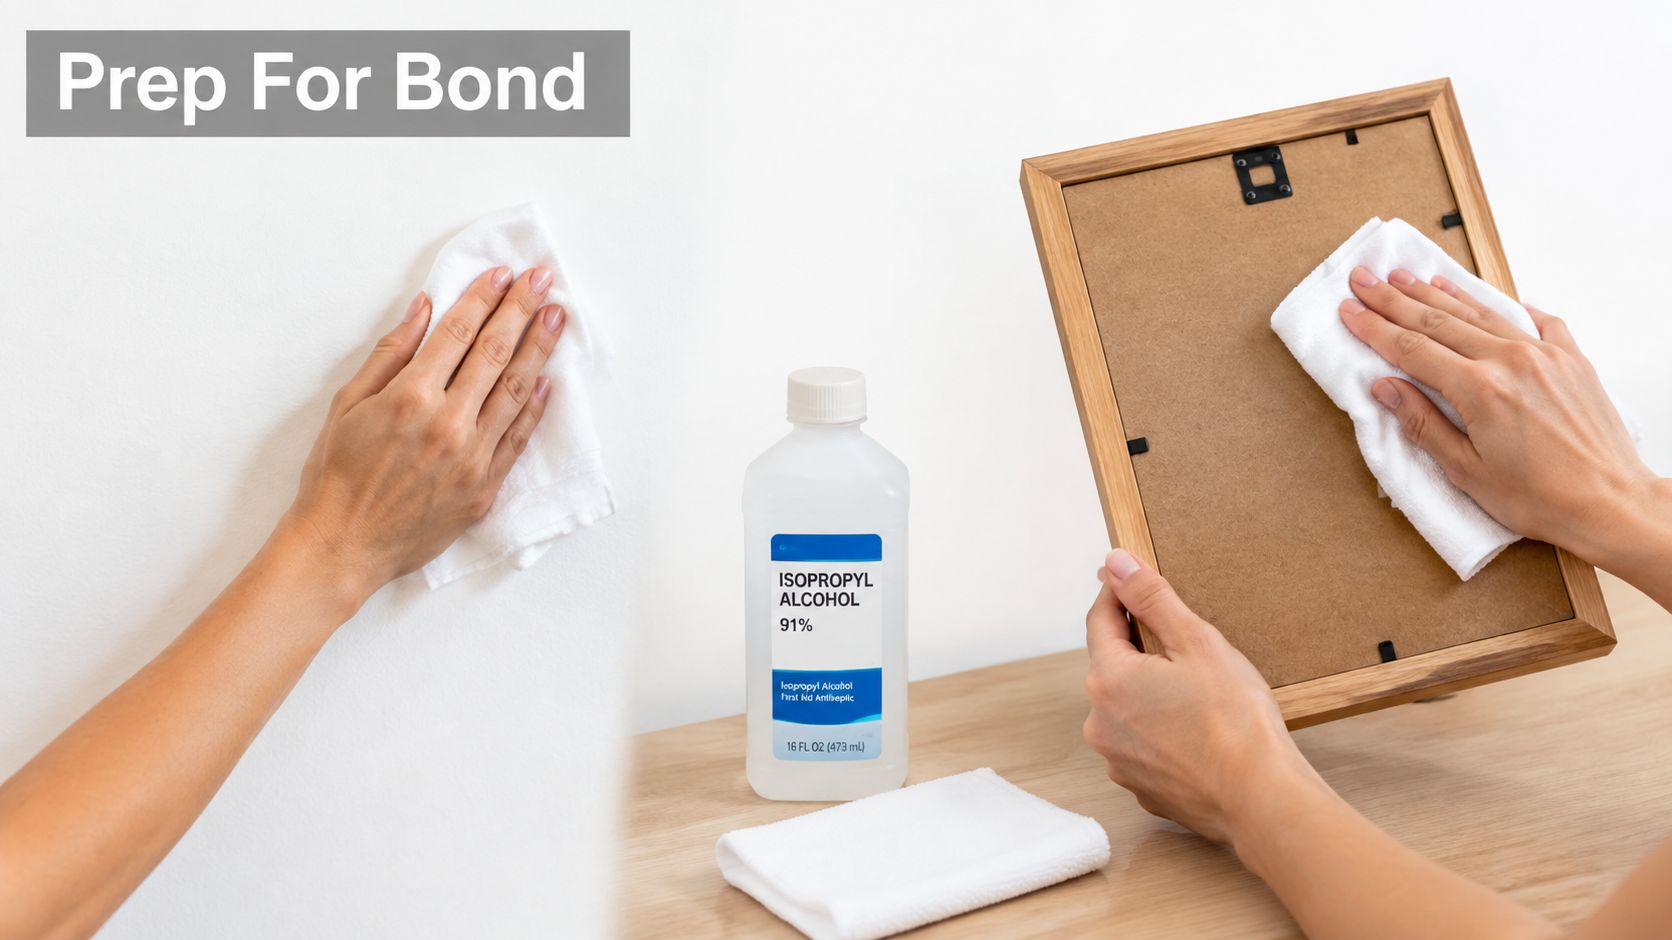
Prepare the wall
Use a clean, lint-free cloth lightly moistened with rubbing alcohol. Wipe the exact areas where the strips will sit, then let the wall dry completely. Don't apply strips over dust, grease, wax, freshly wiped moisture, flaking paint, or a visibly uneven coating.
Fresh paint needs particular care. Even when it feels dry, the finish may not be fully cured and can lift during removal. If the wall has recently been painted, follow the product's curing guidance rather than treating a dry-to-touch surface as ready.
Prepare the frame
Turn the frame over and inspect the back. Remove dust, check that the contact zones are flat, and look for raised hardware, fabric, staples, or a recessed edge that would prevent the adhesive from sitting evenly. If the back is irregular, the strips may peel under load because only part of the pad is carrying the frame.
Mark the intended location with light pencil marks, and plan the frame's position before exposing any liner. A level helps, but so does placing the frame temporarily and stepping back to inspect its relationship to furniture, adjoining artwork, and the wall's geometry. For decorative wall treatments and other surface-sensitive work, the wall decal installation guide offers a useful reminder that surface condition affects every adhesive installation.
Avoid starting in a steamy bathroom or humid kitchen. Lay out the paired strips, decide which pieces go on the frame and which will contact the wall, and keep the liners intact until the placement plan is settled.
Applying and Curing Strips for a Level Hold
Once the surfaces are ready, the installation should be deliberate rather than hurried. Pair the strips by pressing the matching sides together until they click and interlock. Peel one liner from each paired unit, then attach the strips to the back of the frame in the planned positions.
For standard picture hanging, 3M recommends two strips at the top corners and two halfway down the frame. That arrangement spreads the load and limits the tendency of the frame to peel away from the wall. It also helps keep a frame stable when someone brushes past it or adjusts nearby décor. The placement guidance appears in 3M's picture-hanging instructions.
The next stage is pressure. Remove the remaining liners, set the frame against the wall using your pencil marks, and press each strip firmly for 30 seconds. Don't just press the frame in the center. Work across the actual adhesive locations so the pad bonds evenly and conforms to the surface.
After that initial bond, remove the frame as directed so the wall-side strips remain in position. Press those strips again, then leave them unloaded for at least one hour before rehanging. 3M's UK guidance pairs this curing period with examples of four sets holding up to 1.8 kilograms for small strips, 5.4 kilograms for medium strips, and 7.2 kilograms for large strips. The UK hanging guidance makes the timing and load relationship clear.
Patience prevents most avoidable failures. The frame may feel secure immediately, but the adhesive still needs the full curing period before it carries the load.
For a gallery wall, install the upper row first and use a consistent reference line. Paired frames benefit from the same approach because you can set both frames against planned marks before the final attachment. If you need a straight visual reference across several pieces, a picture hanging laser level can reduce alignment errors without repeated repositioning.
Where Strips Struggle and How to Stay Safe
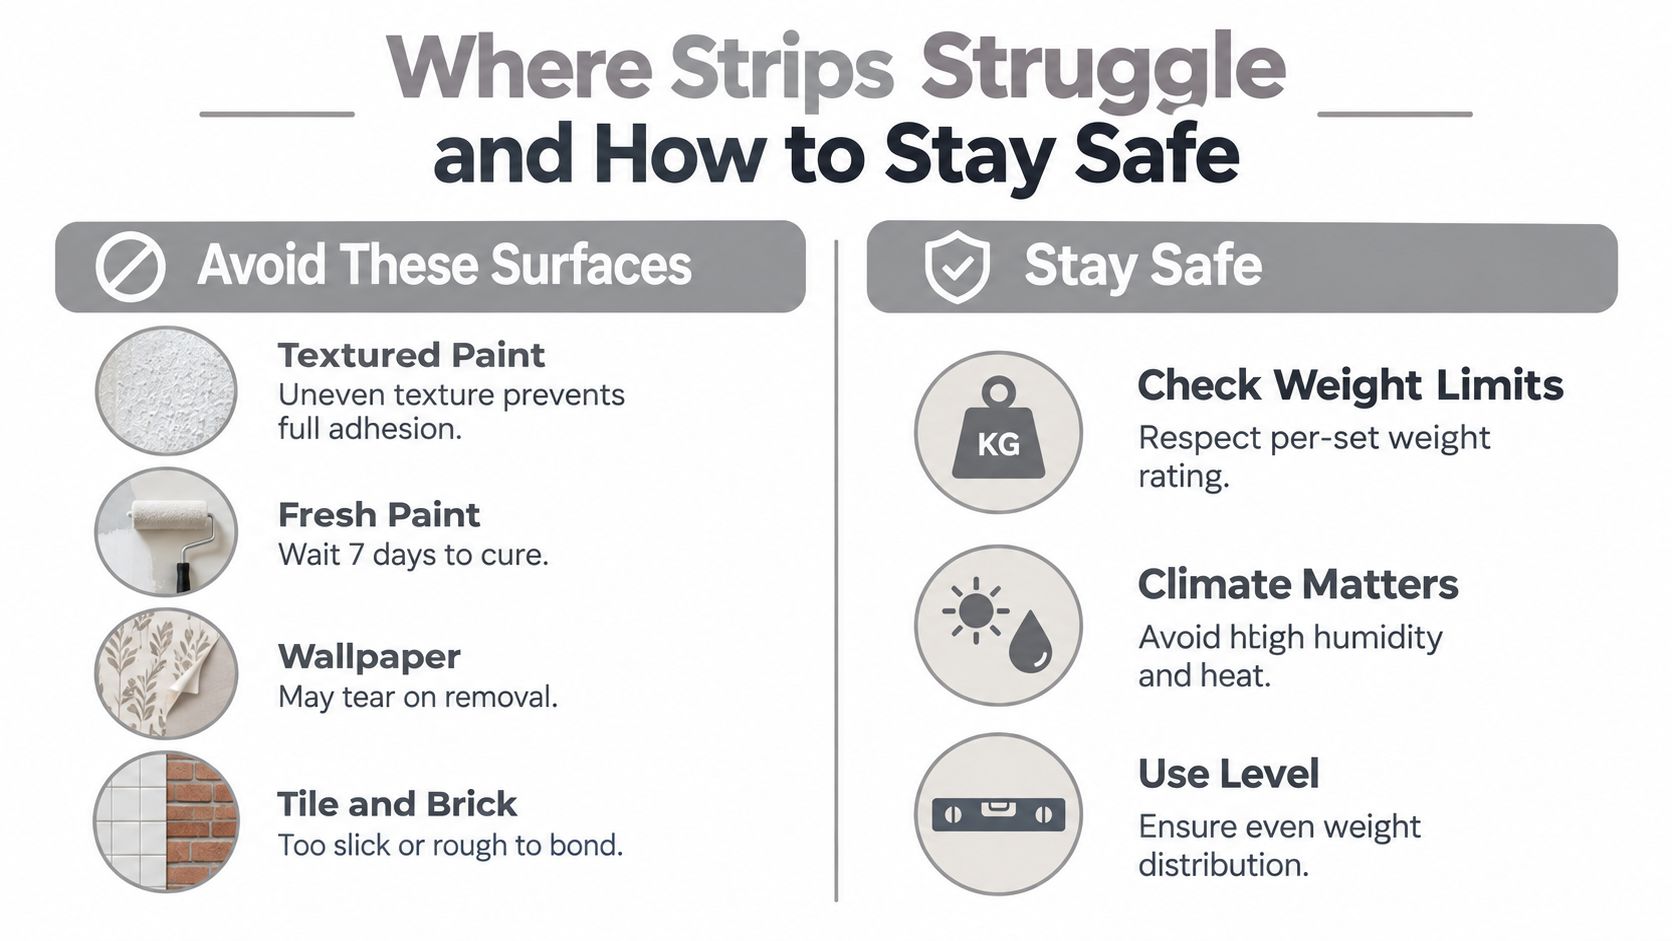
The common assumption is that a printed weight rating tells the whole story. It doesn't. Wall condition and climate can reduce real-world holding power, even when the frame appears to fall within the label's capacity. Textured paint creates incomplete contact, freshly painted surfaces may not be sufficiently cured, and wallpaper can tear when the strip is removed.
High humidity and heat deserve special caution. Recent third-party commentary identifies lower performance in humid conditions and recommends buying for roughly half the stated rating in hot or humid spaces. That recommendation is a conservative safety margin from the supplied guidance, not a replacement for the manufacturer's label. For a valuable frame in a warm or damp room, I'd still consider mechanical hardware instead.
A practical risk check
Use case | Strips may be reasonable | Choose hardware instead |
|---|---|---|
Wall finish | Smooth, sound painted surface | Loose, peeling, or heavily textured paint |
Room climate | Dry, stable interior room | Persistent heat, steam, or humidity |
Artwork | Lightweight, replaceable frame | Valuable art, mirror, or fragile glazing |
Time frame | Flexible décor arrangement | Permanent or long-term display |
Tile and brick aren't automatically safe because they're hard surfaces. Tile can be slick or carry kitchen residue, while brick and grout are too uneven for consistent contact. Wallpaper creates a second risk because the adhesive can bond more strongly to the paper than the paper bonds to the wall.
The supplied Command FAQ guidance also addresses careful removal and edge cases, but no product instruction can eliminate an unsuitable surface. If a frame would be expensive to replace, don't use adhesive strips as an experiment. A properly selected anchor, screw, rail, cleat, or professional mounting system gives you a more appropriate load path.
Removing Strips Cleanly and Fixing Common Problems
Removal is where many otherwise careful installations go wrong. Take the frame off first, expose the pull tab, and pull the strip straight down, parallel to the wall, rather than toward yourself. Extend the tab at least 12 to 15 inches when possible. The long, slow stretch releases the adhesive; a short tug concentrates force at the paint surface.
If the tab breaks, don't grab the remaining adhesive and yank. Slide dental floss behind the strip to separate it from the wall, and use gentle heat from a hair dryer if residue remains. Keep the heat controlled and moving. Excessive heat can soften paint or damage a delicate finish. For broader paint and adhesive cleanup questions, the paint remover NZ guide offers useful background on choosing removal methods without treating every surface the same way.
Match the failure to the cause
The frame slips: The load may be too close to the rating, the surface may be contaminated, or the room may be too humid. Remove it, reassess the wall, and choose a larger margin or mechanical hardware.
The frame sits crooked: The strips were positioned without a level or the weight isn't distributed evenly. Replan the contact points instead of twisting the frame after attachment.
A corner lifts: The frame back may be uneven, or the strip may not have received firm, localized pressure. Don't press only the loose corner while the frame remains loaded.
Residue remains: Use gentle heat and controlled separation. Avoid scraping aggressively, especially on painted drywall.
The complete method is simple to remember: choose by weight, prepare with alcohol, press for 30 seconds, wait at least one hour, and remove by pulling downward. When the piece is heavy, high, fragile, or valuable, Colorado Art Services can manage placement and mounting across the Denver area and Front Range, including installations where wall condition and safe handling matter as much as alignment.
If you're hanging a valuable, heavy, high-mounted, or multi-piece display, Colorado Art Services provides residential and commercial art installation with careful placement, level mounting, and attention to wall conditions. Visit the team to discuss the right hardware or adhesive approach for your artwork before you risk the frame or the finish.
Comments