


Picture Hanging Materials Explained
The most popular advice about picture hanging materials is also the most misleading: choose an anchor rated for more than the artwork weighs, then install it. That approach treats a wall as an inert sheet and a load rating as a promise. In practice, the wall assembly, fastener geometry, frame construction, and movement around the artwork determine whether an installation stays secure.
A heavy mirror on a stud, a framed print on sound drywall, and a deep shadow box on brittle plaster don't impose the same forces, even when their nominal weights are similar. Professional hanging starts with the structure behind the finish, then selects hardware that transfers the load without damaging the wall, frame, or artwork.
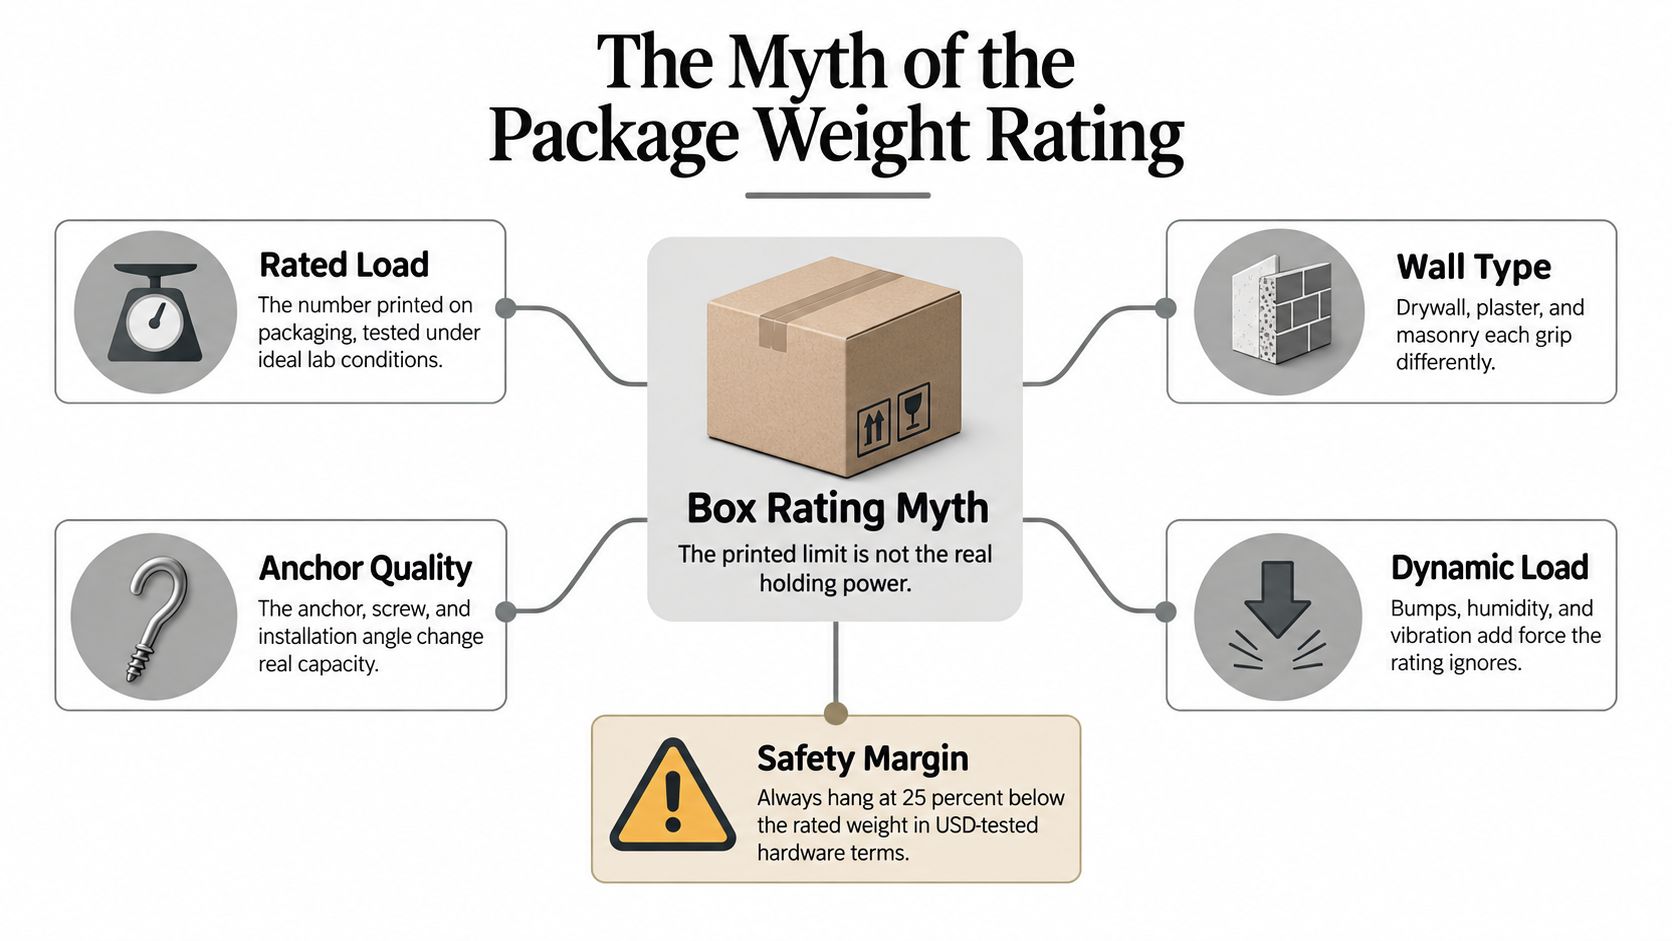
The Myth of the Package Weight Rating
A “50-pound anchor” doesn't automatically make a 40-pound mirror safe. Package ratings often describe laboratory failure values under defined conditions, not a working load that accounts for an imperfect wall, an uneven hole, repeated vibration, or a frame projecting outward from the surface.
Independent TOGGLER laboratory data reports ultimate tensile pull-out values from approximately 97 lbf in 1/2-inch drywall to 143 lbf in 5/8-inch drywall for one anchor model, but the manufacturer identifies those figures as guide values rather than guaranteed working loads because substrate age and condition affect performance (TOGGLER anchor testing data). An ultimate pull-out value is a failure threshold. It isn't the number I would use as the design load for a valuable object above a sofa or in a busy corridor.
The wall controls the result
A fastener's performance changes with gypsum thickness, hole quality, screw engagement, edge distance, and loading direction. A clean installation in sound drywall behaves differently from an anchor placed in damaged plasterboard or close to a board edge. A stud provides a distinct load path from a hollow-wall anchor because the screw engages framing rather than relying on the face of the wall to resist withdrawal.
The artwork's geometry matters just as much. A shallow frame sits close to the wall, while a deep shadow box, sculpture, or cleated mirror places the center of gravity farther forward. That offset creates a rotational moment. The upper attachment points can experience increased tension even when the object's downward weight hasn't changed.
Practical rule: Treat a printed rating as a starting reference, never as permission to hang at the limit.
Door slams, accidental bumps, vibration, and repeated handling add dynamic forces that a simple static packaging test may not represent. Research on gypsum-board connections identifies failure modes including pull-through, cracking, and brittle edge-related failure, not merely clean anchor pull-out (gypsum-board anchor testing).
For that reason, professionals identify studs whenever possible, use two or more attachment points when the frame permits, and maintain a conservative margin below published failure values. The strongest-looking hook can still lose if the gypsum face, paper layer, framing connection, or wall edge is the component that fails first.
Understanding the Art and Wall Connection
Picture hanging isn't only a wall-side problem. The frame is part of the load path, and historic frames may be less tolerant of aggressive hardware than their appearance suggests.
Frames served display and preservation functions for centuries. As paintings moved beyond fixed church settings during the Renaissance and became portable objects in homes, palaces, and collections, separate removable frames became increasingly important. Traditional construction often combined wood, gesso, and gold leaf. Italian frames from the 14th and 15th centuries commonly used carved wood, architectural motifs, gesso, and gilding, while later European traditions used oak, walnut, limewood, pine, and poplar (historical frame materials and construction).
Read the frame before choosing hardware
Material choice served a practical purpose. Pine and poplar were useful for carving and heavy gesso, while oak offered a strong visible-grain structure. With age, however, wood, animal-glue grounds, gilding, and adhesives can become brittle. A modern screw, tight wire, or poorly placed D-ring can split a rail or loosen fragile ornament before the wall fastener ever reaches its limit.
The frame, glazing, backing, and wall support should therefore be assessed together. A valuable work on paper may need a mechanically reversible retention method, inert barriers, suitable glazing, and a backing that protects the object from dust and abrasion. A large modern canvas may tolerate a different frame attachment, but it still needs balanced support and hardware that won't twist the rails.
The protective system has a practical relationship with transport as well as display. For advice on edge protection, wrapping, and handling before an artwork reaches the wall, Packaging Panda's shipping guide provides useful background.
Don't confuse strength with compatibility
A fastener can be structurally strong and still be wrong for the object. Driving a large screw through a delicate antique rail may create a concentrated stress point, while adhesive strips can leave residues or fail unpredictably on dusty, textured, or aged surfaces. Hardware should allow the artwork to be removed for inspection without peeling finishes or forcing conservation materials apart.
A professional installer looks for the weakest interface, not only the strongest component. That may be the wall, the anchor, the frame rail, the eyelet, the wire, or the material placed directly against the artwork.
Comparing Wall Fasteners and Anchors
Wall fasteners behave differently because walls behave differently. A standard nail can work for a light frame on sound drywall when the load stays close to the wall. It isn't a substitute for structural backing under a deep, heavy, or high-value object.
Plaster requires particular caution. Older plaster may be thick and firm, or it may be detached from its lath and vulnerable to drilling vibration. Masonry can provide excellent support, but only with a compatible bit, plug, screw, and installation depth. Small self-drilling plastic anchors are convenient for light domestic work, but they aren't my choice for a heavy mirror, valuable artwork, or an object that will be handled repeatedly.
Wall Fastener Selection Matrix
Fastener Type | Best Substrate | Load Dynamic | Professional Verdict |
|---|---|---|---|
Standard nail | Sound drywall for light, shallow frames, or direct wood framing | Simple downward load with limited projection | Acceptable for light work, not a heavy-piece solution |
Plaster hook | Sound plaster where the hook can seat cleanly without cracking the surface | Moderate load with careful placement | Useful for suitable plaster, but inspect the substrate first |
Toggle bolt | Hollow drywall or plasterboard when the cavity is accessible and intact | Better load distribution than a small plastic anchor | A practical hollow-wall option, but not a replacement for structural backing |
Threaded drywall anchor | Sound gypsum for light to moderate objects within conservative limits | Depends heavily on board condition and installation quality | Convenient, but avoid as the sole support for heavy or valuable work |
Structural screw into a stud | Wood stud or approved framing member | Stronger load path with reduced dependence on the wall face | Preferred whenever the stud location and screw engagement are suitable |
Masonry fastener | Concrete, brick, or block of known condition | Direct transfer into masonry | Effective when the bit, plug, depth, and substrate are correctly matched |
The useful distinction is between hollow-wall convenience and structural attachment. If a stud is available, use it. If the object is heavy, deep, valuable, or exposed to frequent contact, locate framing, install backing, or bring in an installer rather than stacking assumptions on a drywall anchor.
Two attachment points also help control pivoting and distribute the load. They don't magically increase capacity if both fasteners sit in weak gypsum, but they can reduce rotation and share forces when correctly spaced and connected to a suitable substrate.
For straightforward household layouts, Striped Circle's picture hanging help offers a useful overview of common hooks and placement considerations. For a more technical review of substrate and anchor choice, use this anchor selection guide as a companion reference.
Selecting Wires Cords and Cleats
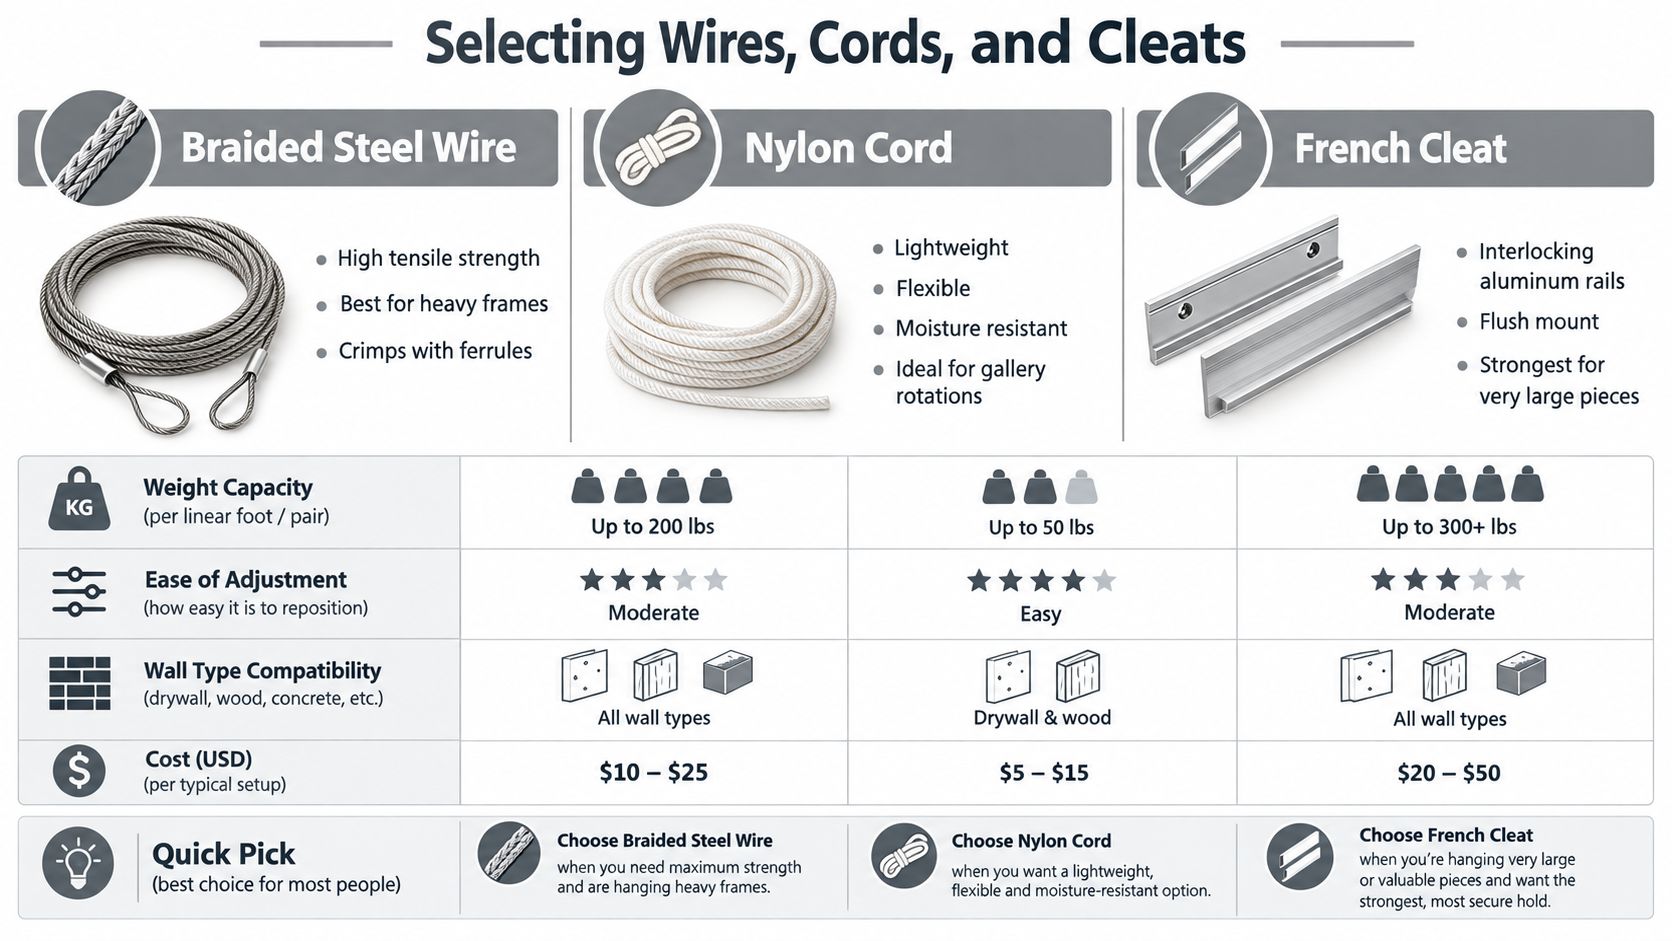
Once the wall connection is sound, choose the suspension method that matches the frame's size, weight, depth, and need for adjustment. The wire or cleat isn't an independent safety system. It transfers the frame load to the wall attachment, so weak frame hardware can defeat an otherwise suitable anchor.
Braided steel wire
Braided steel wire suits many framed works because it offers high tensile strength and can be adjusted during installation. Attach it to appropriately sized D-rings or strap hangers, not tiny eye screws driven into a weak or decorative frame rail. Use ferrules and a proper crimping tool when forming loops. A loose knot or improvised twist is difficult to inspect and can slip.
Set the D-rings below the top rail rather than directly at the upper edge, and keep the wire length controlled so the frame doesn't sit far forward. Excessive slack increases the angle and can amplify force at the frame attachments. Two wall hooks can improve stability and reduce side-to-side pivoting when the frame and wall layout permit.
Nylon cord
Nylon cord is light, flexible, and moisture resistant, which makes it convenient for gallery rotations and situations where quick adjustment matters. It isn't my default for a heavy, deep, or irreplaceable object because cord can stretch, wear, or become difficult to evaluate after long service. Use a tested hanging cord, secure it with the manufacturer's recommended termination, and inspect it before every relocation.
Cord also needs compatible frame attachments. A cord tied to a delicate rail can concentrate force just as wire can. The object should sit evenly, with the suspension points sharing the load rather than allowing one side to carry most of it.
French cleats and Z-clips
A French cleat uses interlocking rails, often with one rail secured to the wall and the mating rail fixed to the artwork or its support. The connection spreads weight along the rail, helps keep a large piece flush, and makes leveling easier. Z-clips follow a similar interlocking principle and can work well for mirrors, panels, and commercial art when the frame or backing is designed to accept them.
For a very large or deep object, a cleat can be more predictable than a single wire because it limits pivoting and distributes the load across a longer attachment zone. The wall rail still needs structural support, and the cleat must be fully engaged along its length. See this practical guide to picture hanging cleats before specifying a cleat for a large-format installation.
Conservation Materials and Chemical Safety
Gravity isn't the only threat to displayed art. Materials touching the artwork can introduce chemical problems that develop over time.
Museum-mounting guidance emphasizes that contact materials should be removable, chemically stable, and non-reactive. Framed works on paper benefit from acid-free mat board and backing, while tape shouldn't contact the artwork directly. Photo corners and archival hinging provide more reversible alternatives (museum mounting guidance).
Separate the structural and protective systems
The load-bearing system includes wall screws, cleats, anchors, masonry fasteners, and frame hardware. The object-protection system includes glazing, mat board, backing, padding, hinges, and retention components. Keeping those systems separate prevents a common mistake: asking an adhesive, cardboard layer, or soft padding material to perform a structural job.
Acidic paper products can discolor, embrittle, or stain adjacent artwork. Rubber-based adhesives may harden or leave residues, while pressure-sensitive adhesives can creep and complicate later conservation. PVC contact materials and untested foam can also introduce unwanted plasticizers or unstable compounds.
Choose reversible contact materials
For photographs, textiles, mixed-media pieces, and works on paper, specify conservation-grade board and mechanical attachments that can be removed without tearing fibers or abrading finished surfaces. Don't place ordinary cardboard directly behind a work just because it fills the frame. Don't use household tape to close a backing if the adhesive can migrate toward the object.
The same principle applies to padding. A cushion that compresses, sheds, or releases unstable chemicals can create pressure points and residues. Use a barrier material appropriate to the object, and make sure the artwork can be removed for inspection without peeling adhesive from the frame.
Detailed guidance on selecting and storing suitable boards, folders, and protective supports appears in this resource on archival storage materials. The goal isn't to make every home frame a museum case. It's to avoid preventable contact between vulnerable artwork and materials that age badly.
Planning Hanging Systems Before Construction
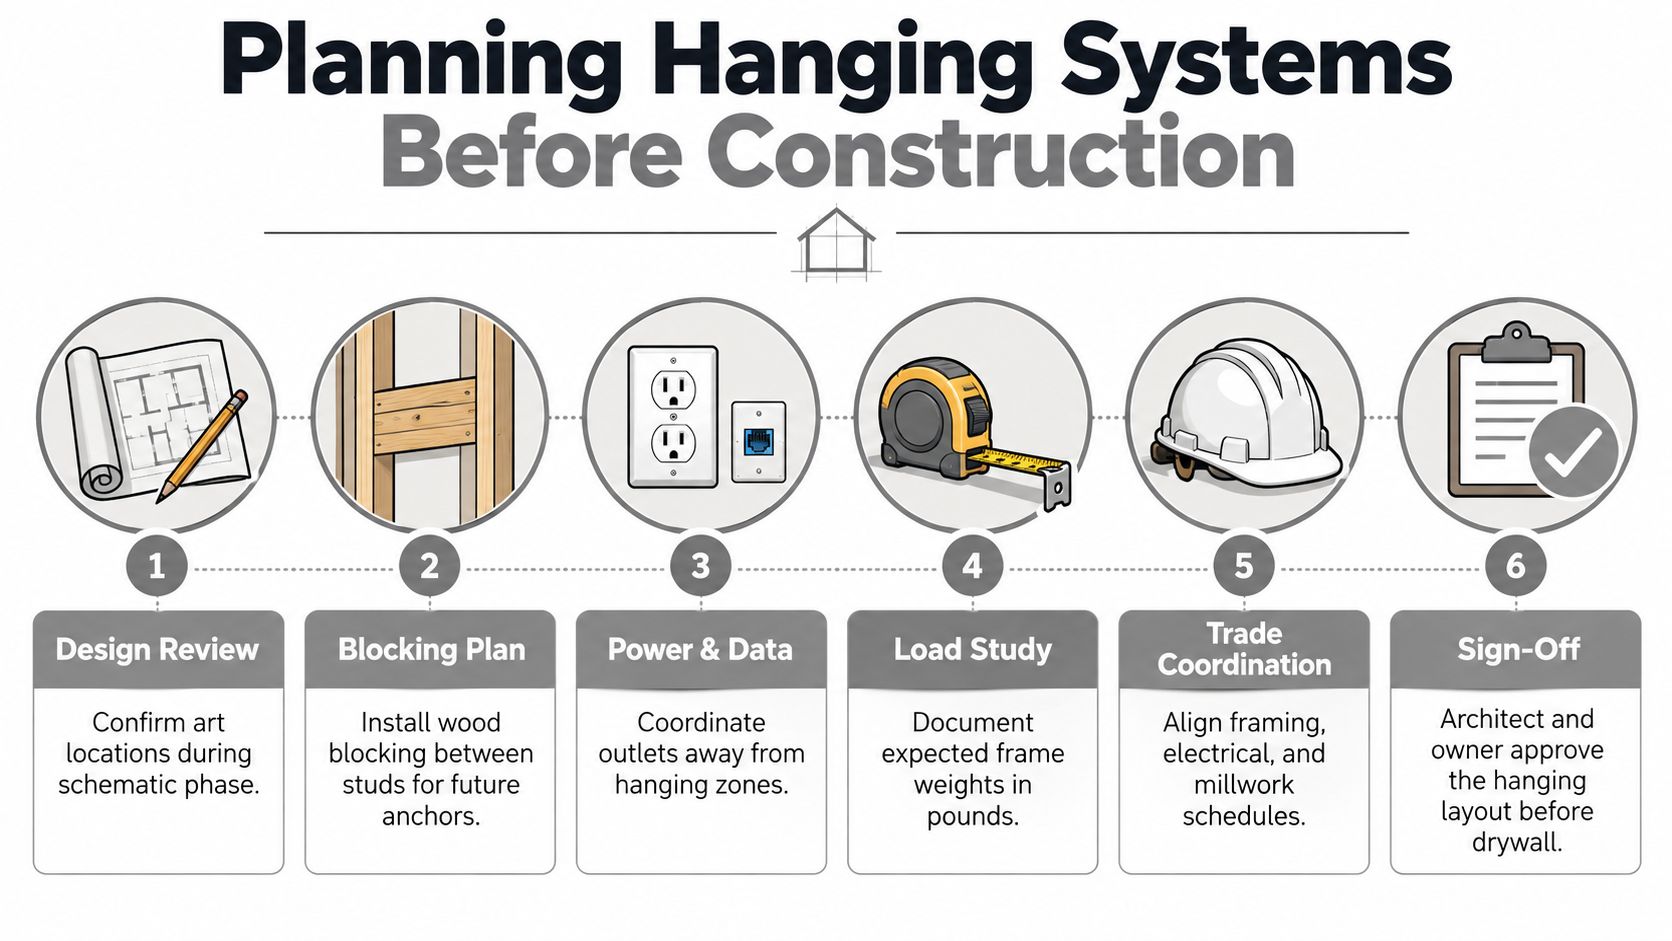
A finished wall hides the very information an installer needs. Once drywall closes, studs, utilities, fire-rated assemblies, insulation, and backing may be difficult to locate or unsuitable for the intended artwork. Planning hanging infrastructure before construction gives the project more options and reduces the temptation to force a weak surface solution later.
Put backing behind the finish
A Canadian government design guide identifies 19 mm, or 3/4-inch, plywood behind drywall as useful for hanging objects and creating a serviceable hollow space. The same guide notes that collections in seismic-risk zones require protection against seismic shock (Canadian cultural-property design guide).
That backing creates defined attachment zones for cleats, rails, mirrors, and future layouts. It also reduces dependence on the gypsum face and makes it easier to reposition work without guessing where structural support exists. The plywood should be coordinated with framing, electrical, fire, insulation, and millwork requirements rather than added as an isolated afterthought.
Specify the system, not just the hardware
A useful preconstruction schedule should document:
Expected object range: Record the types, dimensions, depths, and approximate weights the space may need to support.
Attachment zones: Mark where plywood, blocking, rails, or approved framing will be installed.
Access requirements: Preserve inspection and removal access for concealed cleats, cable systems, and restraints.
Resilience needs: Consider vibration, repeated reconfiguration, high-traffic areas, and seismic movement where relevant.
Trade coordination: Keep outlets, lighting, cabinetry, and utilities clear of planned hanging locations.
Concealed gallery rails, anti-tip restraints, tamper-resistant fixings, and seismic hardware can be specified as part of the building system. This approach supports future tenants, changing exhibitions, and evolving residential collections without treating each new installation as a wall-repair project.
For project teams preparing a renovation or new build, it also helps to browse Trail Star Development articles for broader preconstruction planning context. Art infrastructure deserves the same early coordination as power, lighting, and millwork because the finished wall is the last place to discover that support was omitted.
When to Call Professional Art Installers
DIY hanging ends when the consequences of a mistake exceed the value of the convenience. A light frame on sound drywall is one task. A heavy mirror above a circulation path, a multi-piece grid, fragile historic plaster, or an oversized sculpture requires a different level of assessment.
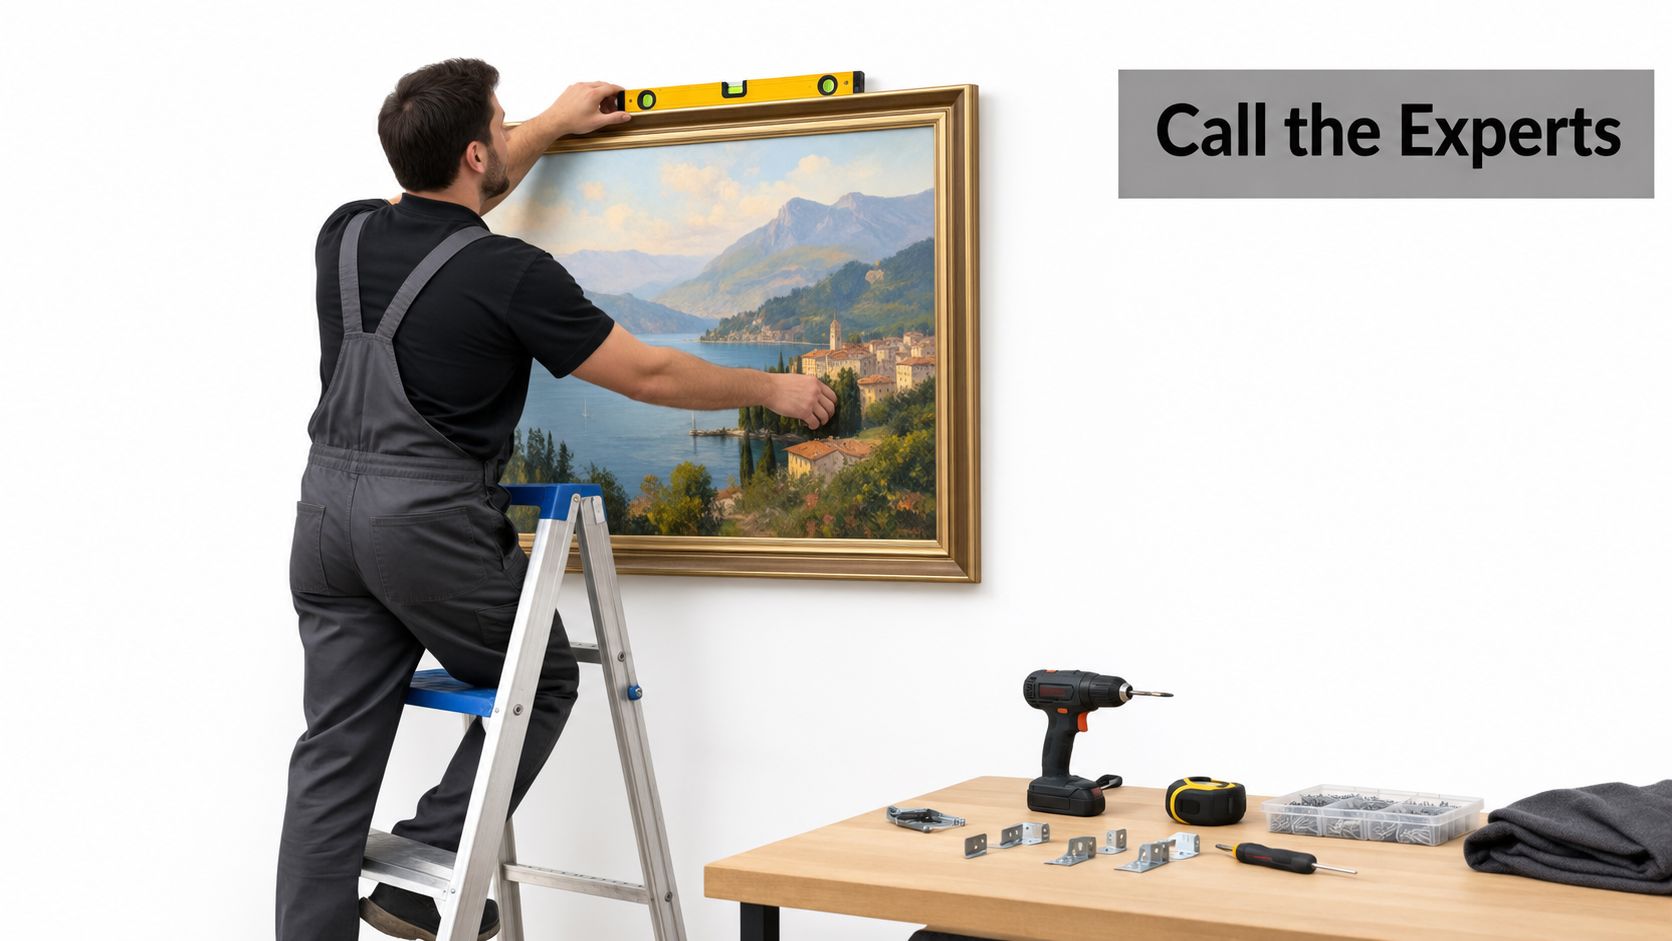
The warning signs are physical and practical. The wall feels hollow or crumbles during drilling. The frame twists when lifted. The piece projects far from the wall. The attachment points sit in fragile ornament, the installation is above a stairwell, or people regularly pass beneath it. A collection also deserves professional planning when several pieces must align, repeat at consistent spacing, or share a concealed rail.
A professional installer evaluates the wall assembly, finds framing where possible, selects weight-rated hardware, and checks the frame's own construction. Tools such as laser levels, stud finders, masonry bits, calibrated measuring equipment, and suitable lifting methods help control both safety and visual precision. The installer should also know when a structural engineer, conservator, electrician, or general contractor needs to be involved.
If you can't identify what carries the load, you haven't finished planning the installation.
Large mirrors and sculpture introduce additional concerns because their center of gravity may sit forward of the wall and their surfaces can be difficult to protect during handling. Historic plaster may require a different drilling strategy, while commercial spaces may need tamper resistance, restraint, and an inspection plan. Colorado Art Services provides residential and commercial art installation, heavy-piece mounting, mirror and sculpture hanging, grid layouts, and art moving across the Denver Metro area and Front Range.
The following video provides a visual reference for professional installation technique and placement:
Before buying more powerful hardware, identify the wall, the load path, the frame condition, and the consequences of failure. If the piece is heavy, valuable, unusually deep, installed high, or exposed to frequent contact, Colorado Art Services can assess the hanging conditions, plan the layout, and install the work with appropriate tools and weight-rated hardware. Contact the team before drilling so the wall assembly and the artwork are treated as one installation problem.
Comments