


How to Space Pictures on a Wall: Gaps and Heights
A GalleryPlanner guide puts the gap between frames in a tight cluster at 2 to 3 inches, then calls for roughly double that once the arrangement wants to breathe. That range explains why so many gallery walls get re-hung: the number people argue about isn't one number at all.
The gap matters less than what the gap is doing. A group of frames is one object on a wall, with one outer border, one center of mass and one relationship to the sofa or console beneath it. Space each frame as its own decision and the wall looks like a list of errands. Space the group as a single piece and it reads as art, even when the frames came from three different shops.
Most people learning how to space pictures on a wall usually want a formula. What they need is an order of work: choose the numbers, do the arithmetic on paper, mark a centerline, then drill. Skip to the drill and you'll be patching drywall on Sunday.
Spacing and Height Numbers That Start Most Layouts
Four values cover almost every multi-picture wall. Find the row that matches your frames, then read the paragraphs under the table before committing to any of them.
Arrangement | Gap between frames | Edge margin | Height reference |
|---|---|---|---|
Tight cluster of small, uniform frames | 4-5 cm (about 2 in) | 1.5 times the gap or wider | Visual center at 145-150 cm (57-60 in) |
Standard gallery grid | 5-8 cm (2-3 in) | 1.5 times the gap or wider | Visual center at 145-150 cm (57-60 in) |
Open, looser arrangement | 10-15 cm (4-6 in) | 1.5 times the gap or wider | Visual center at 145-150 cm (57-60 in) |
Large or visually dense works | Up to about 10 cm | 1.5 times the gap or wider | Adjust to furniture if present |
Group above sofa, console or sideboard | 5-8 cm (2-3 in) | 10-20 cm from corners or doors | 15-25 cm (6-10 in) above furniture |
The tight row is tighter than many people expect. The Eastside Studio London layout guide puts small matching frames at 4 to 5 cm apart and allows up to roughly 10 cm for large or visually dense pieces, which is the table read from the other end. A row of six small prints wants to look like one band, not six objects with air between them.
The standard grid is the workhorse. A 2026 Frameology guide sets the visual center of a gallery-wall arrangement at 57 to 60 inches from the floor with 2 to 3 inches between frames, and a Graystone Gallery guide gives the same figures in metric, 5 to 8 cm apart around a center about 145 cm above the floor. That height is a convention borrowed from galleries, where the assumed viewer is a standing adult. Treat it as a starting point, not a law.
The looser row buys openness, and it's the one people pick too early. It works on a wide wall with big pieces. On a narrow wall with small frames it just makes the group look scattered.
Two numbers to write down: the gap you'll use at every joint in the group, and the height of the group's center above the finished floor. Everything after that is arithmetic.
Decide both before you measure a single wall, because the wall will talk you out of them otherwise.
Measure and Plan the Group on Paper First
Measure the outside of each frame, corner to corner, including the moulding and any deep box profile. Image openings lie. Two prints sold as the same size can finish 2 cm apart once one has a wide mat and a chunkier frame, and that difference has to go somewhere in the layout.
Then build the plan at full scale. A roll of brown paper beats an app here: cut a template for each frame, write the piece's name on the front, and tape the set to the wall with painter's tape. You'll see the problem in thirty seconds, before a hole exists.
The arithmetic, with numbers
Say you're hanging three frames, each 40 cm wide, on a 200 cm wall. The frames take 120 cm, leaving 80 cm to distribute. If the outer margins should equal the internal gaps, you have four spaces (three frames plus one), so each gap and each margin comes to 20 cm. Change the brief and the math changes with it: if you want 25 cm margins, take 50 cm off the top, and the two internal gaps split the remaining 30 cm at 15 cm each.
Divide by frames plus one only when the outer margins are meant to match the internal gaps. When the margins should be wider, remove them first and divide what's left by the number of gaps.
One thing the arithmetic can't fix is center of mass. A dark, heavy or oversized piece pulls the group's visual weight toward itself. Hang a perfectly symmetrical grid with the heaviest work sitting bottom-left and the arrangement will read as sagging, even though every measurement is correct. Better to reorder the pieces than to move the nails.
Tape the templates up, then walk the room. Look at the group from the doorway, from the sofa, from the spot where you stand to talk to people. If the plan survives those three views, it'll survive the installation.
How to Mark, Level and Hang the Group Without Drift
Bad spacing almost never comes from bad frames. A FrameCalculator spacing guide names the failures that cause most of it: inconsistent gaps, measuring from image openings instead of frame edges, centering each piece rather than the collection, and letting the group drift toward a door, a corner or the nearest piece of furniture. Each one is prevented before the first hole.
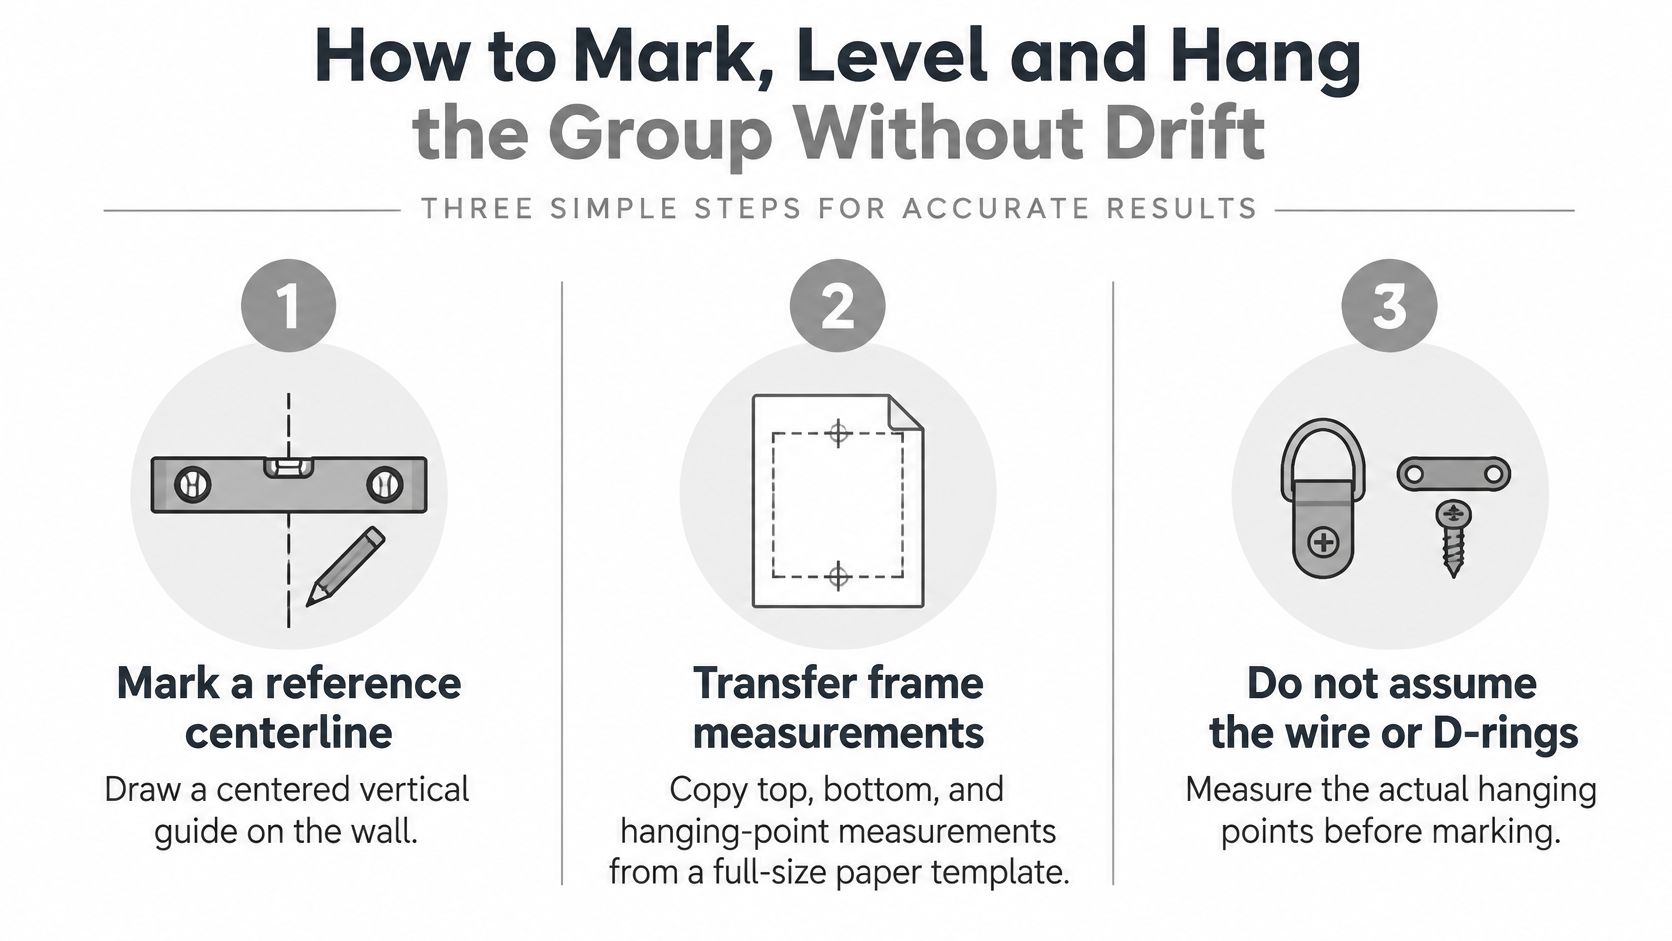
Mark a reference centerline. Pencil a vertical line down the wall at the center of where the group will sit, checked with a spirit level. On a long wall, a laser level makes the centerline a ten-second job and gives you a line you can verify from across the room rather than from 30 cm away.
Transfer top, bottom and hanging-point measurements from the templates. Mark all three on the wall for every frame, not just the nail position. The top and bottom marks are what let you check the group after it's up.
Measure the hanging hardware on each frame separately. Wires stretch, D-rings get mounted at different heights, and a taut wire sits closer to the top than a slack one. Two identical-looking frames can hang 15 mm apart off the same nail height.
Tape the templates and check the sightlines before drilling. Stand at the room's main entry point, then sit down. If the group looks high from the sofa, now is the cheap moment to fix it.
Cut a spacer block for grids. A scrap of MDF trimmed to your chosen gap, dropped between every adjacent pair, does more for consistency than a tape measure held at arm's length. Check horizontal and vertical rows with a long spirit level, not a short one.
Protect the border. Keep the outside margins visibly larger than the internal gaps, and hold 10 to 20 cm from corners, doors and furniture edges so the group doesn't crowd the architecture.
Hang, then verify from seated and standing positions. The level tells you about gravity. Your eye tells you about the wall.
For heavy, glazed or high-value pieces, spacing accuracy comes second to load-rated hardware, a stud or a properly specified anchor, and two-point support where the frame allows it. A single nail or an unverified drywall anchor will tilt, rotate or drop a frame even when the layout was flawless.
If the height figure is still nagging you, this walkthrough on how to hang pictures at the right height works through the same decision from the furniture side, which is where most height calls go wrong in the first place.
Arranging Grids Above Sofas, Consoles and Doorways
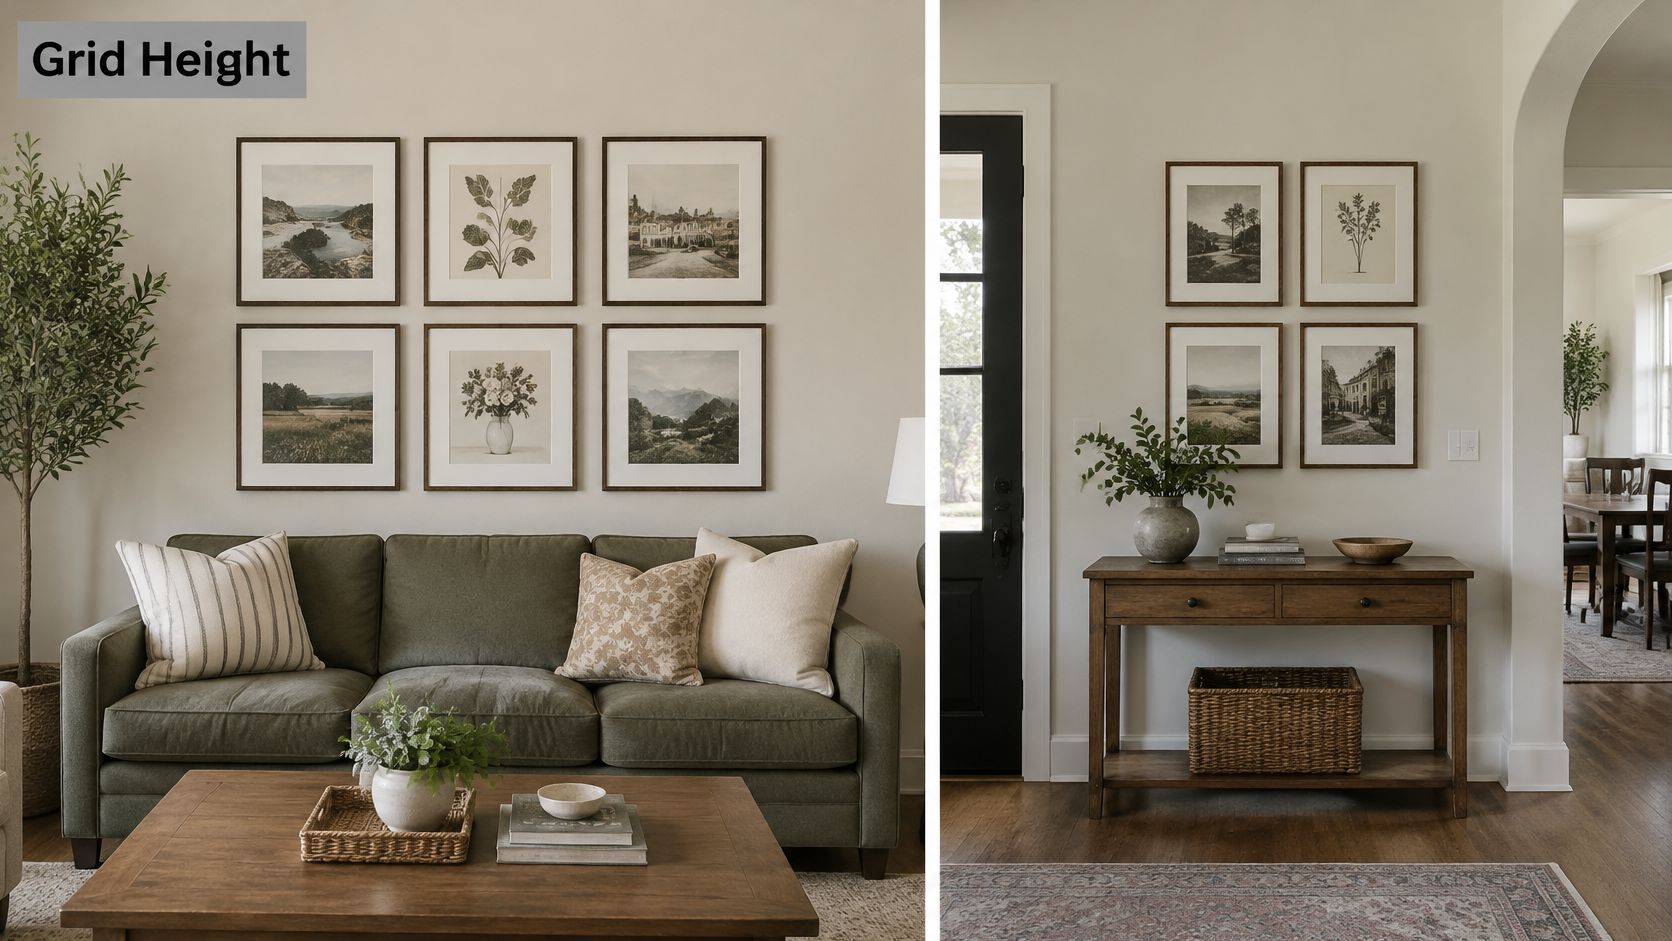
You can hit the perfect centerline and still have the wall look wrong, because whatever sits under the group sets a second height that overrides the first. A 2026 Frameology guide advises leaving 5 to 8 inches between the bottom of a picture grouping and the furniture beneath it.
Other guidance stretches that clearance to somewhere between 15 and 25 cm (6 and 10 in). The spread exists because a low console and a deep sofa back need different answers, so use the number that fits the piece in front of you and confirm it by eye. On a 180 cm sofa carrying a three-frame row, the lowest frame usually wants to sit about 20 cm above the cushion tops: close enough to look attached, high enough that nobody's head touches glass.
Wall, furniture or doorway
Open-plan rooms give you three possible centers and they rarely agree. Centering on the wall suits a room entered head-on. Centering on the furniture suits a room where the sofa or sideboard is the anchor. Centering on the primary approach path suits a hallway or a room you see through a doorway first.
Pick the one that matches how people arrive. Then walk to the doorway and look back. If the group stops reading as a single unit from there, the center is wrong, no matter what the tape measure says.
If you're still choosing the piece underneath, wall accents for residential interiors can help you work out how much wall it should own before you decide where the frames land. And when the furniture is already fixed, sizing and placing art above a sofa is its own calculation, separate from hanging a group on empty wall.
Adjusting Height for Seated Viewers and Mixed Sightlines
The 57 to 60 inch centerline assumes a standing adult of roughly average height. Plenty of rooms are used by people who are sitting down, and the standard figure has nothing useful to say about them.
The gap in the guidance is real. A Photography Icon guide on hanging photos makes the point that the standard midpoint height is repeated everywhere while almost nothing explains how to adapt it for wheelchair users, children, seated viewers, public-facing offices or rooms viewed from a staircase. It also notes that a single height can't serve conflicting sightlines, and that artwork in a seating area often needs to hang lower.
The fix is to separate three things that get collapsed into one number. The visual center of the composition is what makes the group look balanced on the wall. The usable viewing zone is where eyes are. The clearance above furniture is what stops the lowest frame from being blocked or crowded.
Then measure the people, not the room. Sit in the chair guests use and note where your eye line falls. Stand at the spot where someone walks past the wall. Check both. In a lounge, that usually pushes the group lower. In a corporate reception area, the public wall wants a height that reads comfortably to someone standing and walking, not to someone sitting at a desk behind it. On a staircase, the work is seen from below on the way up and above on the way down, so the center wants to sit where the middle of the flight meets it. For high placements like these, hanging large artwork in a stairwell or double-height space involves different equipment and different decisions.
A height that's wrong for the room doesn't just look off. It puts pieces behind sofa backs, forces people to crane, and creates access problems for anyone shorter or seated lower. Start with the convention, then adjust it to the eyes in the room.
Common Spacing Mistakes and How to Fix Them
The complaint that comes up first isn't a wrong gap, it's an uneven one. The numbers were right and the wall still looks sloppy.
Symptom | Likely cause | Fix |
|---|---|---|
Gaps look uneven | Measured from image openings | Re-measure from frame edges and re-mark |
Group looks low or off-center | Each frame centered on its own | Center the whole group, checking center of mass |
Arrangement drifts toward a door | Not anchored to reference centerline | Re-mark the centerline and shift from the wall center |
Frames tilt on a level wall | Wire or D-rings not centered or identical | Measure each frame's hanging points before drilling |
Group crowds a sofa or console | Furniture clearance ignored | Raise the group so the lowest frame sits 15-25 cm (6-10 in) above |
Uneven gaps are almost always an image-opening measurement. Frames with wide mats have a visual center that sits nowhere near the middle of the outer edge, so anyone measuring from the picture rather than the frame builds error into every joint. Fix it once, from the outer edges, and the problem disappears.
A group that reads low usually wasn't centered at all. Each frame got its own careful placement and the collection never got one, which is exactly how a symmetrical grid ends up looking like it's sliding down the wall.
The camera test: photograph the finished group from eye level, straight on, then look at the image as if it were someone else's room. Drift toward a door, a sagging center and a high border all show up in a photo when they're invisible in person.
Frames that tilt on a wall you know is level point at the hardware, not the wall. Measure the D-rings on every piece before you drill. And a group that crowds the sofa skipped furniture clearance entirely, which is a 20-minute fix with a tape measure and a patching compound.
Confirm the Layout Before You Commit to the Wall
Run the checklist in order, and don't drill until every line passes.
Template on the wall. Full-size paper, taped, with the group's outer edges marked.
Gaps match the row you chose. Every joint, measured from frame edges.
Centerline marked and level. A vertical line you can check from across the room.
Center of mass checked from a normal viewing position. Not just the geometric center.
Furniture clearance set. Lowest frame clear of the sofa, console or sideboard.
Sightlines confirmed seated and standing. Especially where the room is used for long stretches.
Some jobs are worth handing over. Many pieces, large or heavy frames, high placements over stairs, glazed and high-value work, and anything going into stone, brick or a wall whose structure you can't verify all tip the balance from a Saturday project to a professional install. The risk isn't the layout, it's the load and the ladder.
Colorado Art Services has over 15 years of experience in picture hanging and art handling throughout the greater Denver metropolitan area, and we handle artwork regardless of size, weight or delicacy. When you request an estimate, our contact form asks how many art pieces need installing, whether ladders or scaffolding are required, whether the install involves drilling into any hard surfaces, and the dimensions of the largest piece, so the quote reflects the actual job rather than a guess.
Write down your gap and center height, tape a template to the wall, and look at it from the doorway before anything else happens. If the layout involves heavy, glazed or high pieces, send those four details over and get a free estimate before the ladder comes out.
Colorado Art Services plans and installs gallery walls, grids and large-format displays across the Denver metro area, from a single centerline check to a full-building hang. If your layout involves heavy frames, high placements or a wall you'd rather not experiment on, we'll map the spacing, confirm the sightlines and mount everything level and secure. Visit Colorado Art Services to request a free estimate and put the measurements in front of someone who hangs for a living.
Comments