


8 Hanging Pictures on Walls Ideas for Every Room in 2026
You buy a set of prints, choose frames you like, and hang them across the living room wall. Each looks fine on its own, but the row feels uneven and the room still looks unfinished. Moving a frame higher only seems to make its neighbor look lower.
The fix usually isn't a better frame. It's a layout that fits the usable wall width, furniture, viewing distance, and movement through the room. A dense arrangement can look deliberate in a dining room and crowded beside a busy doorway. A precise grid can suit a broad office wall but feel squeezed between a window and a bookcase.
Before choosing among these hanging pictures on walls ideas, decide what the arrangement belongs to. Is it centered over the sofa, contained within an architectural recess, or intended to connect an otherwise empty hallway? That decision matters more than filling every patch of wall.
Choose the layout first, then locate the fasteners. Salon walls, grids, asymmetrical groups, eye-level displays, rails, cleats, ledges, and mirror combinations all benefit from the same method: measure the complete arrangement, establish a reference line, test full-size templates, and transfer the actual hardware positions. Keep these step-by-step picture hanging tips handy for the installation sequence, but settle the composition before making holes.
1. Salon-Style Gallery Wall
A dining room wall with mixed frames and artwork can feel cohesive when the pieces form one planned composition. Salon-style hanging grew out of crowded exhibitions in Paris during the 18th and 19th centuries. At home, the arrangement works best when its density suits the available wall, rather than filling every open patch.
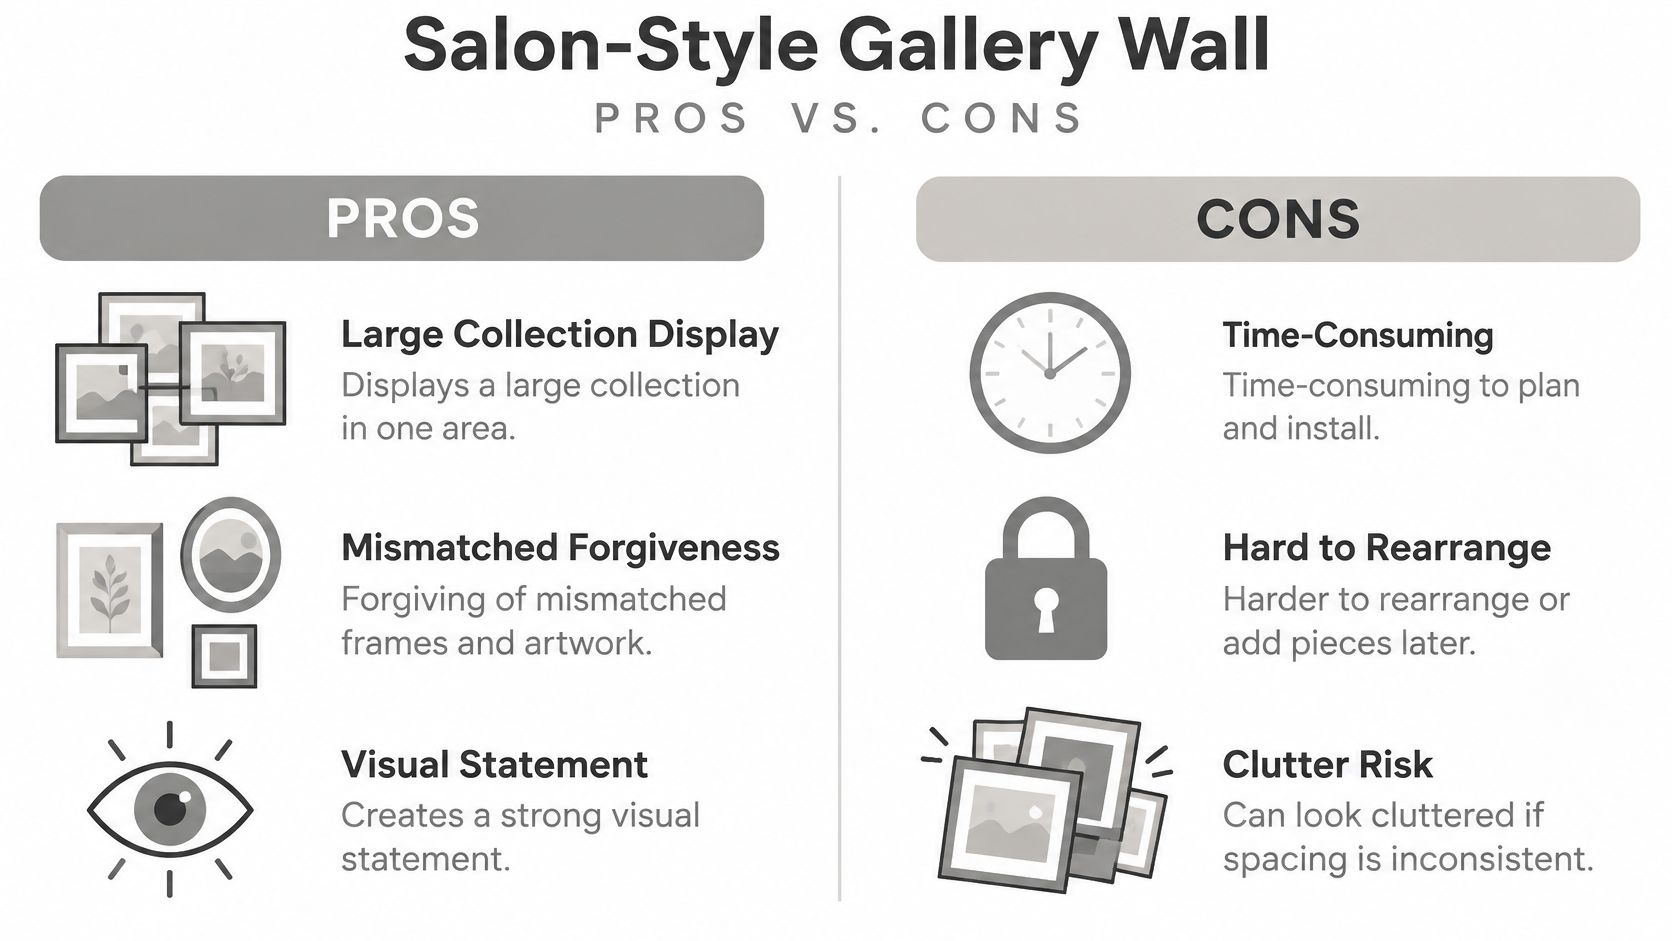
Give the Collection a Boundary
Lay the frames on the floor within an outline that matches the usable wall area. Place the dominant work first, then arrange the smaller pieces around it. Repeat the spacing between frames, and keep the group's outer edge intentional even when the frame edges do not align.
Broad walls: Extend the composition sideways instead of stacking it into a narrow column.
Low ceilings: Keep the top edge low enough to leave visible space above the collection.
Deep sofas: Check the arrangement from the main seating position; frames that sit too low can feel crowded against the sofa.
Busy passages: Keep projecting corners and fragile glazing away from places where shoulders or bags may hit them.
The wall material affects the installation. On drywall, locate suitable fixing points for the weight of each piece. On plaster or brick, settle the whole layout before drilling; changing several positions can leave visible holes and repairs.
This demonstration shows another way to assess a grouped arrangement before installation.
2. Grid Layout
Choose a grid when the artwork benefits from repetition. A photography series, botanical collection, or set of architectural prints looks orderly when matching frames share consistent spacing. The arrangement works particularly well on an uninterrupted office wall or above a sofa with a clear horizontal shape.
The example below shows how matching frames can connect separate images into a single composition.
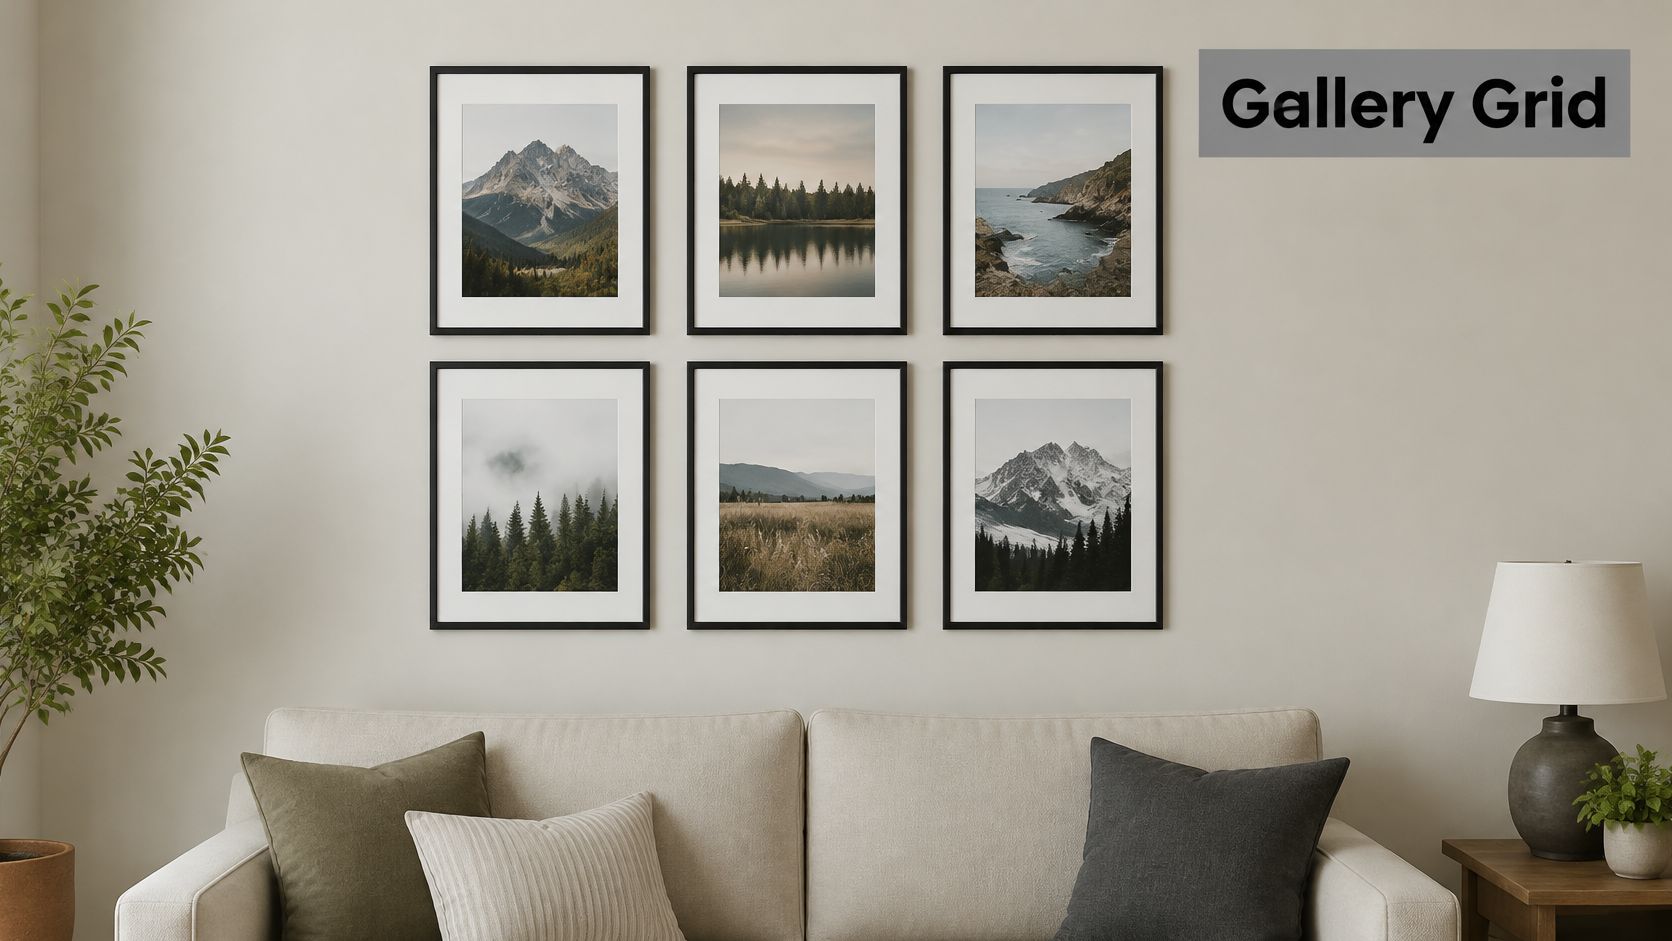
A grid is less forgiving than a loose collection. A slightly tilted frame or widening gap becomes conspicuous because the viewer has clear lines to compare. Don't use the ceiling, baseboard, or sofa back as proof of level; check the arrangement with a spirit level or laser.
Measure Each Position from the Same Reference
Calculate the group's outside dimensions, including gaps, and mark its center. Establish level horizontal references and plumb vertical references, then locate every hanging point from those references. Measuring from the previous frame lets small errors accumulate across the wall.
Check the hardware on every frame, even when the frames appear identical. Wire tension and attachment positions can differ, so identical nail heights won't necessarily produce aligned top edges.
Installation rule: A grid should be measured from fixed reference lines, not copied from the frame beside it.
In a narrow hallway, use a compact arrangement that leaves comfortable clearance around switches and door trim. On drywall, match anchors to the wall assembly and load; on brick, verify that the chosen fixing locations suit sound masonry before committing to the grid. Never preserve a visual pattern by accepting an unsuitable anchor position.
3. Asymmetrical Balanced Arrangement
Say you have a large scenic painting and a collection of smaller drawings. Matching their top edges may make the drawings look like an afterthought, while placing everything in a symmetrical pattern wastes the collection's differences. An asymmetrical arrangement lets the painting lead without leaving the opposite side visually empty.
This living-room example shows the kind of dominant artwork that can anchor a larger composition.
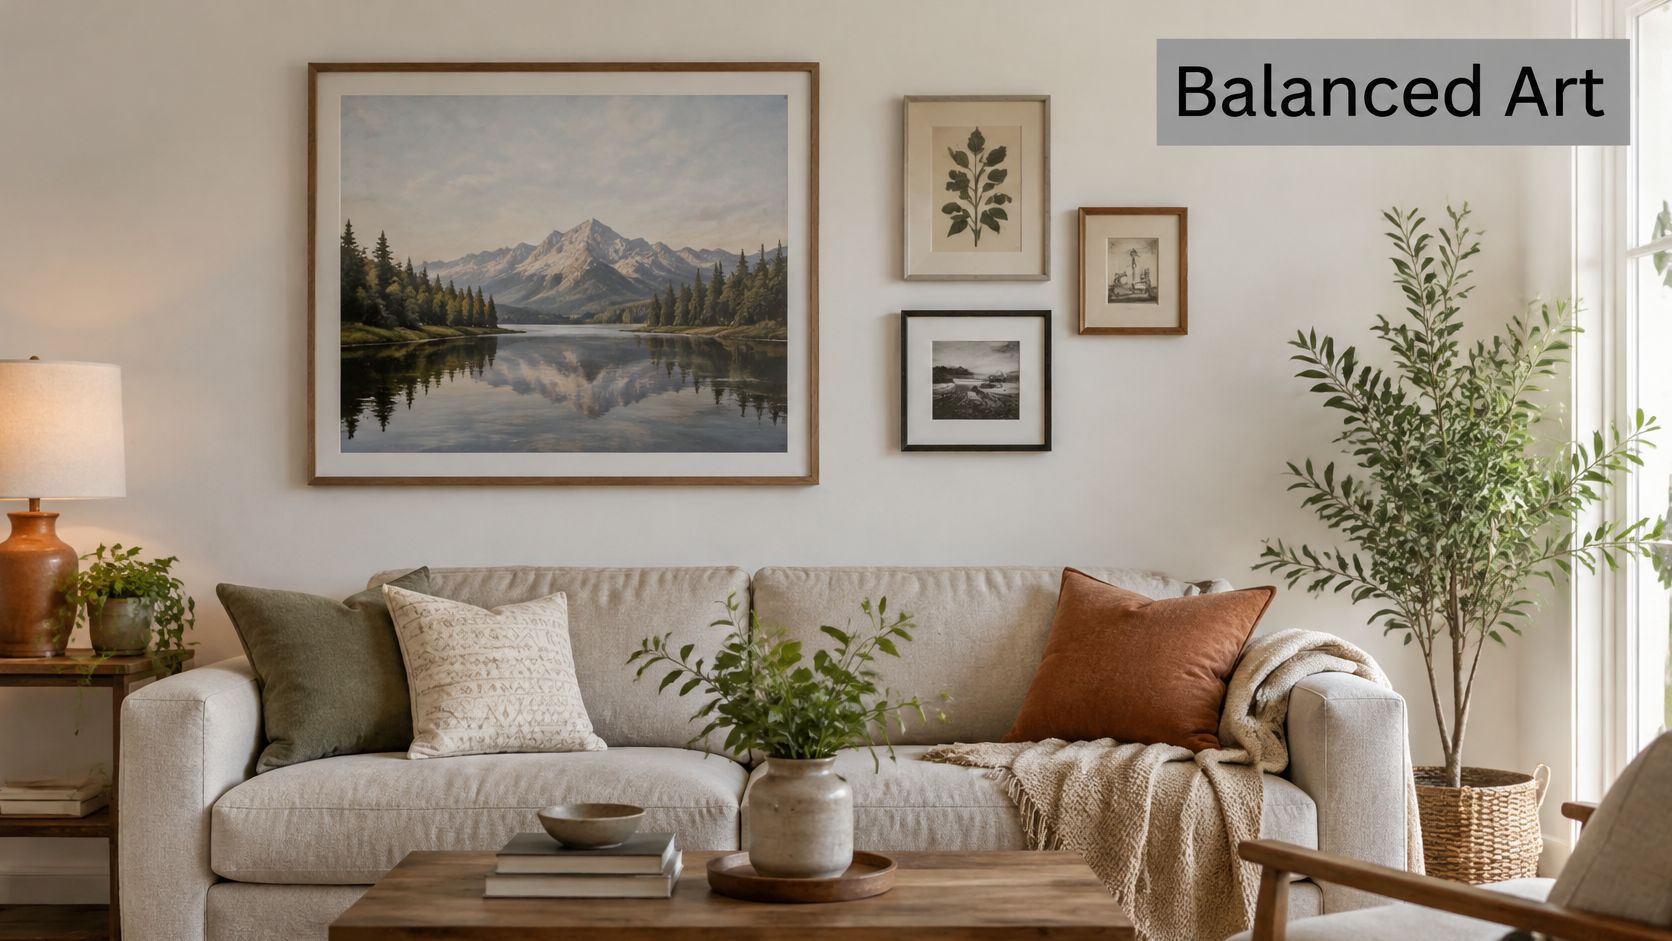
Balance visual weight, not just frame dimensions. A dark photograph in a thick frame can feel heavier than a larger pale drawing. Position the dominant piece first, then use the smaller works to balance its color, contrast, and mass.
Let the Furniture Define the Group
Above a sofa, judge the complete arrangement against the seating area rather than the entire wall. If the sofa sits off-center because of a doorway, centering the art on the architecture can make it feel disconnected from the furniture.
Wide seating areas: Let the smaller works extend the composition without scattering them across unrelated wall space.
Deep sofas: Check the arrangement while seated and from the room entrance. Those views can suggest different adjustments.
Nearby openings: Keep a deliberate boundary beside the doorway instead of squeezing in a final small frame.
Photograph the paper-template layout from the main viewing position. A photograph makes it easier to notice a crowded corner or an empty patch that didn't stand out while you were working close to the wall.
This approach tolerates varied frame sizes, not careless installation. Confirm each piece's weight and mounting requirements separately, especially when a substantial painting shares the wall with lightweight prints.
4. Museum Eye-Level Standard
A consistent centerline is the strongest starting point for a hallway, gallery corridor, or room with standalone artwork. It connects pictures of different sizes without forcing their top or bottom edges into alignment. Measure the center, not the frame's top edge.
For an unobstructed wall, set the visual center within 145–155 cm (57–61 in) above the floor, the museum-informed baseline described by FrameCalculator's art-hanging guide. That guide also recommends 5–8 cm (2–3 in) gaps within gallery groups and a lower frame edge 15–25 cm (6–10 in) above furniture.
Those are starting dimensions, not reasons to ignore the room. A tall console, a substantial headboard, or someone's head resting against a sofa can require a different final position.
Use the Same Measuring Method Everywhere
Treat a collection as a single outer rectangle. Find that rectangle's center, place it against your chosen centerline, and check its relationship to furniture and nearby trim before marking individual fixings.
Transfer the measurements in this order:
Outline the display: Tape up full-size paper templates showing every frame's outside edges.
Check the view: Inspect from the doorway and the main seated or standing position.
Locate the hardware: Measure down from each frame's top to its loaded hanging point.
Mark and verify: Transfer those points to the templates and confirm level before drilling.
For a wire-hung frame, pull the wire into its loaded position when measuring. Otherwise, the picture can settle below the intended height.
Use the eye-level art-hanging guide to work through placement decisions. High ceilings don't automatically justify high artwork; leave open wall above the display rather than lifting it away from comfortable viewing height.
5. Picture Rail and Cable Hanging System
A picture rail makes sense when the collection changes more often than the wall should be drilled. It's useful for rotating exhibitions, home collections, and plaster rooms where repeated patching would be intrusive. The rail carries adjustable cables or rods, allowing pictures to move without creating fresh fixing holes at artwork height.
The trade-off is visible suspension hardware. Fine cables can remain noticeable against a pale wall, and some frames tilt forward unless their attachment points and lower supports are carefully arranged.
Check the Entire Load Path
Don't assume an existing decorative molding is a load-bearing picture rail. Inspect its profile, condition, and attachment before hanging anything from it. A new rail needs fixings suited to the structure, not merely screws driven into the wall finish.
Drywall: Locate framing or use a rail system explicitly designed for the confirmed wall assembly and intended load.
Plaster: Establish what supports the plaster and anchor the rail without relying on a brittle finish coat.
Brick: Select masonry fixings for the actual substrate and inspect the drilling locations for deterioration.
For a home office with changing photography, a rail can preserve the wall while allowing seasonal rearrangement. Establish the overall display boundary and centerline just as you would for directly mounted pictures, then adjust the cable hooks to achieve that layout.
A rail reduces repeated holes. It doesn't remove the need to verify the rail, its anchors, the cables, the hooks, and the frame attachments.
In a busy commercial corridor, account for vibration and accidental contact. Use compatible locking components, balance the suspension points, and inspect the hardware after changes. Don't substitute an unverified hook because it fits the cable.
6. French Cleat Hanging System
A French cleat solves a mounting problem, not a composition problem. Its interlocking wall and artwork components can support a substantial frame while keeping the installation close to the wall. It's a useful option for oversized art, heavy framed work, and mirrors that need a stable, carefully leveled position.
Unlike a small picture hook, a cleat requires compatible attachment surfaces on both the wall and the object. A thin decorative frame back isn't automatically strong enough to accept one.
A cleat is particularly helpful for a large statement piece above a wide console. In Apartment Therapy's 2024 survey of 131 interior designers, 79% said they preferred the look of a statement art piece over a gallery wall. That preference isn't a sizing rule, but it supports considering a simpler composition before building a complicated group.
Plan for Engagement and Removal
Mark the artwork's final outline, then calculate the wall-cleat position from the installed artwork component. Leave clearance above the piece so it can lift into engagement and be removed later. Tight ceiling recesses can make an otherwise suitable cleat impractical.
Use the picture-hanging cleat guide when assessing the hardware arrangement. Level the wall component before final tightening, and verify that the components engage fully.
For substantial loads, prioritize structural attachment. Wood studs, steel-stud assemblies, plaster over lath, and masonry require different fastening decisions; a screw that works in one isn't a universal solution.
Check the load rating of the complete installed system, including the artwork attachment. Don't add together fastener ratings or assume a published maximum provides spare capacity for poor positioning, mechanical advantage, or accidental impact.
7. Layered and Leaning Display on Ledge
A ledge suits someone who wants to rearrange prints without measuring new hanging points each time. It works well above a console or along a quiet living-room wall, where overlapping frames can be viewed without people brushing against them. Choose it for flexibility, not as an excuse to skip restraint.
This example shows how varied frame heights can share a common support.
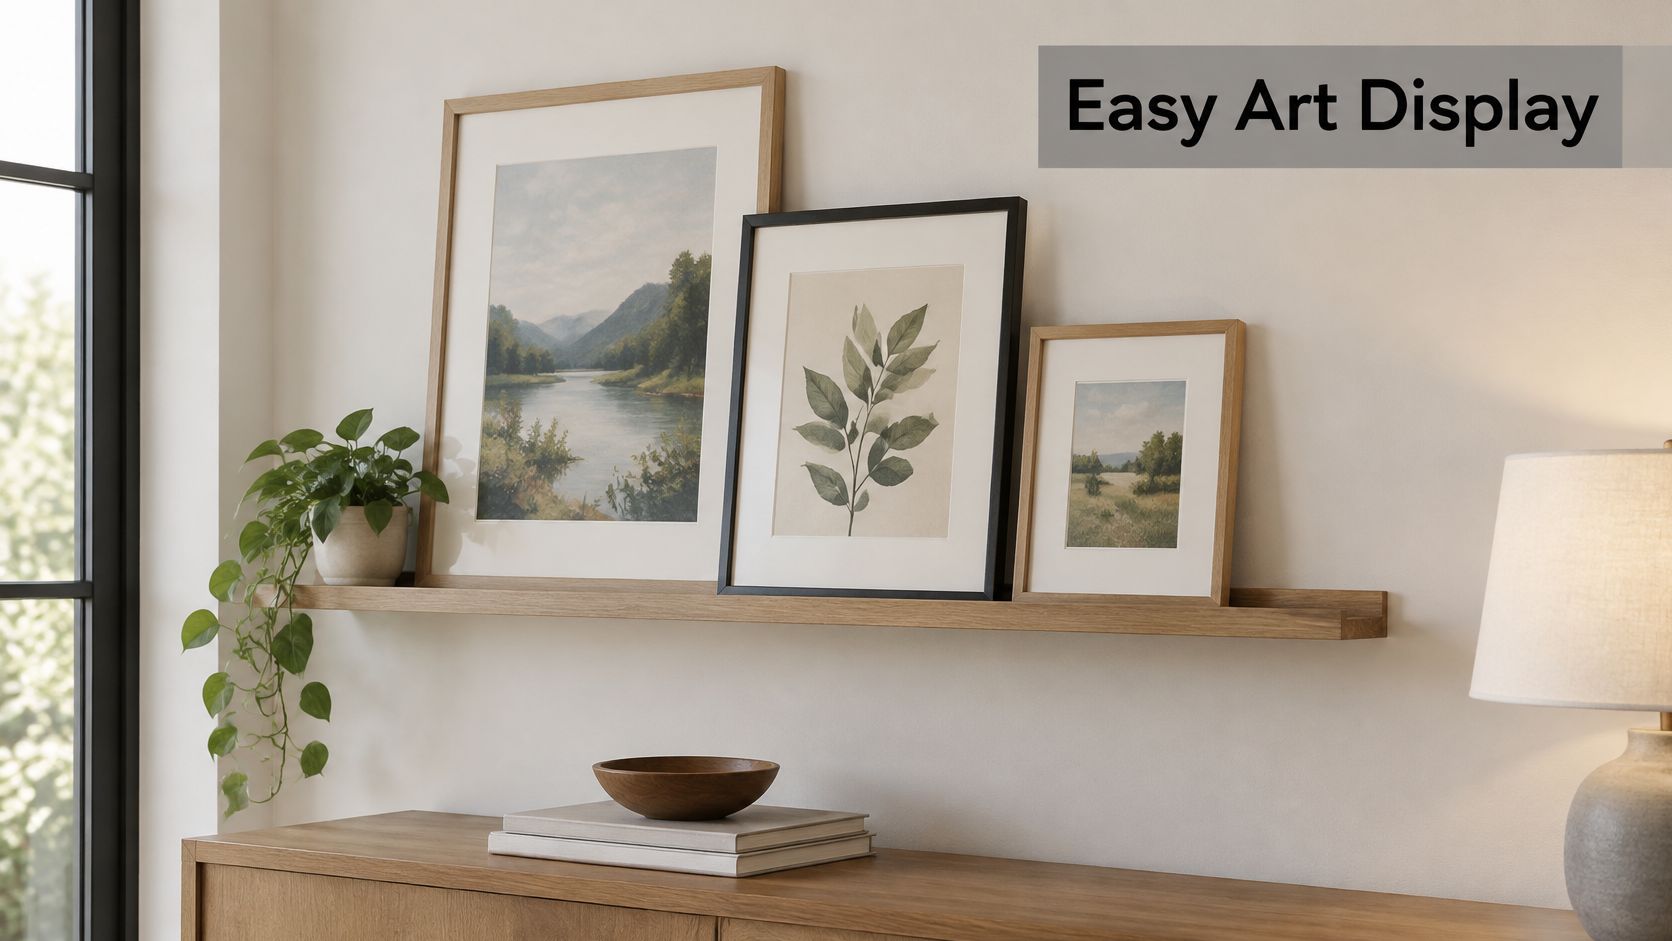
Place the larger work behind smaller pieces, but keep important image areas visible. A ledge becomes visually cluttered when every frame overlaps a subject or when decorative objects block the artwork.
Depth and Restraint Matter More Than Styling
Choose a ledge deep enough to support the actual frame bases and their leaning position, with a retaining lip where appropriate. There isn't a universal shelf depth that makes every frame safe. Check the shelf's load capacity and the wall attachments before loading it.
Above seating: Check head clearance when someone sits back or stands up. Sofa depth alone doesn't guarantee separation from the shelf.
Near children or pets: Use positive restraints for frames that could be pulled, knocked, or tipped.
Beside circulation routes: Avoid projecting shelves where people carry laundry, bags, or bulky objects.
Anti-slip pads help resist sliding, but they aren't substitutes for mechanical restraint where falling artwork could injure someone. In a household with energetic pets, directly hanging the pictures may be the better choice.
Keep works on paper away from direct sunlight and heat sources, and leave room to lift frames without scraping their neighbors. For a rotating family-photo display above a secured console, a restrained ledge can provide flexibility without turning the wall into a patchwork of abandoned holes.
8. Mirror and Art Combination
Check the reflection before you decide where the mirror belongs. A mirror opposite a window can introduce a useful view and reflected light; the same mirror placed carelessly may show an overflowing coat rack or create uncomfortable glare. Stand where people will sit or enter the room.
In an entryway, use the mirror as the dominant shape and place smaller artwork beside it. Over a dining-room console, a rectangular mirror can share an alignment line with framed pieces without requiring identical frames.
Separate Composition from Mounting
A mirror belongs visually to the group, but its hardware must suit its own weight, frame construction, and wall substrate. Don't hang it from decorative frame details or assume a picture wire is appropriate because it's already attached.
Use the mirror-hanging height guide to evaluate placement against furniture and viewing positions. In a narrow passage, check both the reflection and the frame's projection into the walkway.
Before drilling: Test the mirror's reflection from the room entrance, the main seat, and the nearest doorway.
For a heavy mirror, select compatible mirror hardware or an appropriate cleat with structural anchoring. Inspect masonry condition before drilling, and don't treat drywall and plaster as interchangeable substrates. WhiteWall's picture-hanging guide also emphasizes matching plugs to wall material and using suitable screws for large or heavy pictures.
If clear acrylic frames accompany the mirror, keep their surfaces clean without introducing scratches. These care tips for lucite frames are useful for maintaining transparent frames that reveal fingerprints and dust.
The best combination feels connected without making every object compete for attention. Leave enough open wall to distinguish the mirror's reflection from the artwork beside it.
How the eight hanging pictures on walls ideas compare by room fit, wall needs, install effort, and reversibility
Wall width, substrate, and traffic determine which layout will work. These typical ranges help compare the space each option needs with the effort and wall repair it may involve. Actual width depends on the artwork and the gaps between pieces.
Item | Best For | Typical Wall Width | Install Effort | Wall Damage and Reversibility |
|---|---|---|---|---|
Salon-Style Gallery Wall | Displaying a large, varied collection | 6–8 feet | Time-consuming to plan and install | Multiple fasteners leave several holes; rearranging may require patching and repainting |
Grid Layout | Matching prints, photos, or artwork series | About 3–6 feet, depending on the number and size of pieces | Requires precise measuring and leveling | Each frame needs a mounting point; changing the arrangement can leave visible holes |
Asymmetrical Balanced Arrangement | A relaxed display with one standout piece | About 4–6 feet for a small grouping | Harder to plan; trial layouts help balance varied pieces | Several mounting points leave holes; moving pieces may require wall touch-ups |
Museum Eye-Level Standard | Consistent, gallery-style artwork placement | About 1–3 feet for one piece | Measure the artwork center and set a reference line | Usually leaves one or two mounting holes per piece; easy to reposition, but holes remain |
Picture Rail and Cable Hanging System | Rehanging and rotating art, especially in historic spaces | About 3 feet or more for a useful display | Requires an existing rail or professional installation | Reduces repeated wall holes; artwork is easy to rearrange along the rail |
French Cleat Hanging System | Securely hanging heavy or large pieces | At least the width of the cleat and artwork | Requires careful measuring, cutting, and anchoring | Wall anchoring leaves holes; the artwork can be removed without disturbing its position |
Layered and Leaning Display on Ledge | Casual, easily updated displays | About 2–4 feet for a small ledge display | Low effort for artwork; requires a ledge or shelf | No new holes from the artwork itself; easy to rearrange, though the ledge needs secure mounting |
Mirror and Art Combination | Brightening and adding depth to a display | About 4–6 feet for a mirror with adjacent art | Requires secure, weight-rated hanging hardware | Anchors leave holes; rearranging may require patching, especially for a heavy mirror |
Pick One Layout, Measure Once, and Hang with Confidence
Start with the room's use, then consider the wall's width. A quiet dining room can accommodate a layered salon arrangement; a busy corridor benefits from a restrained display with little projection. Above a sofa, connect the composition to the furniture rather than stretching it across every available patch of drywall.
Choose a grid when repeated images and matching frames deserve orderly presentation. Choose an asymmetrical arrangement when the collection varies in size and visual weight. If the room already contains strong patterns, shelving, and contrasting furniture, a standalone statement piece may be more effective than adding another dense group.
Make the Layout and Hardware Decisions Separately
Rails, cleats, and ledges aren't interchangeable visual styles. They're support systems with different benefits and limitations. A rail accommodates changing displays, a cleat can stabilize substantial work, and a ledge makes rearrangement easier while introducing shelf-loading and tipping concerns.
Use this decision path before reaching for the drill:
Define the boundary: Measure usable wall space after allowing for doors, trim, furniture, switches, and normal movement.
Set the centerline: Use a floor measurement and level, then adjust deliberately for furniture and viewing conditions.
Test the composition: Tape up full-size templates and inspect them from the places people occupy.
Confirm the mounting: Identify the substrate, weigh the framed work, and select compatible hardware for the complete installation.
The fastener position isn't necessarily the picture's center or its top edge. Transfer the actual hanging points only after the templates look right, and check for concealed utilities before drilling. For a useful companion to that sequence, consult this guide to hanging wall art.
For large, heavy, or high placements, a professional installer can handle the planning, anchoring, and leveling. Colorado Art Services offers a free estimate for art hanging, display, and installation services. When preparing project details, include the number of pieces, the largest piece's dimensions, hard wall surfaces, and whether ladders or scaffolding will be required.
Don't keep adjusting a layout to compensate for hardware you haven't assessed. Set the composition, verify the wall, and then choose the mounting strategy. That order gives you a display that looks intentional and can be installed with its actual room conditions in mind.
We offer art placement, layout and design, picture hanging, mirror hanging, and heavy-piece installation throughout the Denver Metro area and Front Range communities. Visit Colorado Art Services to request a free estimate and share your artwork dimensions, wall conditions, and preferred arrangement.
Comments