


Hanging Pictures on Metal Walls Without Damage
Forget the usual advice to grab the strongest magnet or the first self-tapping screw in the drawer. That advice fails on metal because the shiny face in front of you often isn't structure at all. It's a skin, a coating, or a thin panel hiding a cavity, a stud line, conduit, or a rated assembly. Hanging pictures on metal walls safely starts with identifying what that face is, then weighing what you're hanging, and only then choosing hardware. Reverse that order and you can dent a panel, strip a hole in seconds, or watch a glazed frame creep down overnight.
Match the Wall and Size the Load
A visible metal surface tells you almost nothing about its holding power. Structural steel can take a real fastener. A decorative aluminum skin over a soft core can't take a point load without dimpling. Those two walls can look identical in a finished office or gallery, which is why I won't buy hardware until the wall assembly has a name.
The Littleton museum installation guidelines make the contrarian point that the frame hardware must be engineered first, with sturdy D-rings, properly secured wire, or a French cleat for exceptionally large or heavy pieces, because improperly mounted hardware can cause the artwork to fall. That guidance also frames the wider problem. Structural steel, corrugated or architectural metal panels, metal-backed drywall, and aluminum composite panels are different installation problems, not one surface. Treat them as one and you'll pick an anchor for a material you don't have.
Identify the Assembly Before You Touch a Drill
Start with tests that don't make a hole. Run a strong magnet slowly across the face. A firm grab suggests ferrous steel somewhere close to the surface. No grab doesn't prove there's no steel behind drywall or a thick coating, but it does rule out a magnetic hanger on that face and warns you the skin may be aluminum, most stainless grades, or composite.
Press firmly with the heel of your hand and knock along the panel. Flex, oil-canning movement, or a hollow drum sound points to thin sheet over a cavity. A dead, rigid feel suggests backing, a rail, or solid structure nearby. Read the seams next. Vertical joints, horizontal reveals, and lines of exposed fasteners often mark panel edges, studs, purlins, or top and bottom track. A fastener line isn't permission to drill beside it. It's a clue to where support probably runs.
Then check what you can't see. Use a stud finder rated for metal framing, scan for electrical runs where outlets or switches sit nearby, and ask for drawings in commercial space. If the wall is a fire-rated assembly, part of a demountable partition system, or still under a panel maker's warranty, stop. A puncture that breaches a rating or voids a warranty costs more than any picture hook saves. In corporate interiors and luxury properties, a small dent or a compromised rated wall can cost more than the installation itself.
Don't hang from a finish. Hang from the structure behind the finish, or use a system the wall maker designed for that skin.
Pick one row from the table below and stay in it. If you can't place your wall in a row with confidence, you don't have enough information to drill.
Mounting choice by metal wall assembly
Wall assembly | Fitting hardware | Load posture | Main damage risk |
|---|---|---|---|
Structural steel | Structural screw or through-bolt into steel | High if the steel is the structure | Coating cut, corrosion at the hole |
Thick sheet metal | Self-tapping screw with washer if thickness supports it | Light to moderate | Burrs, dimples, overtightening |
Thin sheet or decorative skin | Do not hang from the skin; fasten to stud, rail, or backing plate | Skin capacity is near zero for point loads | Dents, oil-canning, warranty void |
Metal studs behind drywall | Screw into the stud; drywall anchor is not the support | Limited by stud and screw engagement | Missed stud, hit electrical or plumbing |
Hollow metal partition | Rated toggle or through-fastener with backing washer or plate | Modest unless a rail is engaged | Panel crush, fire-rating puncture |
Corrugated architectural panel | Fastener at the high rib into a purlin or rail, then sealed | Set by the purlin, not the sheet | Leaks, rust, crushed rib |
Aluminum composite panel | Adhesive system only if the maker allows it, or fastener into real backing | Face sheet is not a beam | Delamination, edge peel |
Size the Load From the Whole Object
Weigh the complete assembled piece on a bathroom scale. That means frame, glazing, backing board, mat, D-rings, wire, and any cleat. A print on paper weighs almost nothing. The same print in a wood frame behind glass can weigh several times more, and a mirror of the same size is heavier again because the glass is the artwork and the load. You're not supporting an image. You're supporting a rigid, fragile assembly that can lever away from the wall if someone bumps it.
Published ratings need careful reading. EngineerFix guidance on picture hanger weight limits places standard picture hooks in the approximate 10 to 30 lb range, while heavy-duty toggle anchors can reach 100 lb or more when correctly installed in suitable drywall or hollow-wall conditions. Those numbers don't transfer to a metal skin. A toggle rating earned in drywall assumes the toggle spreads load behind gypsum in a specific way. Thin sheet metal fails differently. It dishes, tears around the hole, or lets threads strip. The rating is only useful when the substrate, hole size, and load direction on the package match your wall.
Use a margin, and make it honest. A conservative practice is to select hardware rated for at least twice the artwork's actual weight. I go nearer three times when the frame stands proud of the wall, hangs in a corridor, or sits where doors slam and vibration works on the fastener. That margin covers imperfect installation and small changes in load. It doesn't rescue a fastener installed in the wrong material.
Separate two kinds of force. A flush frame hanging close to the wall puts mostly downward shear on the screw. A deep shadow-box frame, a standoff mount, or a piece tilted forward on wire adds an outward pull. Outward pull is harder on thin metal because it tries to enlarge the hole and bend the sheet. If your frame projects, you need stronger anchorage than the scale weight alone suggests, through a stud, rail, backing plate, or cleat that spreads the pull across several fasteners.
Spread the Load and Protect the Finish
Wide or heavy work belongs on two attachment points, not one centered screw. Two points cut rotation, halve the demand at each fastener when they're level and share the load, and keep a long frame from pivoting every time someone brushes past. A French cleat or a short rail does the same job more evenly. It's also the point where choosing the right wall mounting brackets matters, because a bracket or cleat that fits the frame depth and wall fixing pattern will keep the piece flush instead of forcing one screw to do bracket work.
Frame hardware is part of the load path. Small sawtooth hangers pressed into a soft frame back, eyebolts screwed into the top rail of a thin frame, or wire wrapped loosely around a single screw will fail before a good wall fastener does. Fit sturdy D-rings into the side rails with screws of proper length, size the wire to the weight, or skip wire entirely on a cleat. If you're comparing anchor types for different substrates, the detail in our anchor selection guide for different wall types helps you match the fixing to the assembly you've identified, not to the hardware aisle label.
Metal finishes punish casual choices. Pair stainless or coated fasteners with coated steel panels. Don't use bare steel screws in a damp stairwell, a bathroom, or an exterior soffit where the cut edge and the screw will rust and bleed down the face. Put a nylon or rubber washer under the head so the washer face doesn't scrape a ring through paint as it seats. After drilling, touch the raw edge with matching primer or the panel maker's touch-up paint before the hardware covers it. Keep strong tape off fresh coatings, and don't use painter's tape as a long-term layout tool on a delicate powder coat in heat. It can lift or leave residue you'll see in raking light.
Plan groups before hardware goes in. Set one eye-level datum line for the row, lay out even gaps with tape on the floor or a paper template, and check the sightline from the doorway where people first see the wall. Consistent height and spacing are what make a group read as one installation instead of several accidents. Lock the row, confirm each assembled weight, write the wall row beside each piece, and only then buy fasteners. If any piece in the group needs a stud that isn't where the layout wants it, shift the layout or use a rail or cleat that reaches the stud. Don't solve a layout problem by screwing into a skin.
How to Fasten a Picture into Metal
This sequence assumes you've already chosen a wall row that allows a hole. If your row says the skin isn't structure, skip to the no-hole options instead of forcing this procedure onto the wrong panel.
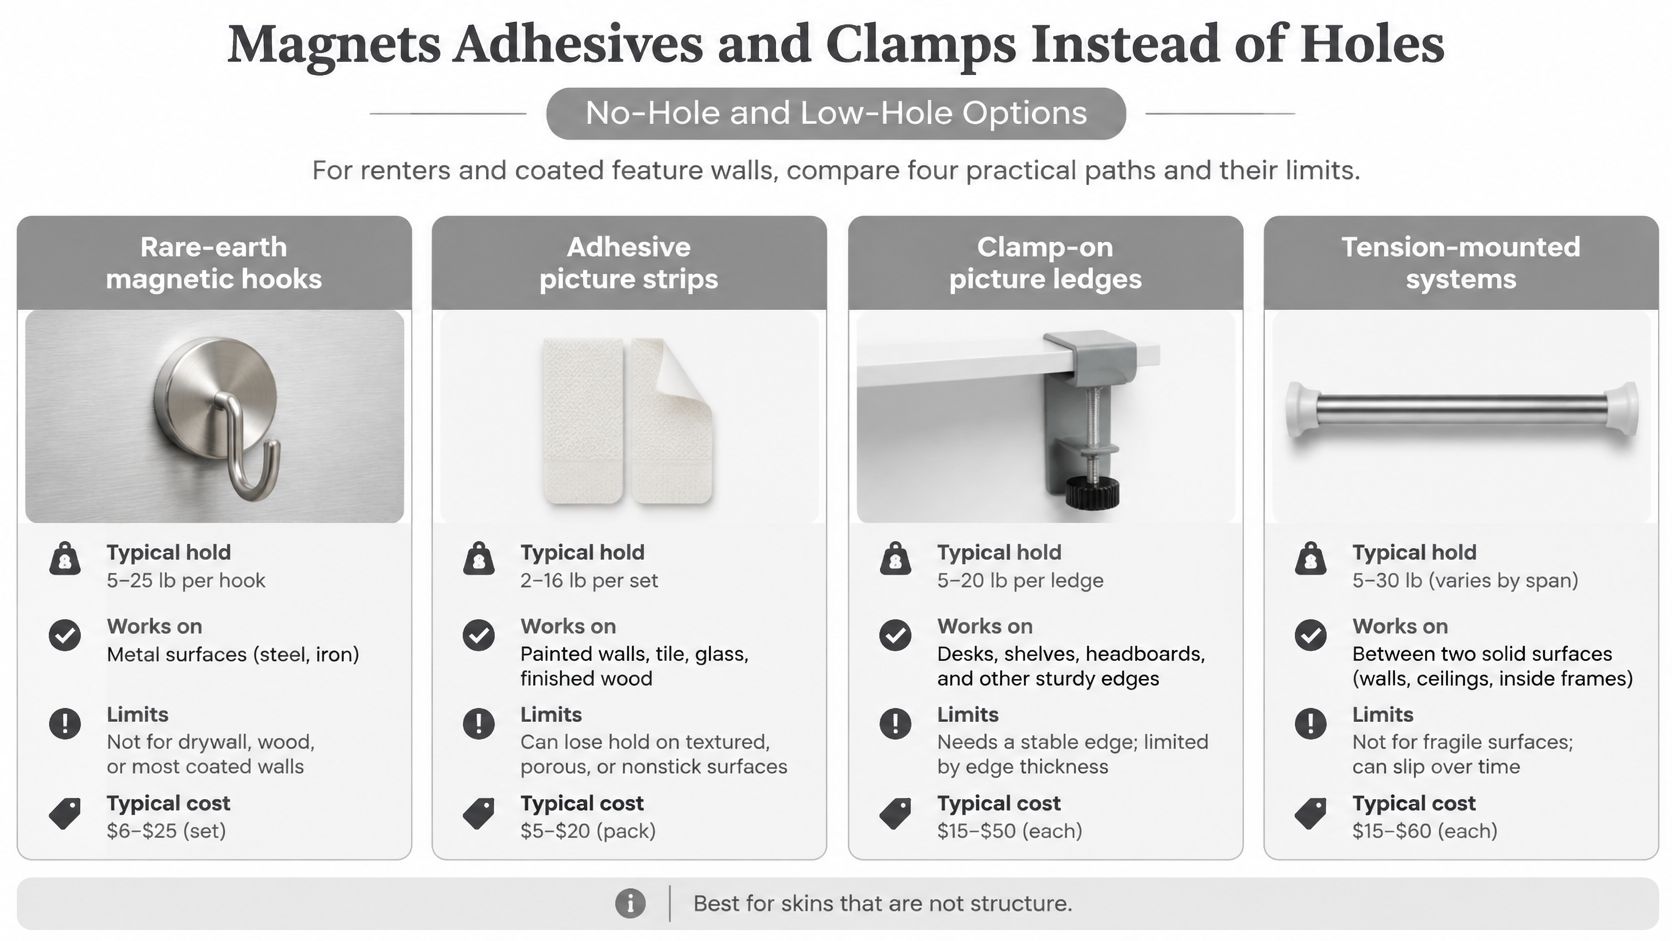
A quick visual comparison helps you keep the drilled and non-drilled paths separate before you start.
Inspect the panel first. Look for rust, bubbling coating, flex around the mark, and outlets or switches that hint at conduit behind the face. Skip a corroded or soft spot entirely. A fastener in weakened metal fails by tearing, not by the screw snapping.
Mark centerline and hanging points. Tape the picture outline, mark the frame's D-ring or wire contact points, set your eye-level datum, and level everything before a bit touches metal. Guessing height after drilling leaves you with a level picture in the wrong place or extra holes.
Drill only the specified pilot. Use the diameter the fastener maker states, a sharp bit made for metal, steady pressure, and a vacuum or magnet to catch chips. An oversized pilot in sheet metal strips immediately. A wandering dull bit heats and discolors the coating.
Deburr both faces. Ease the sharp lip with a deburring tool or a larger bit turned by hand so the washer sits flat. A raised burr holds the washer off the surface, concentrates load on a ring of coating, and scrapes that coating when you tighten.
Install corrosion-matched hardware. Put a washer under the head, use a backing plate or manufacturer-rated toggle in a hollow cavity, and anchor into the stud or rail whenever you can reach it. Where a screw must pass through metal into wood framing behind it, products in the class of Fastgrip Hi Lo metal-to-wood screws illustrate why thread form matters, because the fastener has to clear the metal and still bite properly in the wood member that carries the load.
Stop when the washer seats. Snug is the endpoint on sheet metal. Extra turns dish the panel, crush a hollow partition face, or strip threads you've just cut. If the screw keeps turning, it isn't getting stronger. It's telling you the material has given up.
Hang from two points or a cleat. Use two D-rings hung directly on two screws or hooks for wide work, or a French cleat for heavy pieces, and keep wire from pressing against the artwork back. Add a lower restraint or small bracket in public areas so a bump can't lift the frame off its hooks.
Check and record. Tug gently downward, confirm level, and write down the hardware, the substrate you hit, and the assembled weight you assumed. That note saves the next person from trusting a mystery screw.
The Smithsonian guidance on caring for paintings recommends sturdy, appropriately sized hardware, stud or proper-anchor support for large paintings, double-strand picture wire, and periodic inspection. Follow that inspection habit on metal too. Screws loosen under vibration, wire frays where it bends over a hook, and corrosion at a cut edge reduces capacity.
Watch the full drilling and seating motion once before you try it on a finished panel.
Put screws, hooks, wire, and brackets on a seasonal walk-through list. Check for a frame that has crept out of level, a washer that has cut into coating, or rust staining below a hole. Keep the artwork itself out of heat, direct sun, and unstable humidity even when the screw is sound. A secure fastener doesn't protect paper, canvas, or a wood frame from a bad environment.
Magnets Adhesives and Clamps Instead of Holes
Renters, coated feature walls, and any panel you aren't allowed to puncture need a different answer. No-hole methods work, but each has one honest job. Give it a heavier job and it won't warn you politely. It'll let go at night.
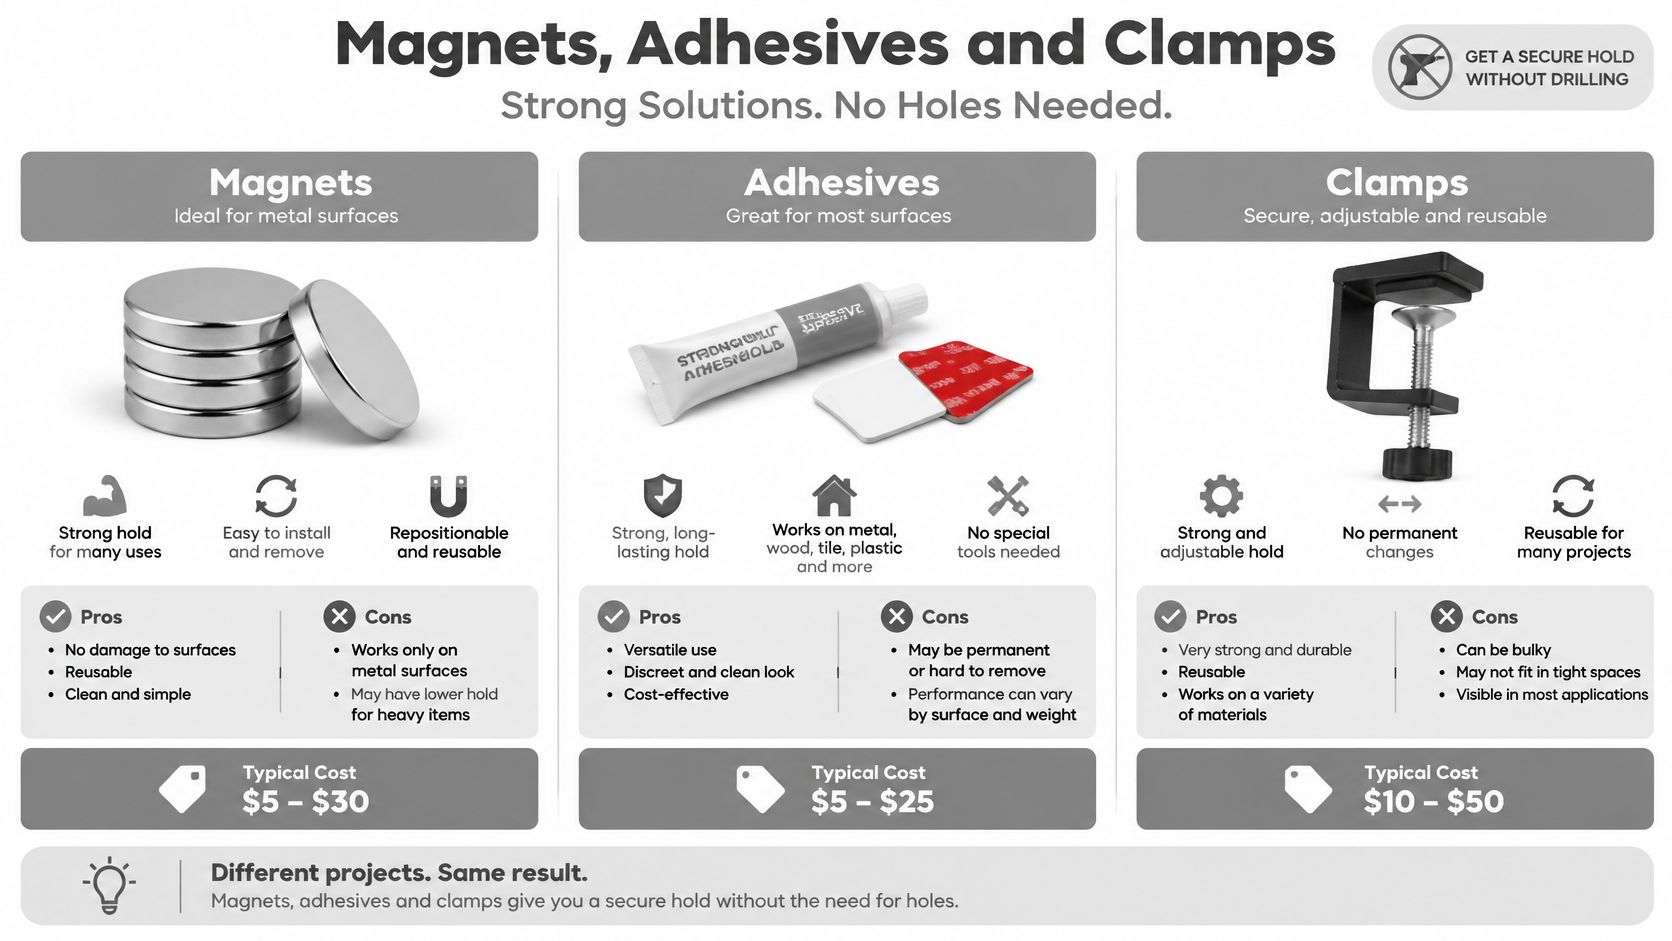
Rare-earth magnetic hooks and magnetic rails hold only on bare or thinly painted ferrous steel. On a steel door skin, a metal-clad column, or a ferrous partition face, a good magnet can carry a light, unglazed frame in a quiet hallway and let you adjust height without new holes. It won't hold reliably on aluminum, most stainless, aluminum composite, or thick paint and filler that keep the magnet off the steel. Shear load matters too. A magnet resists a straight pull better than a slow downward slide, especially on a glossy coating. Products like the Revolink Satellite Gear magnetic mount show how much engineered contact area and magnet strength a serious magnetic fixing needs, which is a useful reality check before trusting a small decorative hook with glass. For more detail on where magnets earn their keep, see our notes on picture hanging magnets and their limits.
High-bond acrylic tape, in the VHB style, can carry a small frame on a smooth, degreased, room-temperature coating if the maker's shear rating covers the assembled weight with margin. Prep decides the result. Clean with isopropyl alcohol, not an oily household cleaner, let the surface dry fully, press the pad firmly across its whole area, and wait the full cure time on the package before hanging. Texture kills it. A rough powder coat reduces contact, heat softens the bond, cold makes it reluctant to wet out, and a lifted corner starts peel that unzips the rest. Removal can pull paint. Test one pad overnight with a scrap board of similar weight before you trust it with a real frame.
Edge clamps and system clips suit office partitions, storefront mullions, and panel systems with an exposed cap or edge. The clip the wall maker designed for that profile is a real support. A generic clamp pinched onto a finished edge is not. It can rock, mar the edge, and walk under vibration. If the clip moves when you load it by hand, walk away.
A short French cleat or rail screwed only into a stud, top track, or steel member is the low-hole option for wider or heavier work. You still make holes, but they land in structure at the top of the panel or along a framing line instead of scattered across the decorative face. The rail then gives you lateral adjustment and two-point support without new punctures for every rearrangement.
No-hole and low-hole mounts compared
Method | Works on | Honest load | Walk away when |
|---|---|---|---|
Rare-earth magnet or magnetic rail | Bare ferrous steel | Light frame, low traffic | Aluminum, stainless, composite, thick paint, mirrors |
High-bond acrylic tape | Smooth, clean, cured coating | Small frame within the tape's shear rating | Powder coat texture, heat, cold, or a corner that can be peeled |
Edge clamp or system clip | Exposed panel edge or office partition cap | Whatever the clip system is rated for | No accessible edge, or a clip that rocks |
French cleat or rail into structure | Stud, top track, or steel member | Wide or heavier work, load shared | Only the decorative skin is available to screw into |
Rule for glazed work: If the piece is wide, glazed, valuable, or hanging where the public walks, skip magnets and tape. Go back to structure.
When the Picture Slips Dents or Pulls Out
Most failures on metal announce their cause if you read the symptom instead of replacing the hook with a bigger version of the same mistake. Start with the two installers see most, the creeping magnet and the spinning screw.
Metal-wall hanging failures and fixes
What you see | Usual cause | Fix |
|---|---|---|
Magnet slides down | Aluminum, stainless, composite, or thick coating | Leave magnets; fasten to stud, rail, or a rated clip |
Screw spins or sheet dishes | Thin skin or overtightening | Stop; add a backing plate or move into framing |
Drywall anchor in a metal face | Anchor chosen for the wrong substrate | Remove it; use a metal-rated toggle or structural screw |
Tape releases at a corner | Peel, dirt, cold, or weak coating | Do not re-stick; switch to a mechanical support in structure |
Frame rotates or sits crooked | One attachment point or uneven wire | Two D-rings or a cleat, set level |
Rust bleed at the hole | Bare steel fastener or unpainted cut edge | Swap to a coated or stainless fastener and touch up the edge |
Panel flexes or a rated wall was drilled | Point load on a skin or a forbidden penetration | Stop and repair the wall before rehanging |
A magnet that creeps down overnight is telling you the face isn't ferrous enough or the coating is too thick for the magnet's grip. Stacking more magnets on the same skin adds weight and false confidence. Move to a stud fixing, a system clip, or a rail. If a magnet held for weeks and then slid after a hot spell or a cleaning with a waxy product, the friction at the face changed. Clean steel may recover some grip for a light piece, but a glazed frame shouldn't depend on friction alone.
A screw that spins, or a shallow dish forming around the head, means the sheet was too thin for the threads or the driver went past snug. Back the screw out. Don't drive a fatter screw into the same torn hole and call it repaired. Add a backing plate that spreads load behind the panel, use a through-bolt with nut and washer where you have rear access, or relocate the fastener into framing. The This Old House guide to choosing the proper fastener warns against relying on a screw's breaking strength rather than its working load and against using drywall anchors in metal sheet. It also sets a field rule of choosing hardware rated for at least two to three times the static artwork weight, valid only when that rating matches the actual wall material and installation geometry.
A drywall anchor pushed into a metal face never engaged a cavity the way its package assumed. The wings or threads designed for gypsum crumble, fold, or spin against sheet metal. Remove it, inspect the hole for tearing, and replace it with a toggle rated for that hollow panel or a screw that reaches structure. Omitting the washer makes this worse, because the head bears on a small ring of coating and can pull through a weakened hole.
Adhesive that lets go at one corner has failed in peel, usually from dust, oil, cold, or a coating that released from the metal under the pad. Don't press the same pad back up. The bond surface is contaminated and the corner will lift again, faster. Clean the area, check whether paint came away with the tape, and switch to mechanical support into structure for anything heavier than a small, unglazed piece. If the coating itself failed, new tape on the same coating will fail the same way.
A frame that's crooked after a week usually has unequal wire legs, D-rings at different heights, or one point carrying nearly all the load while the other acts as decoration. Reset the D-rings level, shorten the long wire leg, or hang each D-ring on its own hook. A single centered point on a wide frame will keep rotating no matter how often you straighten it.
Rust bleed below a hole points to a bare steel fastener or an unsealed cut edge. Swap to a coated or stainless fastener, clean the stain gently, dry the hole, and touch up the edge before reinstalling. On corrugated or exterior panels, seal the penetration as the panel maker directs, or water will follow the screw.
Some fixes are same-day hardware swaps. A wrong anchor, a missing washer, uneven wire, or a corroding screw can be corrected in one visit. A torn hole in thin skin, a dished panel, oil-canning around a fastener, or a punctured fire-rated wall means abandon that hole. Leave it, get the panel or rated assembly repaired properly, and rehang from structure in a new location. The weakest component governs every installation, whether that's the panel, anchor, screw, hook, wire, or frame hardware. Upgrading only the screw while the skin remains the weak link changes nothing.
Decide Between DIY and an Installer
Do it yourself when four conditions line up. You know which wall row you're in, the assembled weight sits inside a published rating for that substrate with at least a two-times margin, the fastener lands in a stud, rail, or thick ferrous sheet you've verified, and any touch-up is a small dab of primer you can reach from the floor. A light, unglazed frame on a known steel stud line is a reasonable Saturday job.
Call for help when any one of these appears. The piece is glazed, wide, heavy, or a mirror. The hang sits above a stair, needs a tall ladder or scaffold, or forms part of a gallery group that must hold one sightline across many works. Drawings show a fire-rated wall or an electrical chase. The only face available is a thin decorative skin, a composite panel still under warranty, or a partition system with its own clip hardware you don't have. Our comparison of DIY versus professional picture installation lays out that cutoff in more detail if you're on the fence.
Colorado Art Services has over 15 years of experience in picture hanging and art handling throughout the greater Denver metropolitan area, and the team handles artwork regardless of its size, weight, or delicacy. We offer a free estimate for art hanging, display, and installation services, for a single residential piece or a large commercial set. If the wall isn't ready yet, we can also store work until the space is finished, so frames aren't leaning in a corridor while painters and electricians work around them.
To get a useful estimate, send four facts. State how many pieces need installing, whether ladders or scaffolding are required, whether any hard surface must be drilled, and the dimensions and weight of the largest piece. Those answers decide crew size, hardware, and access equipment before anyone arrives with the wrong anchors.
Follow the same sequence either way. Pick the wall row, weigh the framed piece as a complete assembly, then buy the matching hardware or send those four facts before a hole is drilled. Hanging pictures on metal walls rewards that order. The wall keeps its finish, the frame stays level, and nobody learns the panel was only a skin by watching it dish around a screw.
If your metal wall turns out to be a thin skin, a rated partition, or the wrong place for a heavy glazed piece, Colorado Art Services can identify the assembly, select hardware that reaches real structure, and install single pieces or full commercial sets level and secure across the Denver metro and Front Range. Send the number of pieces, access needs, drilling requirements, and the largest piece's dimensions and weight for a free estimate before the first hole goes in.
Comments