


Hanging Pictures on Vaulted Walls the Right Way
The most popular advice for a tall room is to shove the art upward until the vault looks “filled.” That habit photographs as busy and fails the moment someone sits down. Hanging pictures on vaulted walls is a load, sightline, and access problem. The slope changes how gravity acts on the frame, how far a person has to look, and how hard a falling piece lands.
A vault is a volume, not spare drywall. I would keep the visual center at normal viewing height, use the slope only as a contour along the tops of a group, and match fasteners and the climb to sideways pull. If the pretty spot sits over a stair, a bed, or a wall you have not opened up, it is the wrong attachment.
Where Pictures Belong on a Vaulted Wall
Start at the furniture and at the line where the wall turns into slope. Do not start at the peak and work down. A Montcarta placement guide puts the centerline near a seated-eye height of about 57–60 inches above the floor, inside the usable band from the furniture top to where the slope begins.
That band is the only part of the wall that behaves like a normal hang. Above it, the surface leans, the frame wants to creep, and viewers tip their heads. Measure from the floor to the top of the sofa, console, or mantel. Then measure to the spring line of the vault. The picture lives between those two marks.
For a seated living room, set the center of a single work at 57–60 inches. If a high sofa back forces a choice, keep 6–8 inches of wall between the furniture and the bottom of the frame, and let the center drift a few inches. Do not float the piece into the curve just to “use the height.” Every frame stays level with the floor. A frame cocked to mimic the vault looks wrong from the doorway.
Rows, stairs, and a mantel
A lone statement piece wants a level horizon. A series can step with the vault when the gaps stay even, often 2–3 inches, and the top edges hold one steady margin under the slope. The bottoms stay tied to the furniture so the group does not turn into a ragged skyline.
On a stair or ramp, offset each center along the rise. A vertical column ignores the steps, puts one frame in someone's face, and leaves the next one out of reach. Above a mantel, leave about 4–8 inches over the shelf so heat, scale, and the view from the seat still work. Tape paper templates, then read them from the sofa and from the doorway with a laser level before any hole.
Situation | Center or gap | Alignment | What to protect |
|---|---|---|---|
Seated living room | 57–60 in to artwork center | Level with the floor | Eye line from the sofa |
Over a sofa or console | 6–8 in above furniture top | Level with the floor | Connection to the furniture |
Single statement piece | 57–60 in, or the furniture gap if they conflict | Level horizon | One focal point, not the peak |
Series under a slope | Even 2–3 in gaps; consistent margin under the slope | Frames level; top contour follows the vault | A ragged skyline |
Stair or ramp wall | Centers stepped with the rise | Parallel to the stair line | A column that ignores the steps |
Above a mantel | About 4–8 in above the mantel shelf | Level with the floor | Heat, sightline, and mantel scale |
Practical rule: If you cannot see the middle of the picture without tipping your head while seated, the hang is too high, no matter how much empty vault sits above it.
Large canvases follow the same band, only with more mass and a longer viewing distance. Our notes on where to hang large artwork cover that scale when one piece has to carry the wall. If the room is still being planned, custom interiors for your living space from Task Masters Inc. help lock furniture height before you commit holes under a slope.
While the templates are up, write down framed width, height, weight, depth, glazing, and the hardware already on the back. A high hang raises handling and fall consequences, so a heavy work gets redundant support and real access gear, not a strip of adhesive.
Scale Light and Mixed Pieces Under a Vault
A tall wall invites too many small frames. In 2024, 79% of 131 interior designers surveyed by Apartment Therapy said they preferred the look of one statement piece rather than a gallery wall. That preference suits a vault. One work sized to the furniture mass reads as a single shape. A scatter of tiny prints fades before the slope and makes the room look unfinished.
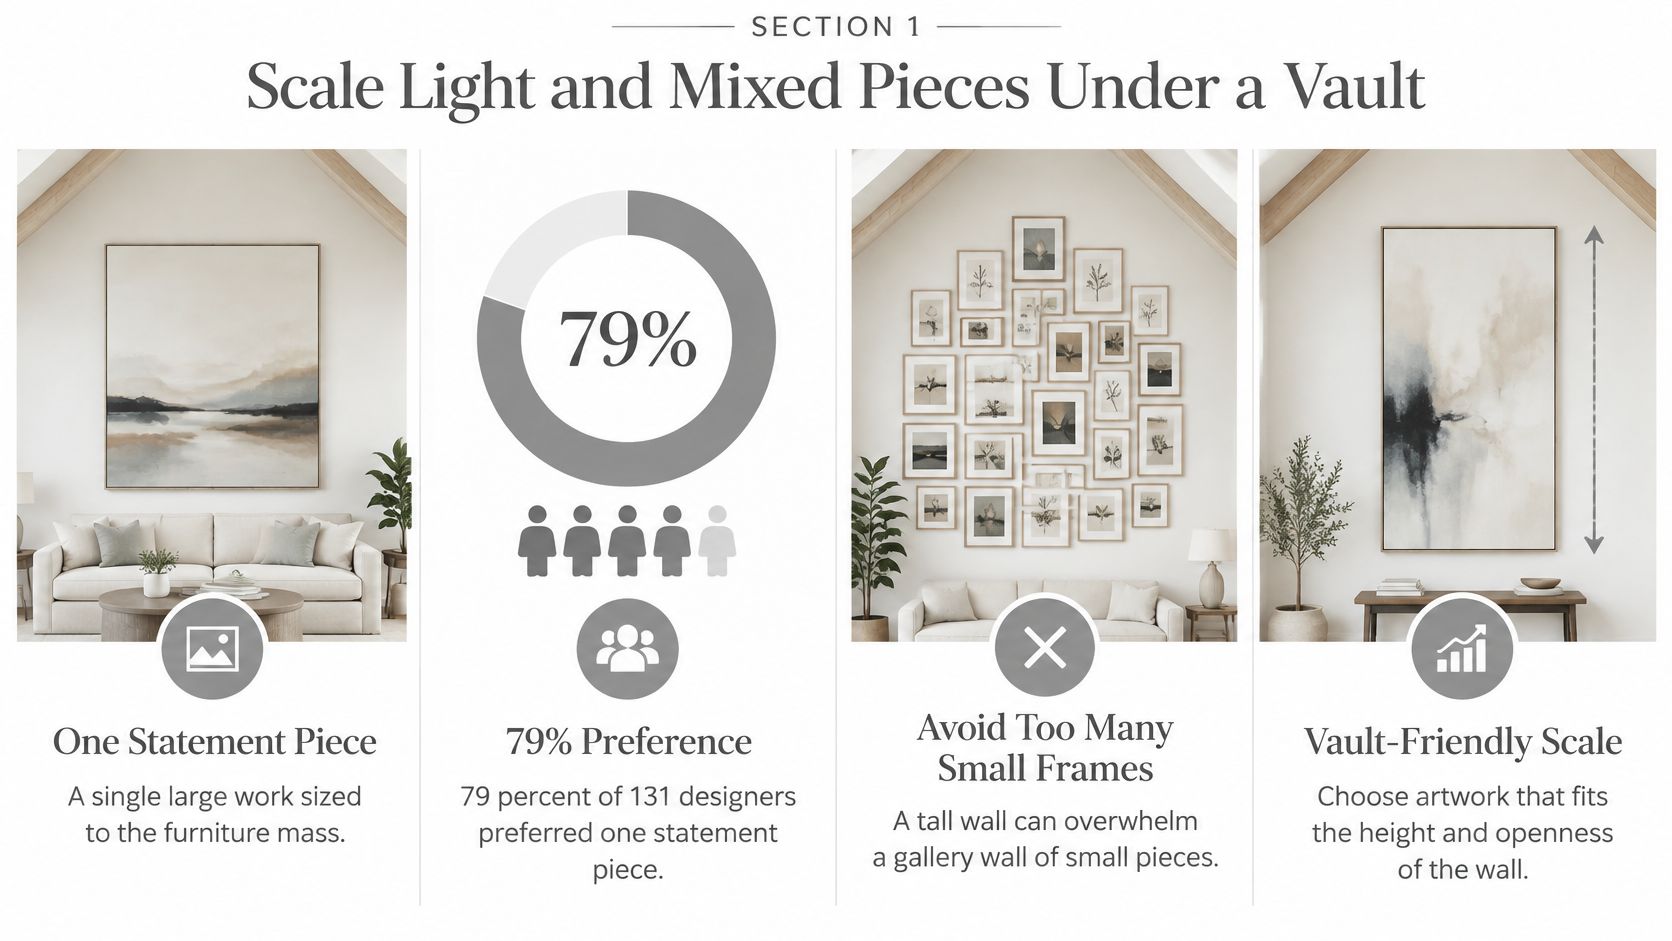
If the usable zone is wide, a large horizontal canvas or a tight pair beats a column of prints. Match width to the sofa or console, not to the peak-to-peak span of the ceiling. Slightly large, relative to the furniture, holds the room. Twelve small frames do not.
Weight order and glare
Keep heavier frames, shadow boxes, and sculpture lower than textiles or works on paper. The view is calmer, and the biggest load stays nearer solid backing instead of on the leaning surface. A 2025 designer survey reported by Authentic Interior found that 46% planned to display more paintings and 41% more sculpture, while searches rose 215% for eclectic maximalism and 135% for fabric wall art. Mixed groups still need one shared baseline. Line the bottoms, or the visual centers, and do not park a heavy box above a light textile.
Check the layout at night and at midday. Skylights and clerestory windows throw glare across glass. Tilting the frame to dodge that glare is a poor fix on a slope, because the tilt adds pry. Use non-reflective glazing, shift the piece off the bright patch, or aim a separate picture light from a screw in a stud. Do not stick a light to drywall you have not identified.
Leave the vault surface mostly clear. The architecture is already the large shape in the room. Art belongs on the vertical band where people look, not pasted along the curve. A mirror under that band needs the same weight order as a glazed frame, because the glass is the hazard, not the image.
Anchors That Match the Slope and the Load
Choose the fastener from the load path, not the bold number on the package. Find a stud or rafter first for anything heavy, glazed, or partly overhead. Two screws into wood beat one hollow-wall anchor. Where the wall is hollow, identify drywall thickness and use an anchor made for that thickness.
A Lowe's hollow-wall anchor guide recommends sizing anchors at roughly 2–3 times the expected load, and notes that some manufacturers say to use only 25% of rated capacity. Published examples run about 25–95 pounds for basic hollow-wall anchors, 140–150 pounds for winged anchors, and 160–265 pounds for channel-style anchors. Thin board, edges, a deep frame that pries outward, vibration, and long-term creep all cut those numbers. They are not a safety rating for a slope.
On a slope, gravity pulls down and sideways. A single hook lets a frame rotate and walk. Add a second point or an anti-lift plate. On a rail, put a physical stop at the low end so the group cannot slide. Adhesive strips and hooks stay limited to very light, unglazed pieces on a clean, flat wall. Glass, mirrors, and anything over a bed, stair, or walkway need mechanical fasteners. Skip a ceiling-only product unless the maker rates it for a sloped wall.
What each fastener is actually for
Fastener | Published capacity | Use when | Do not use when |
|---|---|---|---|
Screw into a stud or rafter | Limited by the screw and wood, not drywall | Heavy, glazed, or overhead frames | The stud cannot be located |
Basic hollow-wall anchor | About 25–95 lb | Light frames on sound drywall, two points if possible | Glass, deep frames, or unverified thickness |
Winged anchor | About 140–150 lb | Medium frames when no stud is available | Edges, thin board, or a single pivot point |
Channel-style anchor | About 160–265 lb | Heavier hollow-wall hangs with correct thickness | Sloped pull or public fall risk without a backup |
Adhesive strip or hook | Maker rates light loads only | Very light, unglazed pieces on a clean flat wall | Glass, slope, heat, or any piece over people |
Rail with a low-end stop | Set by the anchors holding the rail | A row that must not slide downhill | No stop, or anchors only in weak drywall |
A headline capacity assumes a straight pull in sound board. A deep frame on a slope is an eccentric pull, and one fastener becomes a hinge.
Inspect the substrate before you trust it. Tighten until the anchor seats, not until the face of the drywall crushes. Tug for lift and for sideways creep. In a public or high-traffic room, add security hardware so a frame cannot be lifted off. Our anchor selection guide lays out that choice by wall type when the package language is vague. If the hang is part of a larger remodel, Emery Lane Homes luxury renovations are a practical reference for opening walls and confirming framing before the art goes up.
Safe Access and When to Call a Pro
Hardware is the easy part of the conversation. The hard part is who stands under the piece, and how you get back up later to level it. A slope pulls a frame downward and sideways, so migration and rotation are real, and a fall over people is the failure that matters. The photo below is the minimum setup I want before anyone leaves the floor with a frame in hand: one person on a stable ladder, one person bracing it.
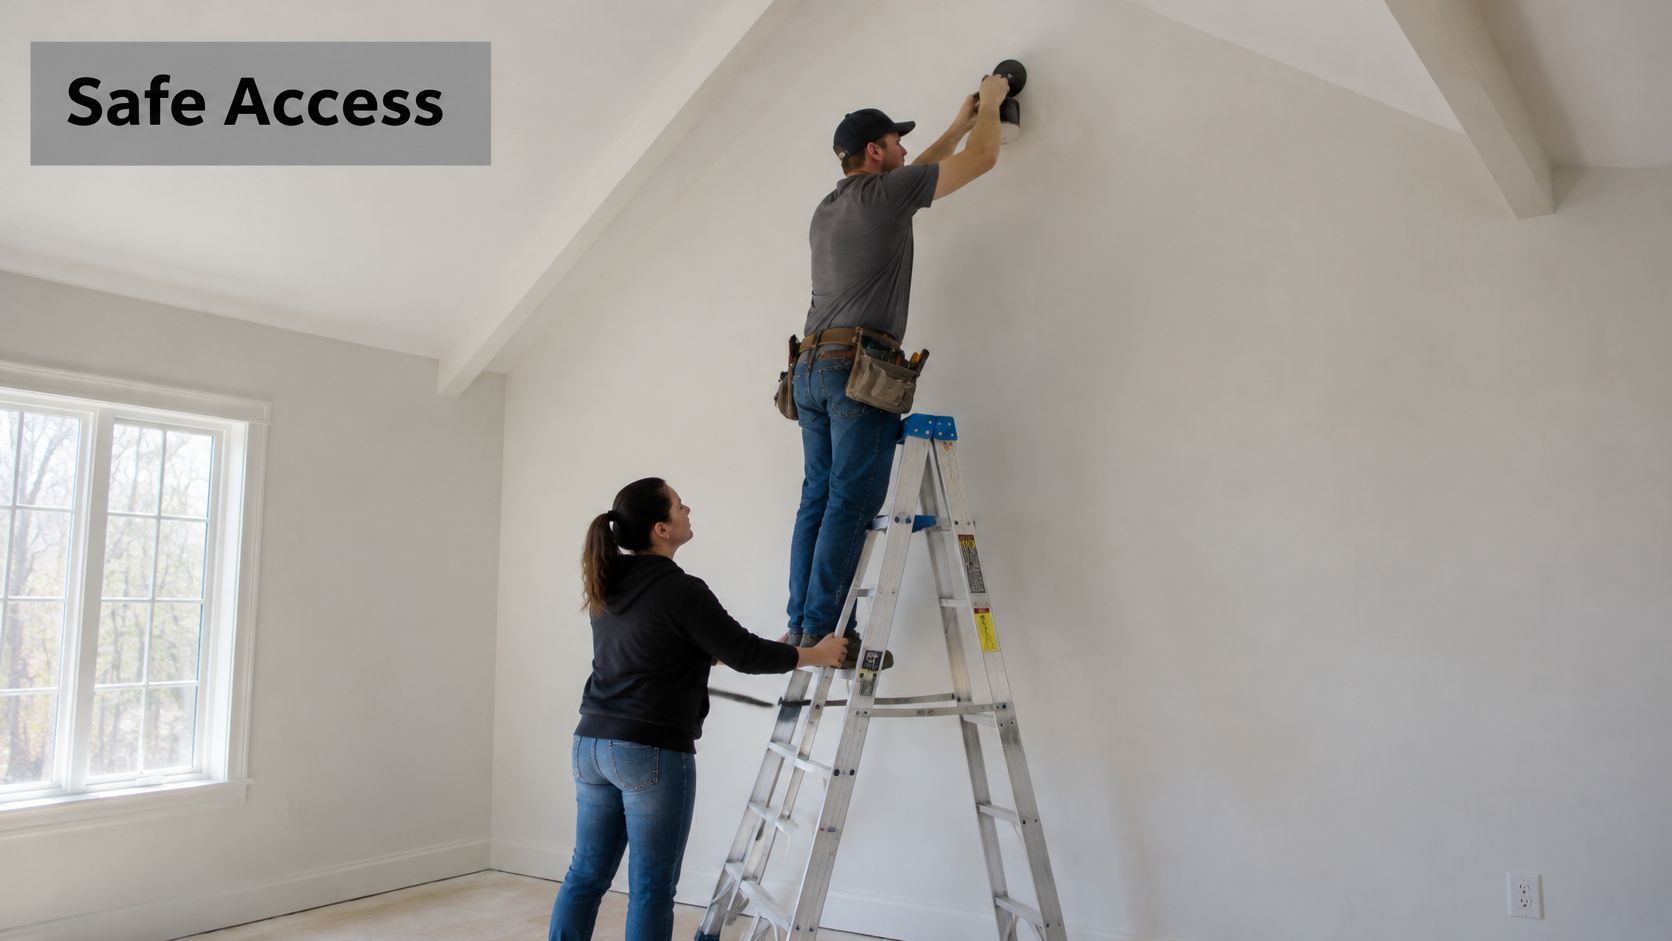
Climb only for the fall path you can control
Use a stepladder only when both feet sit on a rated step, the ladder stands on level floor, and you can control the frame with one hand. Do not lean into the slope, stand on the top cap, or brace a ladder that wants to tip.
Use scaffolding or a rated lift, with a second person, for work above a stair or landing, or any reach past a safe ladder angle.
Carry glass with two people, and clear the floor path before the piece leaves the ground.
Bedrooms, entries, and open stairs need redundant mechanical fasteners, because a fall strikes people. Adhesive is not that fastener.
Plan the later visit for dusting or a re-level. If it needs the same climb, lower the mount.
A Southern West Virginia University hanging-height note treats vault safety as load direction, wall structure, and fall exposure, not a hook size. It separates fastening into rafters, studs, masonry, or hollow drywall when the work sits partly overhead, and it flags bedrooms, stairwells, entryways, and commercial rooms where a falling object can hit someone. For Colorado houses and offices, high placement also means ladders under vaults, seismic movement, and a service visit that is awkward months later.
What is fair to do yourself
A light, unglazed frame on a confirmed stud, reached from a stable ladder in an open room, is a fair DIY job once the centerline and two attachment points are marked. You can see the wall, you can test the screws, and a drop lands on open floor rather than on a sleeper or a tread.
Hire a crew for heavy or glazed pieces, hangs over stairs or beds, masonry or an unknown substrate, or any finish that requires leaning off a ladder. Colorado Art Services has over 15 years of experience in picture hanging and art handling throughout the greater Denver metropolitan area, including high-placement work where the climb is part of the job. The split between a homeowner hang and a crew is laid out in our DIY versus professional installation notes.
Before you request an estimate, have the facts a scheduler uses. Our contact form asks how many art pieces need installing, whether ladders or scaffolding are required, whether the install requires drilling into any hard surfaces, and the dimensions of the largest art piece. Add the weight of that largest piece and photos of the slope and the floor below. Those details decide scaffolding, masonry bits, and whether two people must carry glass.
If you cannot verify the substrate, stop. A low console, a shelf, or a floor-supported stand removes both the unknown anchor and the repeat climb. That is often the better display, not a compromise, when the slope or the wall will not tell you what is behind the paint.
The short clip below shows why a second person and a clear floor path matter once the piece is off the ground. Watch the handoff, not the decoration.
How to Hang the Pictures Step by Step
Run the work in one order. Each step blocks a specific failure, and skipping ahead is how a level frame ends up on the wrong fastener.
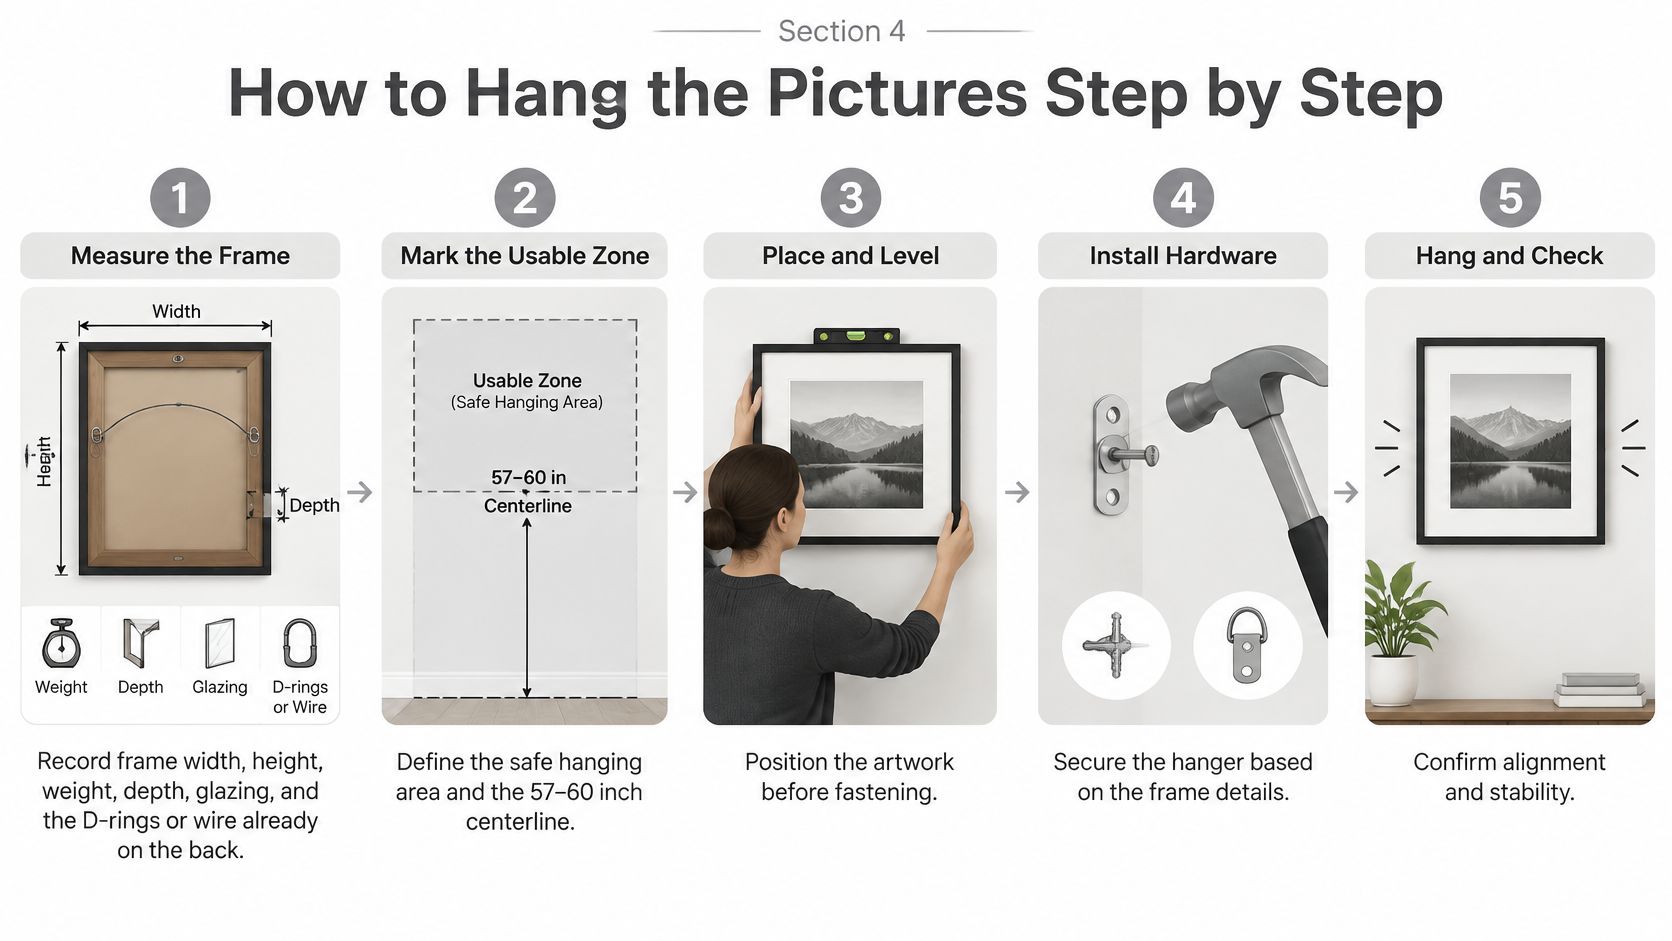
Record the frame. Write width, height, weight, depth, glazing, and whether the back already has D-rings or wire. Guessing weight is how a light anchor gets a heavy mirror.
Mark the usable zone. Set the seated centerline and tape paper templates so you can judge the group from the seat and from the entry. This stops a ceiling-down layout before a bit ever spins.
Name the wall. Scan for studs. Note masonry, metal, or hollow drywall, and pick the fastener that matches that substrate and the weight. A pretty French cleat in the wrong material still fails.
Transfer the holes. Move hook or cleat marks from the template with a laser level. Keep frames level to the floor even when the top contour follows the slope. Vinson Fine Furniture's picture hanging advice is a clear walk-through of that transfer on an ordinary wall, and the same discipline applies when the ceiling is not flat.
Drill only after the marks survive a second look. Use the anchor the wall needs, and set two points on any frame that can rotate. One point is a pivot.
Hang from a stable platform. Seat the hardware fully. Tug-test for lift and for sideways creep before you step down.
Sight the row from across the room. Adjust spacing. Add a rail stop or security hardware if the low end can slide or the room is public.
Stop and switch to a floor console or shelf if you cannot verify the substrate, or if the piece would hang over a stair with no sound anchor. A finished hole in the wrong place is harder to live with than a delay.
Leave the templates up until the tug-test passes. Paper is cheap. Patched drywall on a slope is not.
Colorado Art Services hangs, places, and installs artwork for homes and workplaces along the Front Range, including high placements on vaulted walls where slope, weight, and access all have to be solved together. We plan the layout, match the hardware to the wall, and handle the climb so the piece stays level and secure. Visit Colorado Art Services to request a free estimate and tell us how the vault, the floor below, and the largest piece are set up.
Comments