


Hanging Pictures on Mirrored Walls: Safe Methods Explained
You're standing with a framed print in one hand and a pack of adhesive strips in the other, looking at a mirrored wall that runs floor to ceiling. The mirror's already doing a lot of work in the room, bouncing light and doubling everything opposite it. Hanging pictures on mirrored walls isn't like hanging on drywall. The glass won't forgive a bad anchor, the backing won't forgive the wrong adhesive, and a frame placed a few inches off can spend all day reflecting a window straight into your eyes. Start with weight and consequence, not with whatever hardware's in the drawer.
Choose a Mounting Method by Weight and Risk
The method follows two things: how much the piece weighs, frame, glazing, and hardware included, and what breaks if it falls. A lightweight print you can replace is a different job from a glass-backed original hanging over a sofa. Pick the wrong row in the table below and you've either overbuilt a simple job or trusted tape with something it was never rated to hold.
Adhesive Tape and Its Limits
Adhesive is the most common shortcut, so it's worth being exact about it. One 3M mirror-mounting tape specification rates the product for up to 5 kg, or approximately 1 kg per 20 cm of tape, with an application range of 10–37°C and a required 60-second pressure application. That number assumes a flat, clean, dry surface with no silicone residue, dust, cleaner film, or moisture, plus continuous contact with no gaps.
On a mirrored wall, those assumptions erode fast. Glass flexes, the silvered backing can fail behind the tape, condensation and thermal cycling work at the bond, and a frame that projects from the surface creates peel forces that pry at the top edge every time the room vibrates. Treat the rating as a ceiling for a light, low-value piece you tested first, not as a safety factor. Our guidance on what picture hanging command strips can and can't hold covers that failure pattern in detail.
Mounting Methods by Load and Risk
Method | Load guidance | Use it for | Main risk |
|---|---|---|---|
Adhesive mirror tape | Up to 5 kg per one 3M specification, about 1 kg per 20 cm of tape | Lightweight, low-value décor only | Peel forces, glass flexing, residue and backing failure |
Closed eye-hooks or cleats fixed to the frame | Rated by the hardware maker; use two points for large pieces | Medium frames that can be tied to a structural anchor | Hardware driven into drywall alone pulls out |
Rated toggle or structural anchor | Manufacturer rating, reduced for pull-out, vibration and standoff | Heavy pieces where no stud or blocking is reachable | Drilling near the mirror edge needs an assessment first |
Professional anchored support | Engineered for the piece weight and mirror construction | Valuable, heavy or public-facing art | Needs site access and a pre-install assessment |
For anchored work, closed eye-hooks or cleats fixed to the frame spread the load across the frame's rails instead of a single wire point. A rated toggle or structural anchor helps when no stud lines up, but you reduce its printed capacity for standoff distance and installation error. Professional anchored support puts an independent load path into the structure so the mirror carries nothing.
Practical rule: If the frame outweighs the tape rating, or you can't replace the piece, move down one row in the table before you touch a drill.
Check the Mirror and Wall Before You Drill
The drill is out, the frame is ready, and the mirror still has to work as both composition and load path. A bright face can hide backing that has already let go. A failed bond drops the panel and the picture. A hole in the viewing field shows up twice.
Older sheets often separate at the edges and behind old mounting points. The glass can look sound in the center and still fail where moisture and hardware meet.
What to Inspect in Order
Edges and backing signs: Look for black spots, edge peeling, bubbles, and small chips, especially along the bottom edge where moisture sits.
Bond and movement: Press gently near the corners. Any flex, clicking, or give means the panel isn't firmly bonded and shouldn't take added load or pressure.
Structure behind it: Run a stud finder on exposed wall nearby to locate studs, blocking, or metal framing. Don't drill the glass to find out.
Moisture sources: Note showers, sinks, and exterior walls. Condensation and heat cycling weaken adhesive and backing over time.
If you're comparing newer panels while you plan, browsing the SanCub LED mirror collection gives a sense of how modern units are framed, lit, and mounted, which is a useful contrast to an older bonded sheet.
Before you mark a hole, stand where you use the room and see whether the hardware would sit in the reflection. Then ask what fails if the anchor pulls: a heavy frame into the glass, and a panel you may not be able to replace. I would not drill or tape a loose, delaminating, or damp sheet until it is assessed.
Measure the artwork with frame and glazing on, and estimate the center of gravity by balancing the piece on two fingers at the back. Hardware has to sit at that point so the load stays on the frame and the wall, not on the glass.
Plan the Layout to Control Glare and Reflections
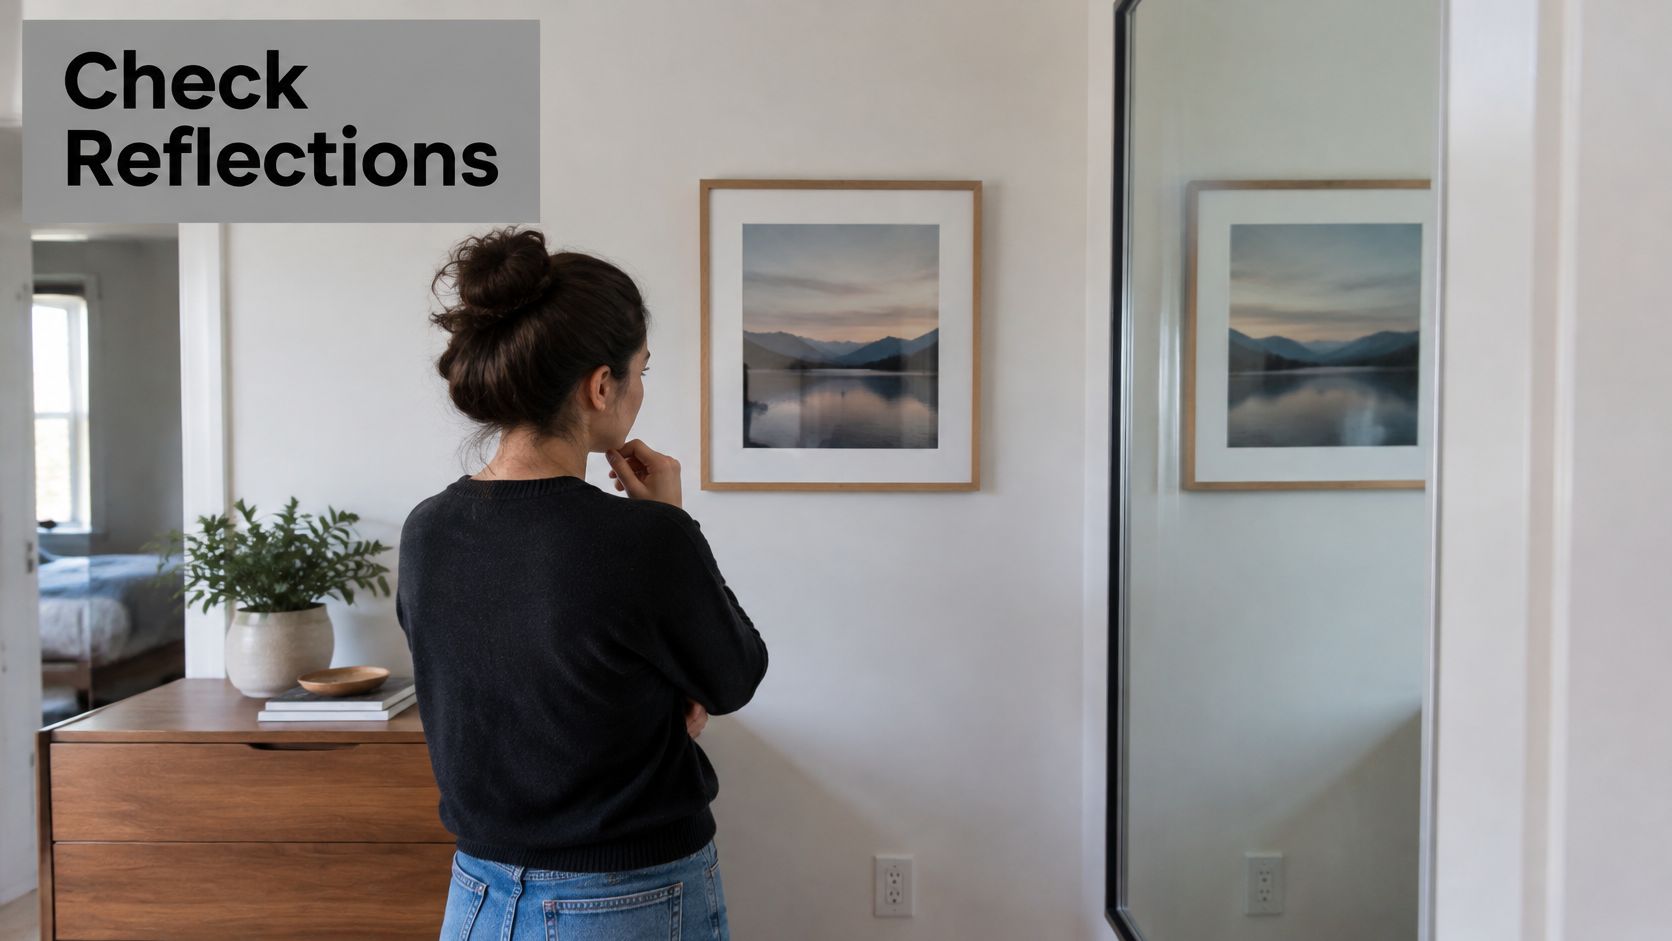
A framed picture that looks calm on a blank wall can turn into a second window once it hangs opposite glass. The mirror doubles the picture, and it doubles the window behind you, the television, the mail pile, and every downlight in the room. Placement is a composition decision with a load consequence, because the spot that reflects badly is often the spot you will want to move after drilling. Mock the piece up with painter's tape and run a reflection audit first. Tape is cheap to move. Holes are not.
Run the Audit From Real Positions
Sit on the sofa. Stand in the doorway. Stand where you wash your hands or check your hair. From each position, note what the mirror shows and whether the taped outline improves that view or fights it. Guidance on using mirrors in interior design recommends indirect or diffused lighting, avoiding direct fixture-to-mirror sightlines, and keeping ambient illumination around 300–500 lux for controlled light. That range is a starting point, not a guarantee. A bright pendant at seated eye level will still show up in the glass.
Test at midday and again after dark. The room changes completely, and a placement that is calm in daylight can catch a bare bulb at night and throw it at seated eye level. Watch for a second mirror in the reflection too. Two opposed panels create an endless loop that makes the artwork hard to read. Cleaning haze matters as well; the question of when Valley homeowners should skip DIY mirror work turns on the same issue, because a smeared panel distorts every judgment you make about glare.
Place the Piece Against the Reflection
Keep the artwork's visual center out of the direct glare line at seated height. Leave a reflected focal point, a plant, a doorway, a piece of furniture, unobstructed so the mirror still opens the room. Avoid a spot where the frame's reflection overlaps a second picture, which reads as clutter from most angles. Rank each taped placement by what a failed fixing would hit: a sofa back is forgiving, a walkway or glass table is not. That ranking should decide the mounting method before you commit.
Our notes on art installation lighting that controls glare go deeper on fixture angles for reflective walls. Walk every primary viewing zone one last time with the tape in place. If the reflection holds up from all of them, in both light conditions, then you can drill. If it does not, move the tape, not the hole.
How to Hang a Heavy Frame Safely
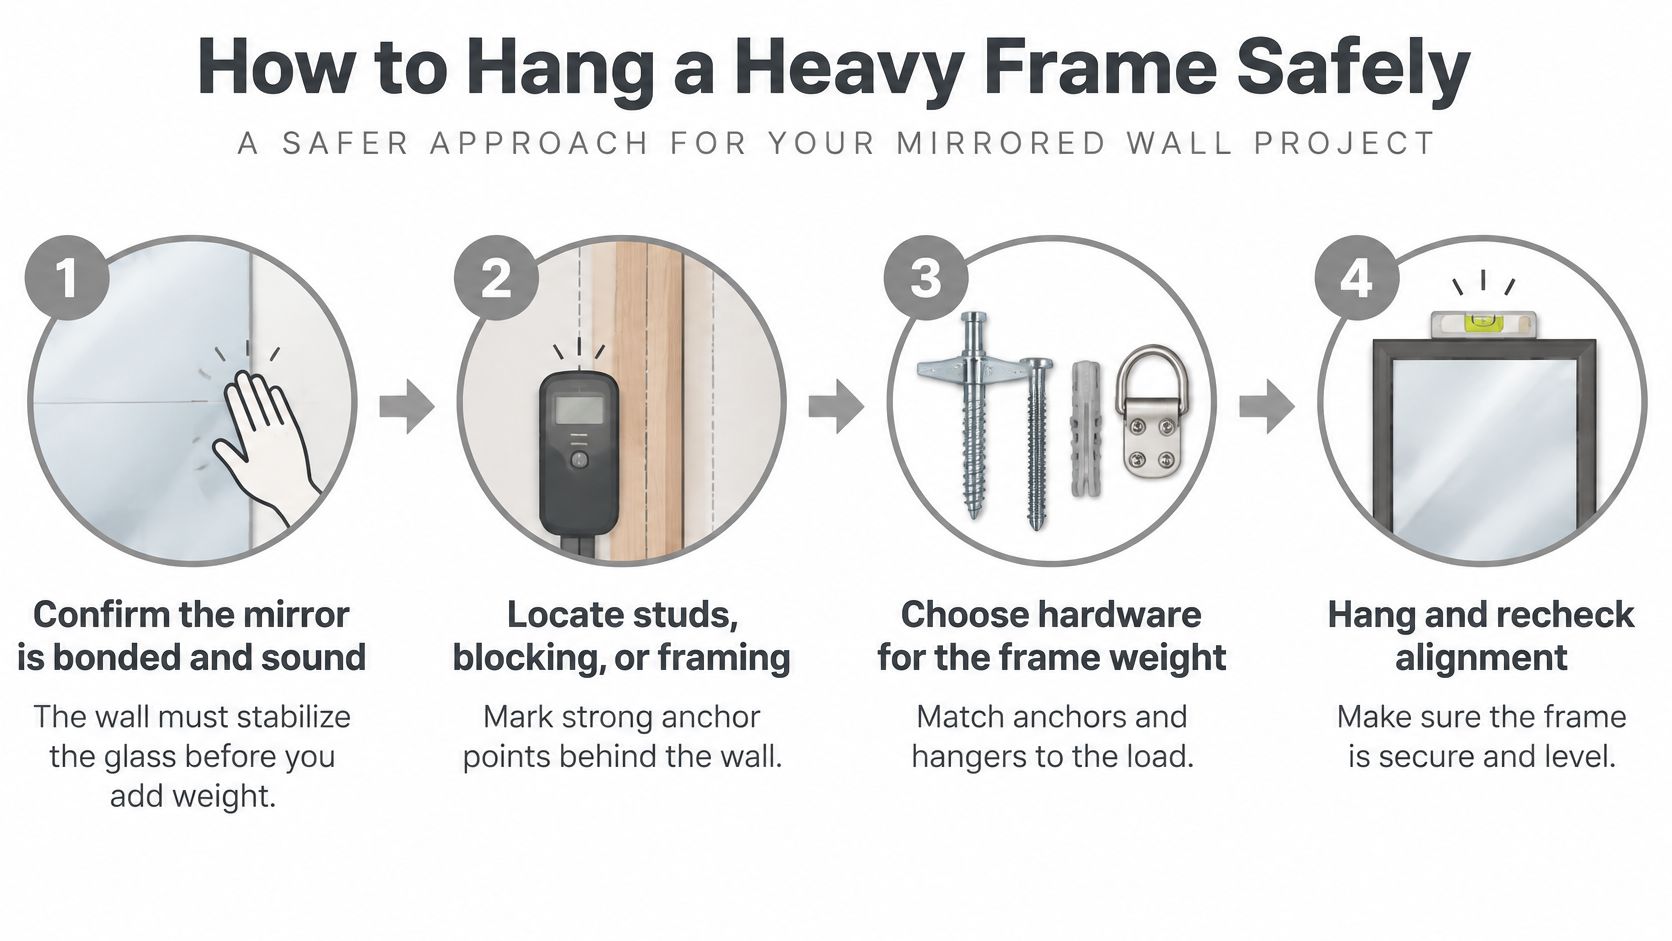
Heavy means mechanically supported. The load path runs from the frame into structural hardware into framing, and the mirror glass carries none of it. Work through these steps in order, because each one depends on the last.
Steps 1 to 4 Cover Structure and Load
Confirm the mirror is bonded and sound. A loose panel can't be stabilized by the picture hanging over it. If it moves under gentle hand pressure, the install waits.
Locate studs, blocking, masonry, or metal framing. Mark your findings on painter's tape at the painted edges, not on the glass. A common slip is marking the mirror face with pencil, which smears into the surface and is miserable to clean off.
Weigh the piece and find its center of gravity. Use a bathroom scale with the frame in your arms if you have to. The hanging points need to sit either side of that center so the frame doesn't rotate.
Choose two attachment points where possible. The National Park Service museum handbook guidance on hanging heavy framed objects relays FEMA's notes that large pictures and mirrors are more stable on two hooks than one, that hooks should penetrate framing rather than drywall alone, and that FEMA recommends hooks approximately 1–2 inches long when sufficient wall penetration is available.
Steps 5 to 8 Cover Hardware and Protection
Fit closed eye-hooks, a cleat, or a hanging rail to the frame itself. Check every screw in the frame hardware and replace anything stripped or corroded. Open hooks can lift off under vibration, so closed eyes are the safer default.
Anchor into the structure. Use screws or structural hardware long enough to enter the stud or blocking, not just the drywall skin. Where structure isn't reachable, use a rated metal toggle matched to wall thickness and reduce its capacity conservatively for pull-out, vibration, and standoff distance. Hardware embedded only in drywall or plaster is likely to pull out.
Level it and add a secondary anti-tip restraint. A short restraint cable or locking cleat keeps the bottom edge from kicking out if someone bumps the frame. Level it after the restraint is on, not before.
Keep the frame off the glass. Fit felt bumpers or spacer blocks at the lower corners so wood and metal never touch the mirror face, with a spacer wherever the frame sits proud. Avoid heavy pieces above beds, chairs, or sofas entirely, since that's where a failure lands on someone.
A frame that touches the glass will eventually mark it. Bumpers cost almost nothing and keep the whole load on the hardware, where it belongs.
Recheck everything after 24 hours. Spacers shift under load, toggles settle, and a frame that was level at noon can creep by morning. Look for new movement at the anchors and confirm the bumpers are still seated before you call it done.
When a Professional Should Handle the Install
A failed hang on a mirror breaks twice. The frame hits on the way down and the mirror panel takes the load, so one slip can mean repairing the artwork and replacing a full sheet to match. The Home Depot guide to picture and mirror hangers reflects common manufacturer guidance excluding valuable or irreplaceable objects, mirrors, and situations where failure could cause injury from adhesive products.
Start with consequence, then choose the tier. Lightweight, replaceable decor within the tape rating can stay a DIY hang after a compatibility test in a hidden spot and a full clean and dry. A medium frame with reachable studs or blocking moves to two anchored hooks set into structure. Heavy, valuable, or glass-backed pieces belong on independently anchored support that never relies on the mirror or its adhesive bond.
Traffic pushes the decision up. In a hallway, entry, or child-accessible room, rated clips, cleats, lower-edge support, safety film, or laminated glass pay for themselves. Our comparison of DIY versus professional installation trade-offs walks through that judgment in more detail. If the mirror is loose, delaminating, or on a wet wall, stop. No method is sound until the panel itself is stable.
Clean glass reads easier than streaked glass when you audit edges and corners for chips and silvering loss. Standard glass care applies here, and this resource on clearer mountain views for local homeowners covers the same wipe-down and inspection habit for windows.
Bring numbers when you call for help. The contact form asks how many art pieces need installing, whether ladders or scaffolding are required, whether the install requires drilling into any hard surfaces, and the dimensions of the largest art piece. Colorado Art Services has over 15 years of experience in picture hanging and art handling throughout the greater Denver metropolitan area. Have the weight and the mirror condition written down too, and the quote stays short and accurate.
Confirm the Hang and Book the Right Help
Don't judge the install in the first five minutes. Run the checks in order and let the hardware settle.
The Post-Install Checklist
Confirm level and restraint. The bubble should sit centered and the anti-tip restraint should be fully seated, not just hooked.
Press the lower corners gently. Watch whether the frame shifts or slides against the glass. It shouldn't move at all.
Wait 24 hours and recheck. Inspect the anchors, the adhesive edges if tape was used, and the mirror for new chips, lifting, or movement.
View it under evening light. Sit down, then check from the entry. New reflections appear once the piece is up and the lamps come on.
If any check fails, take the piece down and reassess the anchors before re-hanging. Re-driving a failed anchor into the same hole is how second failures happen.
Decision rule: Lightweight, replaceable, and passed every check means the DIY route stands. Heavy, valuable, glass-backed, or in a busy room means it moves to the professional route before you add another piece.
Do one thing today. Write down the piece's weight, its largest dimension, and the mirror's condition, and keep those figures with the frame. If you book help, we offer a free estimate for art hanging, display, and installation services, and those three numbers make the first conversation short and accurate.
Hanging pictures on mirrored walls is exactly the kind of job where a measured load path and a checked reflection save you a cracked panel, so if your piece is heavy, valuable, or headed for a high spot, let our installers anchor it into structure and level it properly. Visit Colorado Art Services to request your free estimate and tell us the piece count, largest dimensions, and wall type so we can quote the install accurately.
Comments