


Hanging Pictures on Angled Walls Without Drift
“Just follow the ceiling line and use a stronger hook” is poor advice for hanging pictures on angled walls. A frame can look crooked even when its hardware is level, and a hook that carries the weight may do nothing to stop the bottom swinging away. Start by separating how the picture should look from how the wall slopes, then design the attachment and restraint around both.
Why a Sloped Wall Changes the Hang
Hold a bubble level against an attic wall and the result may feel contradictory: the bubble centers across the frame, yet the picture still looks wrong from the doorway. The tool isn't necessarily inaccurate. You're asking it to answer a viewing question using the wall as the reference.
First distinguish a wall that leans from a vertical stairwell wall with a diagonal ceiling above it. The latter may allow a conventional upright installation. An inclined surface changes how the frame meets the wall and how its weight reaches the fasteners.
Separate the wall plane from the picture plane
Say you're placing a framed print beneath a loft roof. You can make its back follow the roof pitch, hold the image upright with supports projecting from the slope, or use a rail-and-mount arrangement that establishes a separate picture plane. Those choices produce different shadows, clearances, and viewing angles.
The Guggenheim provides a useful architectural precedent. The Solomon R. Guggenheim Museum account published by La Casa de la Arquitectura describes a spiral ramp rising at a 5% slope and walls tilted approximately 97 degrees, with Wright intending an easel-like presentation and museum administrators adopting horizontal metal bars and other mounting approaches.
The residential lesson isn't to copy museum hardware. It's to recognize that the wall doesn't have to determine the picture's orientation. A frame held visually upright may need a deliberate gap behind it rather than an attempt to force every corner flush.
Measure the relationship between the frame and the slope before selecting that gap.
Read the surface before choosing a position
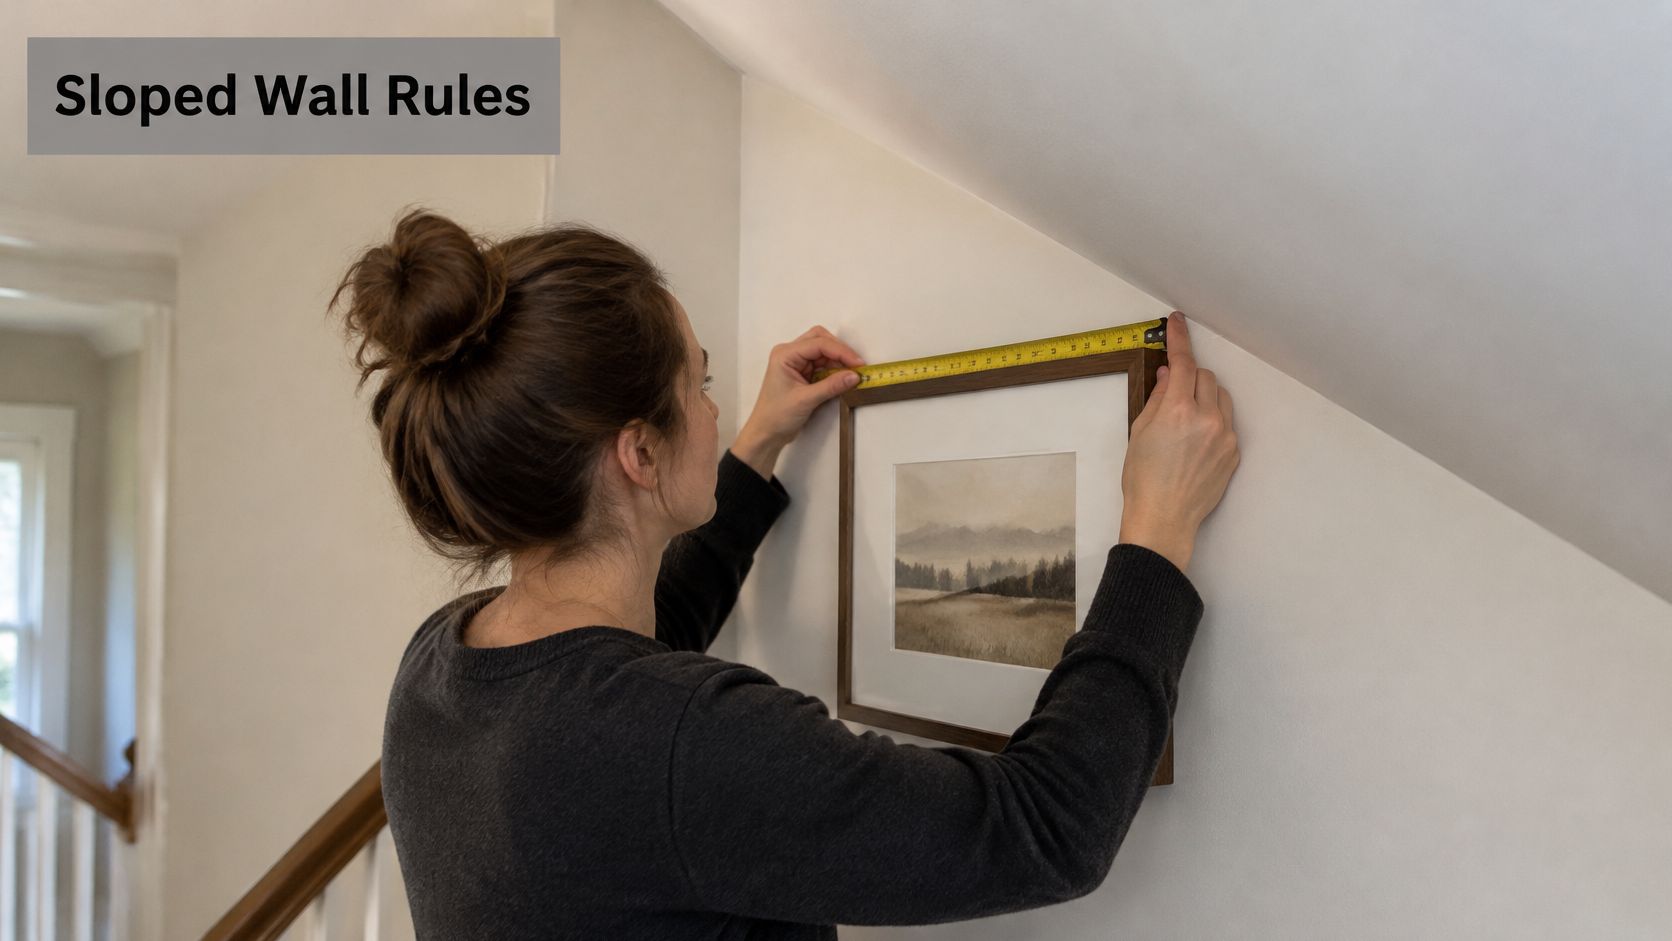
Record whether the wall leans toward the room, away from it, or changes direction across the installation. Use a digital angle finder and a plumb reference, not the ceiling trim alone.
Identify the construction. Drywall, plaster, masonry, and concrete require different fastening decisions.
Map the space below. Note furniture, stairs, and places where people might touch the frame.
Inspect the frame depth. A deep shadow-box frame behaves differently from a shallow print frame.
Choose the intended presentation. Decide whether the artwork should follow the slope or remain upright before marking holes.
Practical rule: Establish visual plumb from the room, then engineer the connection back to the wall.
Hardware That Holds on a Slope
Attachment and restraint by slope and weight
The weight bands below are illustrative planning categories, not tested capacities or automatic approval to install.
Situation | Primary attachment | Extra restraint | Working note |
|---|---|---|---|
Under 10 lb, gentle slope | Paired D-rings into studs | Felt bumpers at the lower edge | May follow the slope; bumpers aren't positive restraints |
10 to 20 lb on a stair or knee wall | Rigid cleat or paired D-rings into studs | Lower bumper or small retainer | Use the selected fastener's allowable load, not a generic drywall allowance |
About 40 lb or heavier | Studs or blocking only | Bottom tether or cleat | Don't add drywall-anchor ratings together |
Steep, curved, or attic slope | Rail, bar, or paired suspension points | End stops or a tensioner | Verify that the system is intended for inclined installation |
Above a bed, stair, seat, or walkway | Structural attachment | Secondary anti-tip restraint | Projection and impact matter more than décor style |
A technical bulletin available through McMaster-Carr's drywall-anchor information recommends limiting ultimate laboratory values to 25% for working loads; its cited half-inch drywall assembly produced 79 lb ultimate tensile and 81 lb ultimate shear, implying nominal working limits of about 20 lb for that assembly, not every anchor or angled installation.
Ultimate strength isn't an allowable hanging weight. Substrate condition, hole quality, bolt size, and distance from the wall affect the result. A frame projecting outward also creates force that a simple downward-weight comparison misses.
Match the connection to the frame
Paired D-rings suit frames with sound side rails and enough material to accept the screws. They offer adjustment, but the receiving hardware must keep the rings engaged in the installed orientation. Open hooks aren't automatically suitable when the frame can lift or rotate.
A rigid cleat spreads the connection across a broader section of the frame and helps control rotation. Check its engagement direction: a cleat that works by dropping vertically into place may need a locking feature on an incline. Don't assume an ordinary cleat will remain seated when the frame is pulled outward.
A rail or bar system offers flexibility where artwork changes frequently. Its trade-off is extra hardware and a need to control movement along the rail, not merely suspend weight beneath it.
For valuable objects, HD Asian Art's mounting guidance for Asian art collectors offers useful context for thinking about the mount as an object-specific support rather than an interchangeable hook. The same mindset matters when a fragile frame limits where screws can go.
Specify the wall fixing separately
The frame-side fitting and the wall anchor are different parts of the connection. A strong cleat attached to weak backing still leaves a weak installation.
Use our anchor selection guide to distinguish substrate choices before buying fasteners. Toggle-style anchors belong only in assemblies that match their instructions and tested conditions.
A felt pad controls contact and protects the finish. It doesn't capture a frame that's trying to leave the wall.
Choose the lower restraint deliberately. If the geometry creates pull-away, a bumper alone isn't the answer.
How to Hang the Picture on the Slope
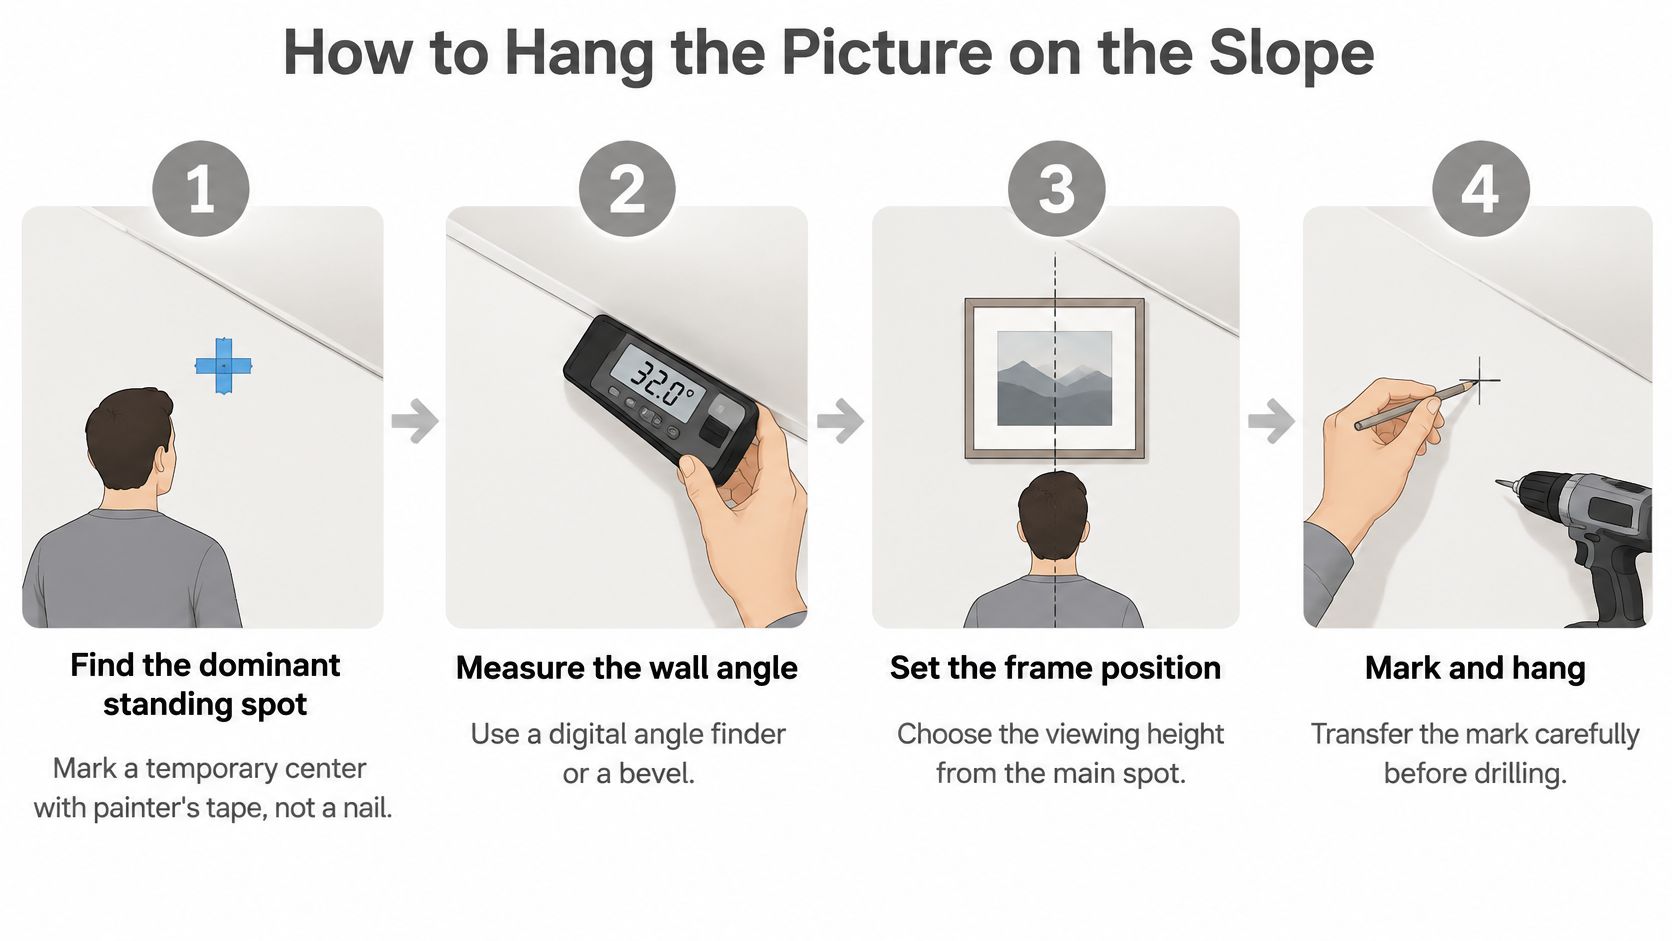
Use a controlled sequence rather than holding the frame up and improvising the fixing positions. Prepare a tape measure, painter's tape, digital angle finder, stud finder, scale, drill, and suitable frame-side hardware before lifting the artwork.
This overview shows the positioning sequence; the restraint checks still need to happen before the installation is complete.
Establish the geometry
Choose the dominant viewing position. Stand where someone naturally pauses, not directly beneath the proposed frame. Mark a temporary picture center with painter's tape and leave it adjustable.
Measure the wall angle with a digital angle finder, or compare a bevel gauge against a plumb reference. Record the direction of lean as well as the reading. A measurement without direction won't tell you which edge needs spacing or capture.
Weigh the complete assembly. Include glazing, backing, frame, and attached mounting components. Locate studs or blocking, verify the substrate, and check for concealed services before drilling. A stud-finder signal alone isn't a complete drilling clearance.
Inspect the frame back and identify where it can safely receive hardware. Note an off-center weight distribution, such as a heavy decorative lower rail. Don't try to find the center of gravity by balancing valuable glazed artwork on an edge.
Transfer the position to the fixings
Fit the frame-side hardware and measure from its engaged position. With D-rings, account for where each ring bears on its support; with a cleat, measure from the seating edge. The top of the frame isn't the fixing height.
Transfer those offsets from the taped picture position to the wall. For a refresher on accurate marking, Tip Top Furniture & Mattresses explains how to hang pictures precisely. On a slope, also preserve the planned stand-off distance so the final image plane matches the mock-up.
Install the structural connections, then seat the frame with support. Keep a helper holding the artwork while you confirm engagement. Tighten fittings snugly without crushing the wall finish or distorting the frame.
For heavier work, follow the load-path approach described in the art-storage rack guidance from MH USA: identify the substrate, select fasteners with published allowable capacity exceeding the expected load, and provide secondary restraint rather than assuming the attachment points share weight equally.
The video can supplement the marking and handling sequence, but the chosen hardware still needs to suit the actual slope.
Finish with capture and inspection
Fit the lower retainer before releasing support. Adjust a tether, locking plate, or captured cleat so it prevents unintended movement without bending the frame. Keep metal fittings clear of the artwork and glazing.
Check the side edges from the entrance and normal approach path. Confirm that the hardware is seated and the frame doesn't rock under a gentle handling check. Don't proof-test the installation by yanking on the artwork.
Leave the painter's tape in place until the final sightline is accepted. If the frame needs repositioning, support and unload it before adjusting the connections.
Composition Across a Changing Plane
A gallery arrangement can be mechanically straight and visually confused. The common mistake is using the angled ceiling as the alignment reference for some frames and the floor as the reference for others.
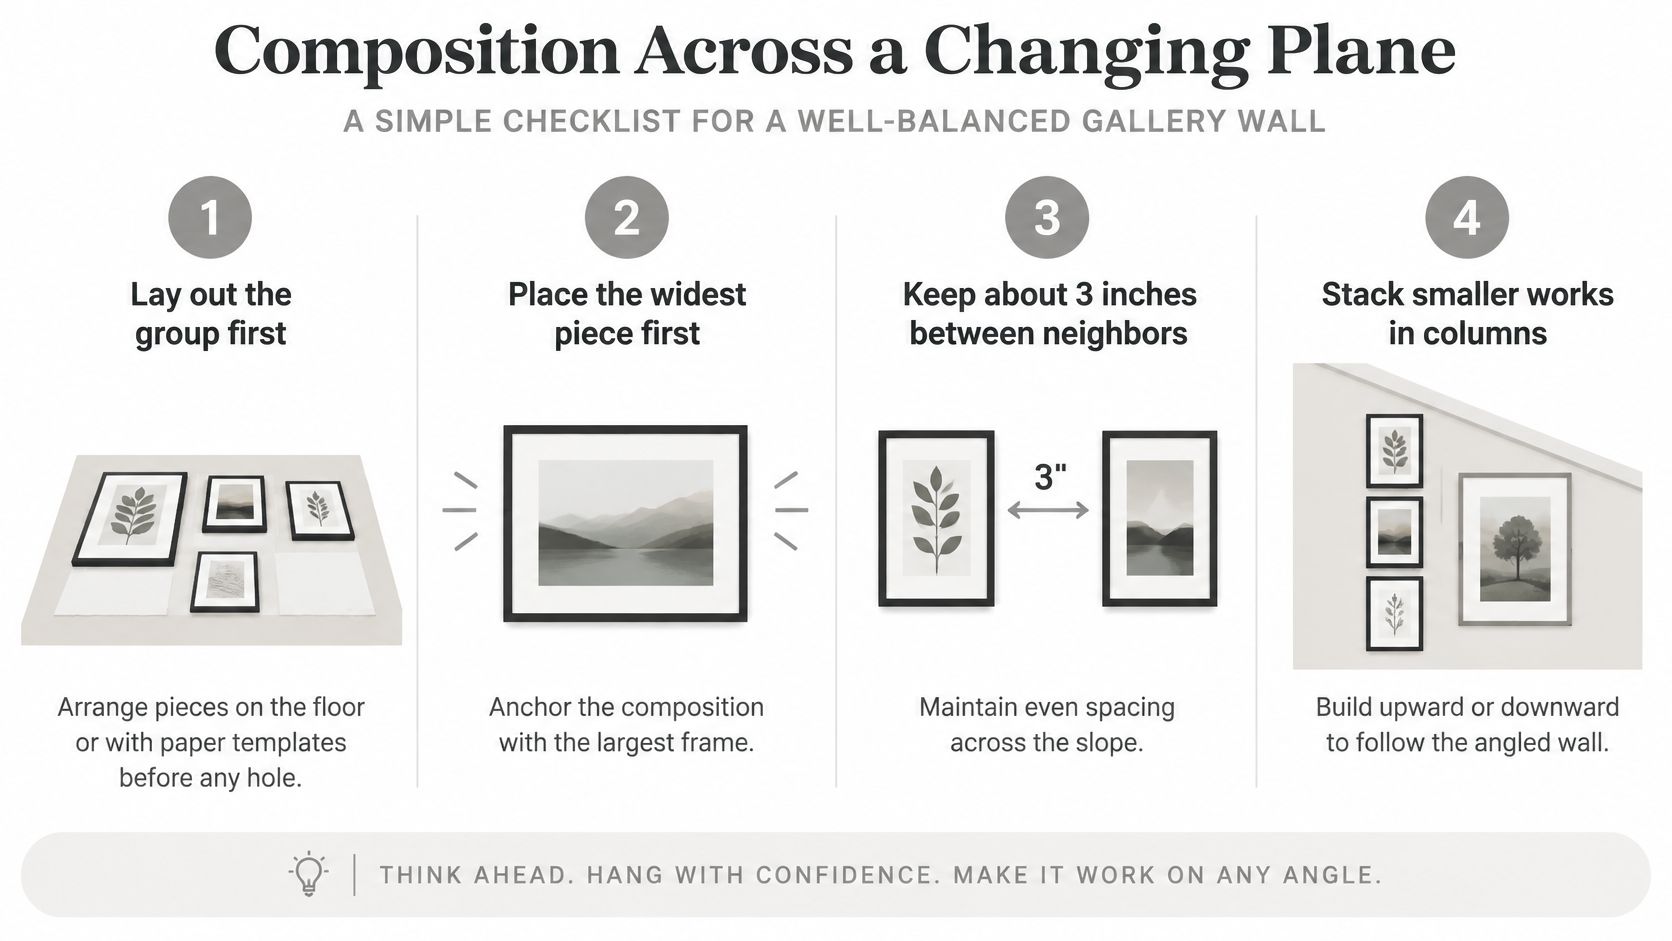
Start with the widest piece, then organize the smaller works around it. In its documented installation, Bucknell University's Samek Art Museum left 3 inches between adjacent pieces, arranged smaller works in vertical columns, and placed the overall grouping's center 60 inches above the floor.
Treat those dimensions as composition targets, not compulsory nail positions. The center belongs to the finished grouping, while each fixing sits wherever its frame hardware requires.
Build the arrangement away from the wall
Lay the frames on a protected floor or cut paper templates matching their outside dimensions. Include the frame width, not just the image size, because the visible outer edges determine the rhythm.
Anchor the layout. Position the broadest work where the wall offers a comfortable view.
Build columns. Place smaller frames above or below that anchor instead of distributing them wherever space remains.
Choose an alignment rule. Use visual centers or a consistent edge; don't force both across mixed frame sizes.
Keep the perimeter open. Avoid wedging the final frame into the narrowing space beside the ceiling.
Use the template checklist to evaluate the whole grouping before transferring hardware marks.
Judge the gaps at the picture faces
A deep frame and a shallow frame can have matching measurements against the wall but appear uneven from the room. Their faces sit at different distances, and the deeper frame may cast a shadow across the apparent gap.
Check spacing from the principal approach with the templates held at the intended picture plane where practical. For a complicated group, our gallery layout design guide provides a useful starting point for organizing the composition before adjusting it to the architecture.
At a landing, stop the arrangement cleanly at the corner unless there's a convincing reason to continue. If a prominent piece connects the views, test its placement from both directions rather than centering it only on the wall segment.
A successful stair arrangement should read clearly while someone approaches it, not only from the spot where the installer stood.
Finally, check the proposed bottom corners against the handrail and the path of someone climbing. A balanced grouping isn't finished if a projecting corner crowds the usable stair.
Stops for Swing Rock and Pull-Away
Pull-away is the failure that's easy to miss. A frame can touch the slope at its lower corners while its upper fittings remain vulnerable to outward movement. Contact doesn't prove capture.
Use the symptom to identify what needs correction. Don't keep tightening a fitting when the actual problem is the wrong support geometry.
Angled-wall hang problems and fixes
What you see | Why it happens | Fix |
|---|---|---|
Top edge lifts off the wall | Gravity pulls the frame outward on the incline | Restrain the upper and lower areas, not one center hook |
Frame creeps downhill | Uneven load or a cable sliding on a track | Balanced attachment points plus a bumper or end stop |
Looks tilted only from the room | Sightline follows the wall instead of the viewer | Reset visual plumb from the main standing spot |
Rocks or rattles when someone passes | Lower edge is free and the stair vibrates | Add a lower bumper or tether |
Anchor feels soft or the hole crushes | Drywall is taking a projected load | Move the fixing into a stud or blocking |
These are diagnostic starting points, not proof of a single cause. A loose frame-side screw can resemble an anchor problem, while a warped frame may rock even when its wall connections are secure.
Stop movement at its source
For a rail-mounted picture, inspect the rail connection, cable carrier, and picture fitting separately. Framky's guidance on sloped-ceiling gallery walls notes that cables can slide on steep tracks and may require end stops or tensioners.
An end stop prevents travel along the track. It doesn't necessarily prevent the artwork swinging toward the room, so check each direction of movement rather than treating any added fitting as a complete solution.
Mirror plates can provide positive capture when properly selected and fixed. Adhesive strips, by contrast, shouldn't be borrowed from flat-wall decorating advice without explicit suitability for the substrate, load direction, and installation orientation.
Know when adjustment becomes repair
If the wall opening enlarges, the fixing turns without tightening, or the finish crushes behind the mount, unload the artwork. Adding a larger screw to damaged material isn't a reliable repair.
Likewise, don't use a tight tether to pull an incorrectly positioned frame into place. That can strain the frame joints while hiding the underlying mismatch.
Remove the load safely. Support the frame before releasing any restraint.
Inspect both sides of the connection. Check the wall fixing and the frame material receiving its screws.
Correct the support. Repair or relocate the attachment before rehanging.
For heavy, glazed, or high-mounted work, stop when you can't verify the fixing. A small amount of movement is a reason to investigate, not something to disguise with extra felt.
Decide When the Slope Needs a Professional
Check the proposed installation from standing, seated, and wheelchair viewpoints, then approach it along the route people really use. These checks answer different questions: whether the image is readable, whether glare interferes, and whether the frame intrudes into circulation.
The Smithsonian Guidelines for Accessible Exhibition Design identify approximately 1,015 mm (40 inches) to the centerline as a potential upper placement for small items and describe 100 mm (4 inches) protrusion limits in applicable circulation conditions, with qualifications concerning cane detection and head clearance.
Those aren't universal hanging dimensions for every home. They show why a comfortable standing view doesn't settle an accessibility question, particularly where a sloped wall pushes the lower frame edge toward the walkway.
Evaluate projection as well as height
Use a full-size template and a temporary stand-off mock-up to represent the frame's deepest projection. Flat paper against the wall won't reveal a corner extending into someone's shoulder path.
Check the approach. Look for corners encountered before the artwork becomes obvious.
Preserve circulation. Keep the installation out of the usable route through the room.
Test the seated view. Check image visibility and glazing reflections from the actual seating position.
Assess installation access. Separate the difficulty of reaching the position from the difficulty of supporting the artwork.
A steep staircase, uncertain backing, or fragile frame can make an otherwise modest picture a professional job. Heavy glazing, oversized work, high placement, and positions above occupied areas warrant particular caution.
Bring useful information to the assessment
Our DIY versus professional installation guide can help you weigh the access, substrate, and handling requirements. The strongest reason to stop isn't that the wall looks unusual; it's that you can't establish a dependable attachment or carry out the work safely.
At Colorado Art Services, we have over 15 years of experience in picture hanging and art handling throughout the greater Denver metropolitan area. We handle artwork regardless of its size, weight, or delicacy.
Our contact form asks how many pieces need installing, whether ladders or scaffolding are required, whether drilling into hard surfaces is involved, and the largest piece's dimensions. Prepare that information alongside photographs of the slope, frame back, and approach route so the installation can be assessed as a complete spatial problem.
Colorado Art Services offers art placement, layout, and installation for angled walls, heavy pieces, and hard-to-reach positions. Visit Colorado Art Services to request a free estimate, and include your frame dimensions, wall photographs, and access details so we can help plan a secure hang with the right sightline.
Comments