


How to Ship Fine Art Prints Safely: A Step-by-Step Guide
The print is on the table, face up, and the box on the floor is the one the last delivery came in. You've got tape, a roll of bubble wrap, and a growing suspicion that this is the moment a valuable sheet of paper turns into an expensive crease. Every collector, gallery assistant and artist who has sold a print online has stood at that table.
Shipping a fine art print is one chain, and the links come in a fixed order. Route and cost first. Then materials, then the pack itself, then glazing, then a test, then insurance and documentation. Skip a link and the rest of the chain carries the risk.
What follows is the sequence I'd follow for a print leaving a studio, a frame shop or a private collection, in the order you'll use it.
Choose Air, Ground or Sea Without Risking the Print
Transport mode sets the carbon footprint of a shipment far more than any packing choice you'll make. The Gallery Climate Coalition's shipping guidance puts air freight at roughly 60 times the CO2e of sea freight over the same distance and about 10 times that of road freight, and the same guidance carries Julie's Bicycle's worked example: moving 0.5 metric tons of art from London to New York produces approximately 55 kg CO2e by ship against 3,000 kg by air.
That gap makes mode a real decision rather than an afterthought. For an unframed, archival print on paper, consolidated ground or sea freight is usually the sensible default when the calendar allows it. Air is justified when an exhibition deadline is fixed, when the object is an irreplaceable original rather than a print with siblings, or when the route has no reliable surface service at all.
The Risk That Grows With Transit Time
Slow freight isn't free of risk, it's a different risk. A print that spends six weeks in a container crosses more climate zones than one that flies out on Tuesday, and paper responds to every one of them. Seal the inner package against moisture, add a desiccant for long sea legs, drop a data logger in the carton if the work is valuable enough to justify one, and use climate-controlled storage at any transshipment point.
Mode | Carbon footprint | Best use and risk |
|---|---|---|
Air freight | about 3,000 kg CO2e for 0.5 metric tons, London to New York | Fastest; justified for exhibition deadlines, irreplaceable originals or routes without reliable surface service |
Sea freight | about 55 kg CO2e for the same shipment | Slowest; add moisture barrier, desiccant and data logger |
Road freight | about one-tenth of air freight | Moderate speed; check humidity exposure on long trips |
The test I apply: if the print survives the slow route inside a properly sealed, desiccated package, book the slow route. If the deadline or the object forbids it, pay for air and put the difference into better packing instead.
Weigh six things before you book: destination, season, whether the piece is framed, declared value, the deadline, and how climate-sensitive the paper is. Fastest is not automatically safest. Greenest is not automatically right.
Shipping Costs by Print Type
Cost is the first decision in the shipping chain, because it sets how much protection the print can justify before you book anything. In 2025, FreightAmigo's artwork shipping guide estimated shipping for a small print of about 1 kilogram at $20 to $50 domestically and $50 to $150 internationally, while the same publisher's guide to art shipping for galleries and museums put domestic express shipping for small framed artworks at $50 to $200. Professional packing and crating, the line shippers underestimate most often, ran between $2,000 and $15,000 per artwork in 2025 depending on size and fragility, according to Dataintelo's art shipping services market report.
Shipment type | Domestic | International |
|---|---|---|
Small unframed print, about 1 kg | $20-50 | $50-150 |
Small framed print | $50-200 express | Above $150; quoted per route and carrier |
Professional packing and crating, per artwork | $2,000-15,000 | $2,000-15,000, quoted per project |
What Drives the Spread
Weight and dimensions set the base rate. Glazing adds both, because glass is heavy and needs more cushioning than an unframed sheet. Destination adds customs handling and, on some routes, a second carrier. Custom crating is the largest single variable, and it's driven by fragility rather than value: a large print on thin paper can need more structure than a small painting.
The spending mistake that ruins shipments is buying speed and economising on packing. A $50 shipment of a $3,000 print deserves the same rigour as a crate, because damage doesn't scale with postage. Compare the shipping cost with the declared value. When packing lands at a small share of what the work is worth, pay for professional packing.
Pack It Yourself or Hire It Out
Pack it yourself when the print is a small unframed sheet, the declared value is modest, the route is domestic, and you're willing to run a test drop on a dummy package first.
Hire help when the work is large, framed under glass, high value, crossing a border, or on a deadline you can't miss.
Professional help covers packing, meticulous crating, transport and shipping arrangements. Ask for a written estimate that itemises each of those lines and insurance separately, so you can compare it with the cost of your own time and materials. Keep the carton or crate afterwards; a reusable crate pays for itself on the return leg.
Packing Materials to Use and Avoid
Every material in the box does one of two jobs. The layer that touches the paper has to be chemically inert, and everything outside that layer is structure or cushioning. The route you chose earlier decides how hard each job works: a domestic ground parcel needs crush resistance more than anything, while a print going by sea spends weeks in changing humidity and needs an inner layer that stays stable the whole way.
Get the inner layer right and the outer layers become straightforward.
Material | Use it for | Avoid it because |
|---|---|---|
Archival polyester (PET/Melinex) sleeve | Thin paper, abrasion and contamination protection | None when archival and clean |
Acid-free tissue | Wrapping thin paper before boards | None when acid-free |
Acid-free rigid board | Stiffening both sides, slightly larger than the print | Non-archival board can release acids |
New acid-free glassine | Short-term protection while the print is in transit | Older glassine becomes acidic |
Bubble wrap | Outer cushioning only, oriented away from the print | Bubbles can imprint the surface if they touch it |
Tape and adhesives | Securing outer packaging | Residues and acids if they touch the artwork |
Newspaper | Nothing near the artwork | Acids and ink transfer |
Wood, felt, wool, polystyrene, biodegradable fillers | Outer structure only, never in contact | Release acids, residues or harmful gases |
Three details decide whether the package succeeds. Ordinary corrugated board is not acid-free board, and the word "archival" on a listing means nothing until the product description confirms it. Glassine has a working life: buy new acid-free stock, keep it to short trips, and retire any sheet that has yellowed or gone brittle. Biodegradable loose fill sounds responsible and is the wrong choice next to paper, because it releases gases as it breaks down. On longer routes the sleeve matters more than the wrap, since polyester holds its properties where paper-based layers slowly change.
Plain acid-free packing paper sits between a sleeved print and its boards as an inexpensive buffer. A listing such as Acid Free White Packing Paper states the property to look for, and the same check applies here as everywhere in the table: confirm from the product description that the paper is acid-free and chemically inert before it goes into the package. When a supplier gives no detail, buy the tissue or paper from a conservation materials supplier whose description proves both.
Buy for the inner layer first. Sleeve, tissue, two boards, archival tape, carton, fill, labels. If the budget stops there, stop there. No outer layer rescues a bad inner layer.
For a closer look at which materials pair with which jobs, our guide to protective packing materials walks through the same trade-offs.
Pack an Unframed Print Step by Step
Before anything goes into a sleeve, document what you're shipping. Photograph the front, the back, all four corners and any existing marks under raking light, then write down the paper dimensions and the edition details. Those images are the difference between a claim that gets paid and one that stalls while everyone argues about when a crease appeared.
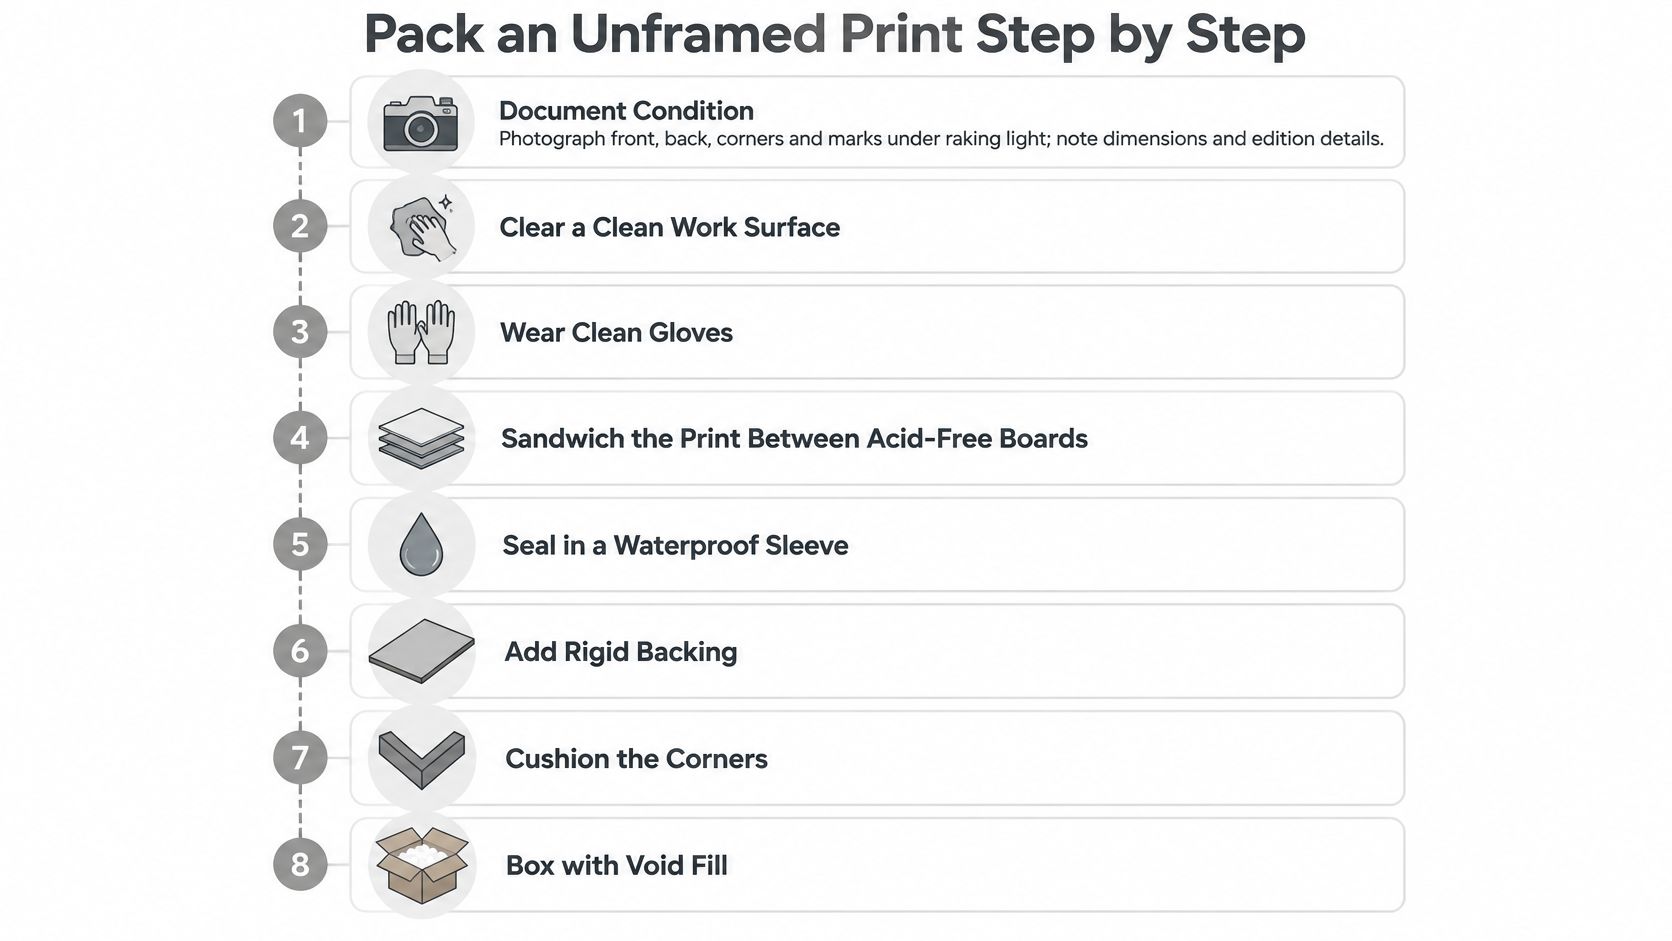
Then work through six steps. Each one answers a specific failure mode rather than adding general padding, and the material list from the previous section is your shopping list. National Museums Scotland's guidance on packing paper and unframed artworks recommends polyester sleeves or acid-free tissue for thin paper, with rigid support on both faces.
Clear a flat, clean surface. Wipe the table, wash and dry your hands, and slide both palms under the sheet to lift it. Corners are the first thing to go when a print is carried by one corner between finger and thumb.
Sleeve or wrap the sheet. Slide the print into an archival polyester sleeve, or wrap it in acid-free tissue, so abrasion and contamination stop at the surface instead of reaching the paper.
Sandwich it between boards. Cut two acid-free rigid boards slightly larger than the print on every side, so no edge of paper sits within a couple of centimetres of an impact.
Secure the sandwich away from the art. Run archival tape along the board edges only, never across the print, or drop the whole sandwich into a closed archival folder.
Box it snug. Set the board package into a crush-resistant carton or portfolio sized to it, then fill the voids so nothing shifts. Fill holds the package still; it should never compress the sheet.
Label inside and out. Contents, orientation, and a fragile marking on both faces. An inside note telling the recipient how to lift the print out is worth the thirty seconds it takes.
Lift the closed package by one corner and watch the boards. If they flex, the print bends with them, and the fix is thicker board or a smaller carton, not more tape. A sleeve protects the surface; only rigidity and immobilisation protect the sheet.
Pack a Framed or Glazed Print Safely
Glazing changes the job. A framed print carries more mass, the glass can break, and broken glass against paper is a loss that no claim restores. Measure the frame, note whether the glazing is glass or acrylic, and plan the pack around the glazing rather than the artwork.
Separate glazing from the surface. Lay a sheet of acid-free tissue or a clean interleaf between the glass and the artwork so that if the glass cracks, the fragments meet tissue instead of pigment. Never tape across the glass.
Arm the corners first. Corner protectors and a wrap of foam or card over the frame edges take the impact that would otherwise travel into the glazing.
Size a double-walled carton to the frame. The frame should sit snugly with cushioning in every gap, and nothing should bear on the glass face.
Mark orientation and fragility. Two labels, two faces, and keep the piece upright through every handoff.
Test a dummy of the same weight. A framed piece costs more to replace and more to ship, so prove the carton on a stand-in before the finished piece goes near a van.
Once a frame passes a certain size, a carton stops being the right container and a crate becomes the cheaper answer over the life of the work. Our team packs, crates, transports and ships artwork, and we quote that work before anything is wrapped, which is the point at which a decision is still reversible. The design questions behind that crate are covered in our notes on shipping crate design.
Test the Package Before It Ships
Transit is where prints are lost and hurt. A Canadian Conservation Institute review of losses reported by 126 art museums found that transit accounted for 34.9% of all reported losses, and that among transit losses, improper handling caused 50%, with mysterious disappearance at 34.2%, environmental changes at 7.9%, theft at 6.6% and water damage at 1.3%, as published in the review of museum loss data. That ranking tells you what to design against: bending, crushing, vibration and shifting inside the parcel, not the dramatic scenarios.
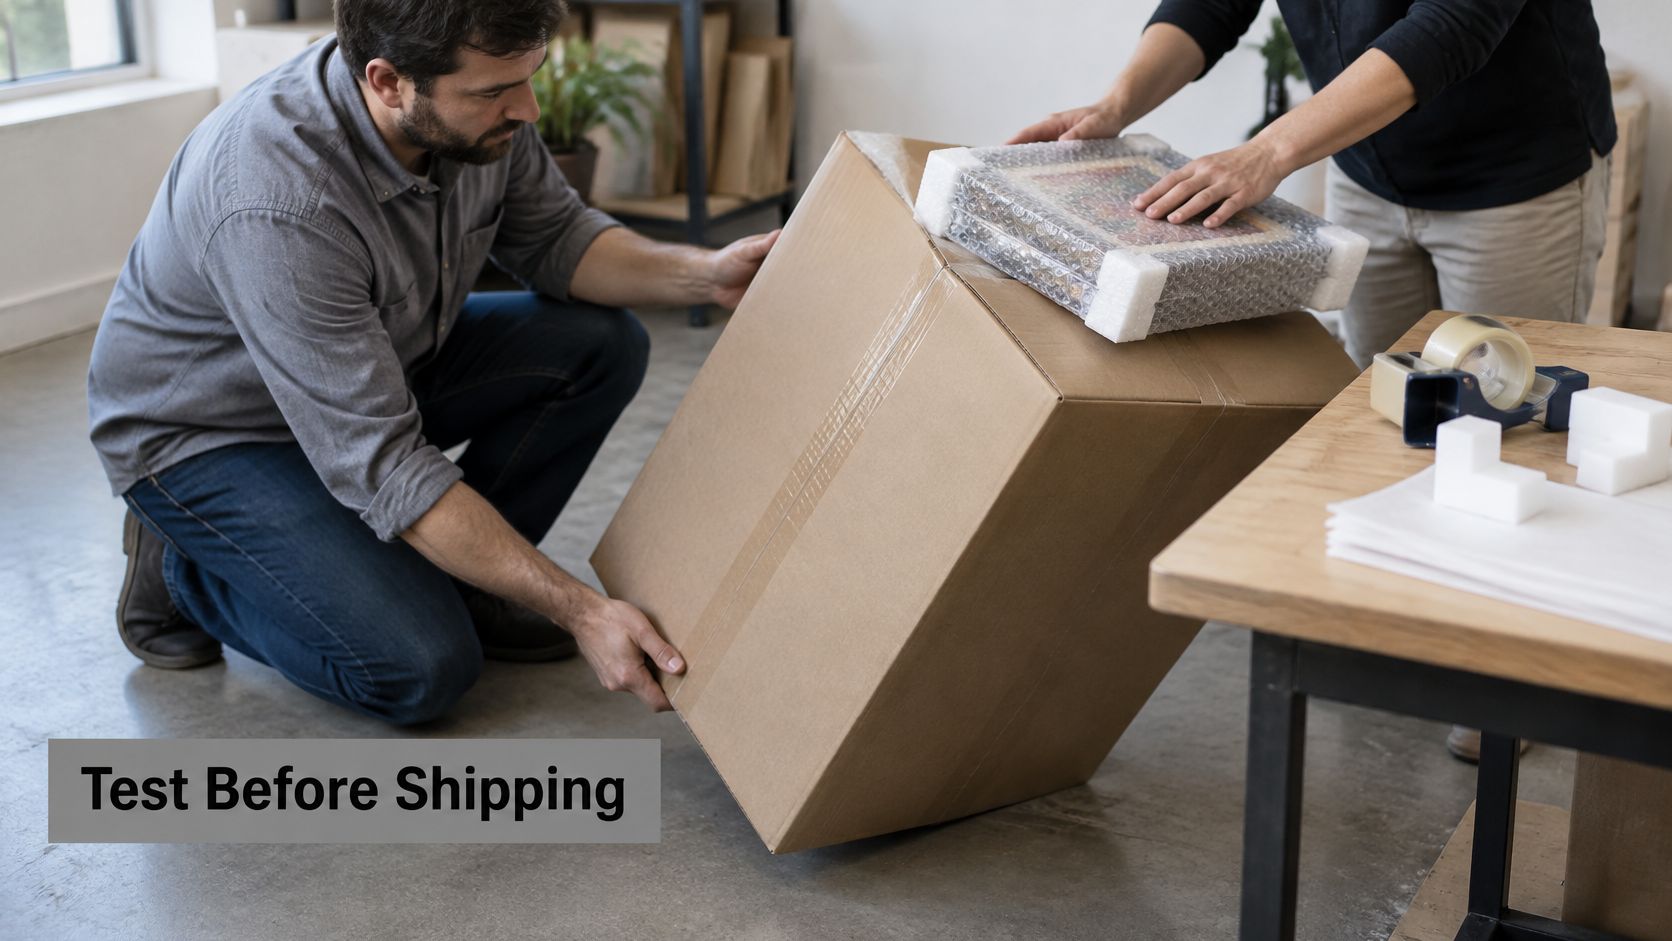
A finished package is a distribution system, and material claims on a supplier's page don't validate it. Build a sacrificial pack with the same print dimensions, board thickness, carton, mass and void fill you'll use in production, photograph it, then put it through a procedure.
Run the Sacrificial Pack Through the Sequence
Record the baseline. Package weight, centre of gravity, orientation, and pre-test photographs of the print.
Follow a recognised procedure. The ISTA testing guidelines set out drop sequences, heights, vibration and compression requirements by shipment mode, and require controlled impact orientation within 2 degrees for flat-face drops and 5 degrees for edge or corner drops.
Inspect under raking light. Look for cockling, scuffing, abrasion, shifted inserts, corner crush and pressure marks, then compare against your photographs and measurements.
Fix the dominant failure and retest. Stiffer boards for bending, less internal clearance for movement, a soft interleaf for abrasion, a stronger outer carton for compression. Retest with new samples rather than the one you just abused.
Watching a full pack and unpack done end to end is the quickest way to see where a parcel loses rigidity, especially at the moment the print is lifted out.
One climate rule before you seal anything. Condition humidity-sensitive paper first, and don't wrap it in material that has equilibrated at 70% relative humidity or higher, because the condensation risk climbs sharply once that package meets a cold cargo hold.
Insurance and Documentation Before You Seal the Box
Coverage is part of the plan, not a substitute for packing. USPS insurance and extra services states that insurance can cover merchandise lost, damaged or missing in its custody up to $5,000, with fees based on the declared value and limitations on some products. Historic provisions allowed other coverage levels, including automatic coverage on some Priority Mail pieces and insured values far higher under stated eligibility rules, which is exactly why you check the current terms for your service, date and package type before dispatch instead of assuming postage protects a valuable print.
Assemble the paper trail before the tape goes on:
The invoice, showing what the buyer paid.
Edition information, including the number in the run and the total edition size.
Provenance or purchase records, if the print has changed hands before.
Photographs of the print and of the packed box, taken the same day.
The tracking number, sent to the recipient the moment it exists.
Then treat delivery as the start of a process, not the end.
Photograph the sealed package as it arrives, before touching it, including any visible impact marks or crushed corners.
Open it as carefully as it was packed, on a clean flat surface, supporting the sheet rather than pulling it.
Keep every component. Sleeve, boards, fill and carton are evidence for an inspection, and they're also a reusable kit.
Notify the carrier inside its deadline, not after the box has been broken down for recycling.
A claim can reimburse a documented financial loss. It can't restore an edition's rarity, an artist's signature, or a sheet that has been creased through the image. Our guide to fine art shipping insurance covers how declared value, frame cost and packing cost interact when a claim is filed.
Colorado Art Services packs, crates, ships, and stores artwork for collectors, galleries, and designers across Denver and the Front Range, so a print can move from your table to a wall without changing hands more often than it needs to. If you'd rather not run a drop test in your own living room, we'll take the piece through the whole chain, from condition photographs and a fitted crate to unpacking on arrival. Visit Colorado Art Services for a free estimate on packing, crating, shipping, or installation.
Comments