


Accent Wall Installation How to Plan and Build It Right
You've chosen the wall, bought the sample pots, and moved the sofa out of the way. Then the first coat goes on and the room feels flatter, not better. The color may be attractive, but the wall doesn't support the furniture, the television glare is worse, or every patch and roller mark now stands out.
That happens because accent wall installation is more than a paint decision. A feature wall changes sightlines, light reflection, mounting conditions, maintenance, and sometimes the permanent construction of the room. The right approach starts with the wall itself, then matches the material to the room, substrate, and expected lifespan.
Introduction to Accent Wall Installation That Actually Works
A wall can look convincing in a sample and fail once it meets the room. A dark finish may expose uneven drywall, a slatted panel may block access to cables, and a heavy stone veneer may turn a simple feature into a permanent construction project. Accent wall installation starts by deciding what the wall must do, then matching the finish, mounting method, and maintenance demands to that job.
Accent walls entered mainstream residential design after World War II and received sustained exposure through home magazines and television renovation programming from the 1980s through the 2000s. One industry summary describes them as the familiar American method for adding color for roughly 40 years, with peak popularity estimated between about 2005 and 2015, before full-room color drenching and all-neutral schemes gained ground. The backlash began around 2018, showing how quickly a dominant treatment can feel dated in professional design circles. (RemodelHome.ai's accent wall history)
Start with the room, not the sample card
The strongest feature wall has a clear visual job. In a living room, it may frame a fireplace, sofa, or media console. In a bedroom, it is often the headboard wall. At an entry, the best surface may be the one visible from the front door rather than the largest uninterrupted wall.
Stand at the main entrance and primary seating position. Check which wall appears first, where daylight falls, and whether windows, doors, outlets, built-ins, or vents interrupt the surface. A feature treatment should reinforce one existing focal point. If it has to compete with several, the layout needs reconsideration before installation begins.
Practical rule: If you have to explain why a wall is the accent wall, the room has not identified its focal point clearly enough.
Light changes the installation decision as much as furniture does. Glossy paint, metallic wallpaper, polished stone, and glass-fronted artwork can reflect daylight or television light into the room. Textured finishes scatter light differently and can add depth without depending on strong color contrast. Before mounting anything, inspect the wall for loose plaster, dents, high spots, moisture, and weak fixing areas. Finish quality depends on that substrate.
Think in five material paths
The main options are paint, wallpaper or murals, wood and board treatments, tile or stone veneer, and a curated gallery wall. Paint is relatively reversible. Panels, tile, and heavy artwork require decisions about anchors, trim, seams, weight, access, and eventual removal. Those choices can affect future maintenance and resale, especially when the wall becomes part of the room's permanent construction.
Current design work includes limewash, Roman clay, wood slats, fluted panels, stone veneer, and integrated lighting. Painted accent walls still have a place. The practical question is no longer only which color looks good, but which material provides the right focal point, mounting security, light behavior, and upkeep for the room.
Choosing the Right Accent Wall Type for Your Space and Budget
The material should follow the room's demands. A removable wallpaper may suit a bedroom or rental, while a slatted wall behind a television needs a plan for cables, equipment, dust, and secure fixing. Tile can handle humidity and impact, but it creates a more permanent installation with heavier materials and more complicated removal.
Accent walls remain part of serious renovation spending, particularly in bathrooms. A 2019 Houzz Bathroom Trends Study found that 35% of homeowners undertaking a master bathroom renovation added or upgraded an accent wall. In the 2025 version, 31% of renovating homeowners said they bring personality into renovated bathrooms through accent walls, and blue was the preferred accent-wall color for 18% of respondents. (Ideal House's summary of accent-wall trends)
Wall Type | Typical Cost and Skill Level | Best Rooms and Durability Notes |
|---|---|---|
Painted color | Lower material commitment, beginner to intermediate skill | Living rooms, bedrooms, offices, and hallways. Easy to refresh, but surface flaws show under bold colors. |
Wallpaper or mural | Moderate material commitment, intermediate skill for large patterns | Bedrooms, dining rooms, powder rooms, and rental-friendly spaces when removable products are suitable. Seam alignment and removal condition matter. |
Wood, shiplap, or slats | Moderate to high material commitment, intermediate to advanced skill | Media walls, fireplaces, entries, and offices. Durable when secured correctly, but joints, dust, trim, and cable access require planning. |
Tile or stone veneer | Higher material and labor commitment, advanced skill | Bathrooms, fireplaces, kitchens, and durable commercial areas. Long-lasting, but heavier and less forgiving to remove or repair. |
Gallery wall | Variable art and hardware commitment, intermediate layout skill | Living rooms, stair halls, offices, and commercial spaces. Flexible, but every anchor and hanging point must suit the artwork and wall construction. |
For a tile-focused project, start by reviewing feature wall tile ideas to compare patterns, scale, and placement before committing to a layout. Tile can make a bathroom or fireplace feel built-in, but a small sample won't reveal how grout lines interact with outlets, corners, or trim.
Wallpaper is often the most forgiving choice for someone testing a stronger pattern, especially when the product can be removed without damaging the wall. It still demands a smooth, clean substrate. A mural with a visible horizon or architectural line will expose a wall that bows or a ceiling that isn't level.
Paint works when the wall is already sound and the visual change needs to remain easy to reverse. Gallery walls work when the art, rather than the surface finish, should carry the emphasis. For decal-based layouts and removable graphics, these wall decal installation techniques can help prevent bubbles, crooked alignment, and edge lift.
Planning and Preparing Your Wall for a Flawless Finish
A feature wall can fail before installation begins. Shine a bright work light across the surface and inspect it from several angles. Loose coating, greasy drywall, active moisture, or a visible bow will remain visible beneath the finished material.
Check for cracks, popped fasteners, stains, mildew, uneven texture, and earlier repairs. Hold a long level or straightedge against the wall to find humps and dips. A painted finish may hide minor variation, while large panels, tile, and wallpaper can reveal it through shadow, telegraphing, or uneven seams.
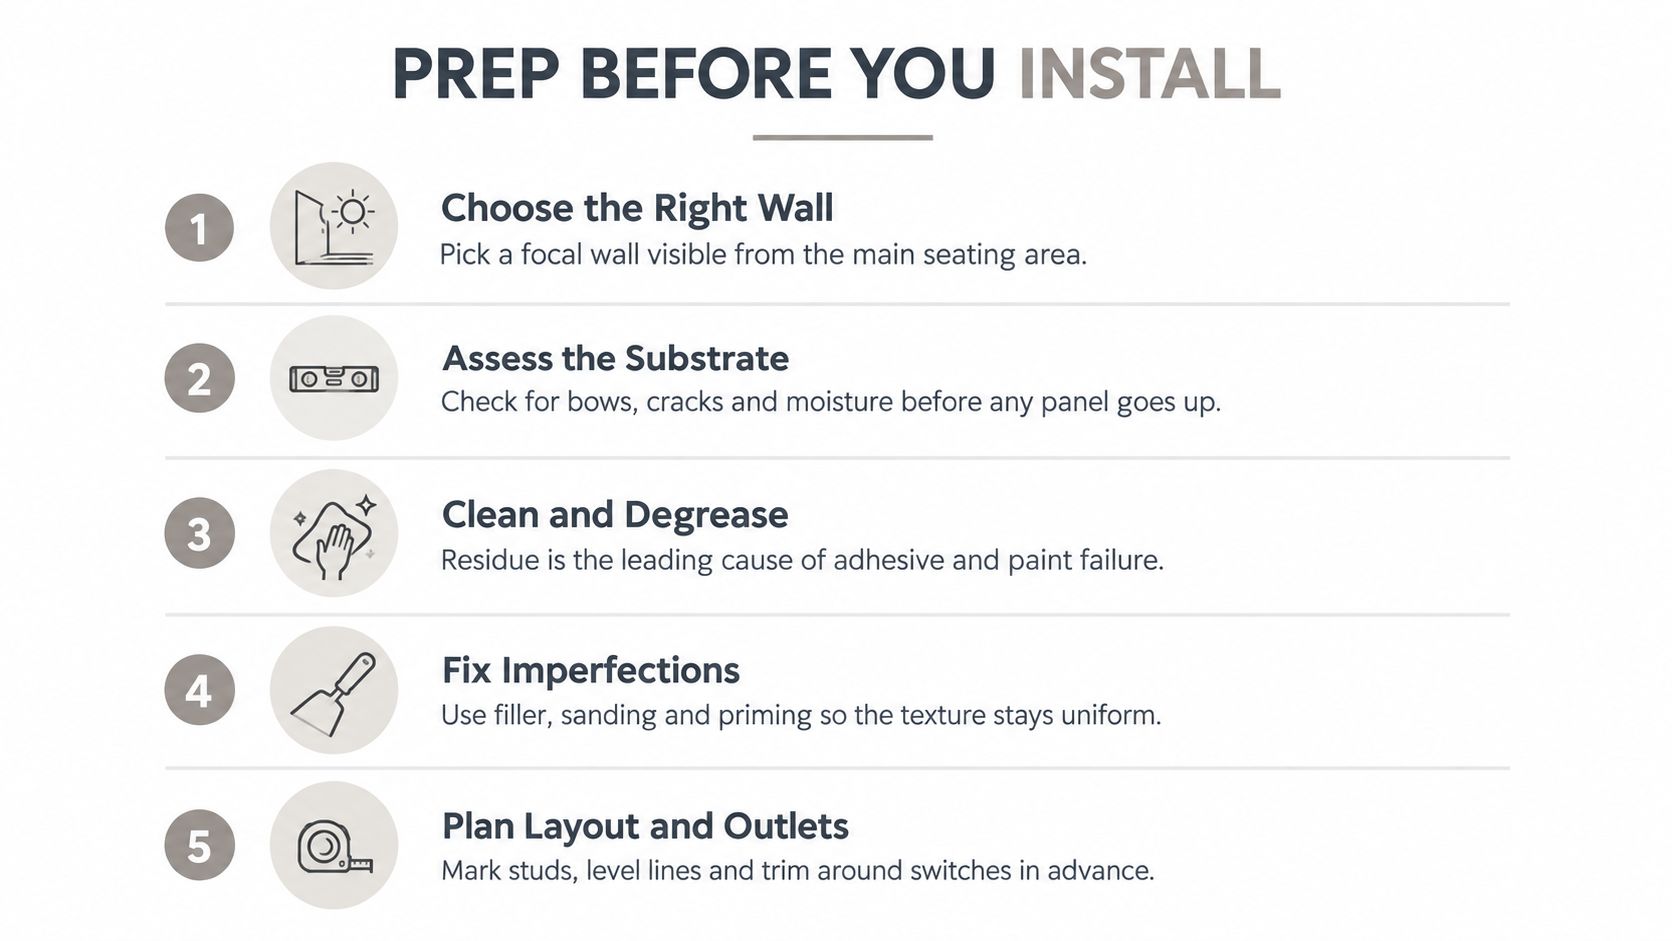
Run the preparation sequence
Choose the right wall. Confirm that it is visible from the main seating area or entry path. Observe how daylight and artificial light move across it, since side lighting exposes surface defects.
Assess the substrate. Identify drywall, plaster, masonry, existing tile, or a previously finished panel. Check for movement, cracks, bows, and moisture before choosing an adhesive or primer.
Clean and degrease. Remove dust, grease, mildew, soap residue, polish, and cleaning-product film. Residue can weaken paint adhesion and prevent construction adhesive from bonding properly.
Repair the surface. Fill holes and cracks, scrape unstable material, sand glossy areas, and feather each repair into the surrounding wall. Strong color and side lighting make patch edges easy to spot.
Plan layout and services. Mark studs, outlets, switches, trim lines, centerlines, and cable routes before cutting. For drywall framing, use a reliable process based on these methods for finding studs in drywall.
The PCA guidance recommends removing dust, grease, and mildew, sanding glossy or previously coated areas, and checking existing-coating adhesion with tape testing aligned with ASTM D3359 before priming. This confirms whether the old paint can support the new finish. (PCA P14 surface-preparation guidance)
Match the primer to the problem
Use bonding primer on difficult glossy surfaces, stain-blocking primer over contamination, and alkali-resistant primer on new masonry or fresh wall conditions. Primer will not solve dampness or an unstable substrate, so address those conditions first.
Clean, patch, sand, and prime, then allow the surface to become stable before installation. For paint projects, these tips from I PAINT STUFF offer practical preparation guidance. Preparation determines whether the visible finish stays attached and uniform.
How to Install Different Accent Wall Materials With Confidence
Material-specific technique matters. Paint needs controlled film application, wallpaper needs seam discipline, boards need a level starting line and secure fasteners, tile needs a deliberate layout, and gallery walls need a mounting plan that respects the artwork and wall structure.
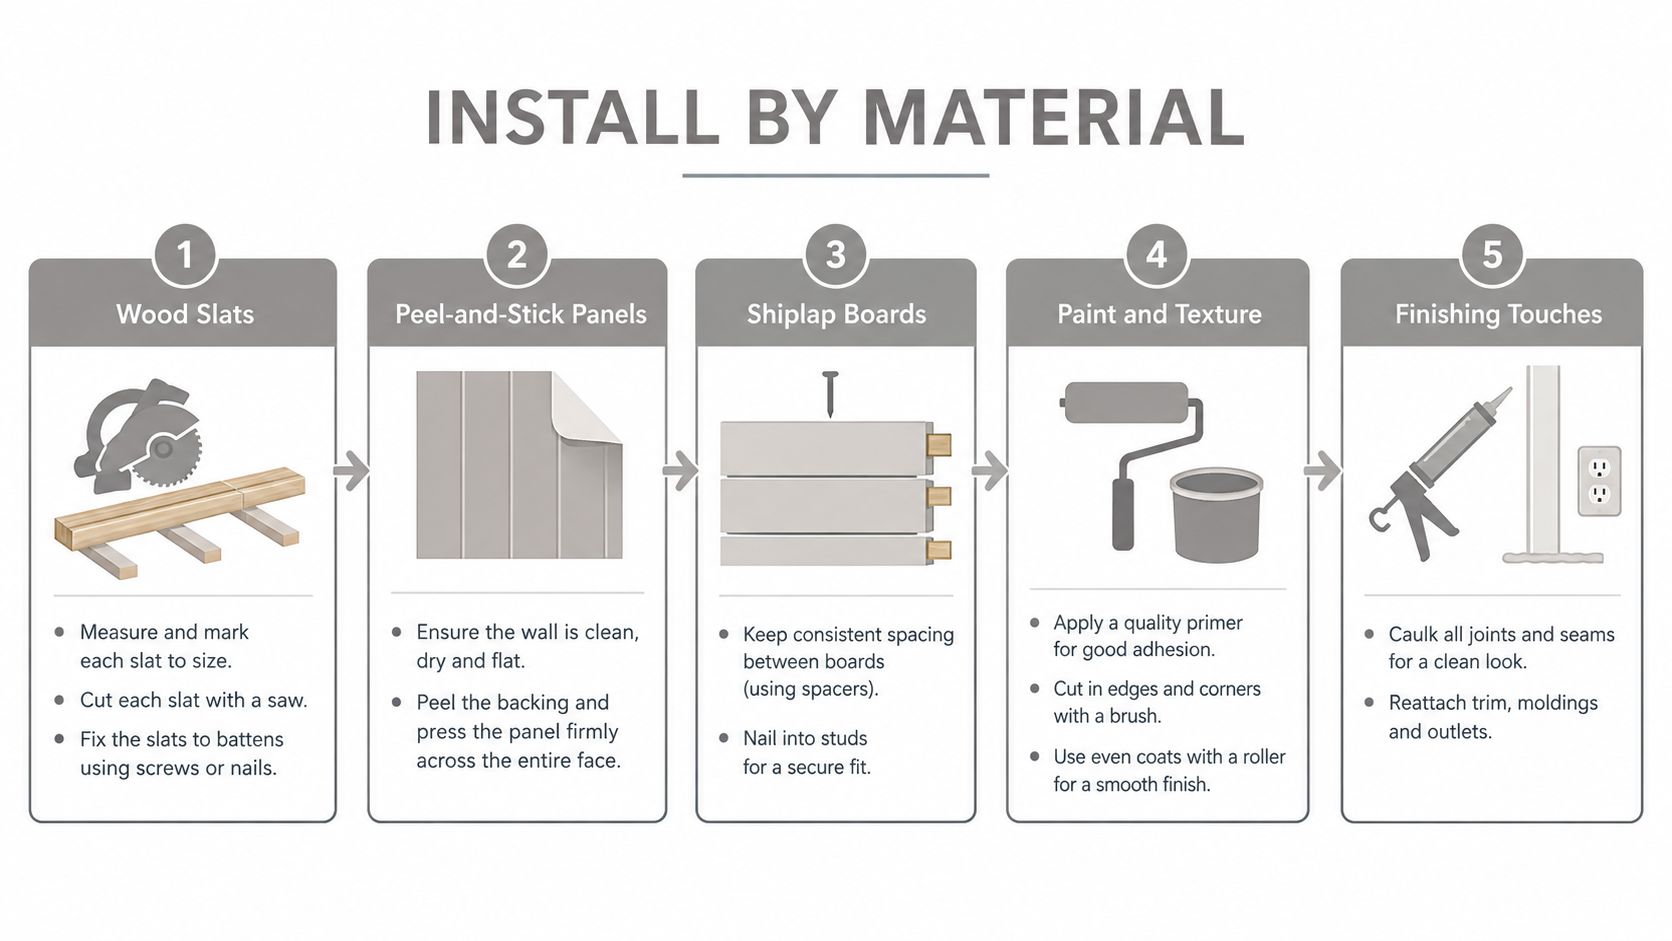
Painted color and decorative texture
For paint, protect adjacent surfaces, establish a level reference where needed, and cut the perimeter with a quality angled brush before rolling. Work in manageable sections and maintain a wet edge so lap marks don't develop. Two or more thin coats usually produce a more even result than one overloaded pass.
Paint only within the manufacturer's recommended temperature and humidity range. Technical guidance recommends keeping relative humidity roughly between 40% and 70% when possible, and favors multiple thin coats with adequate drying or flash time to reduce orange peel, streaks, and uneven sheen. (Vernici Spray's paint-defect guidance)
Limewash and Roman clay need a different mindset. Their variation comes from the application pattern, so random overlapping strokes can look intentional only when the substrate is consistently prepared. Test the technique on a board first, especially when the wall receives strong side light.
Wallpaper and peel-and-stick panels
Dry-fit the first lengths or panels before exposing adhesive. Establish a plumb line rather than trusting a corner, because corners are often out of square. For traditional wallpaper, follow the product's instructions for paste, booking, open time, and seam rolling. For peel-and-stick material, keep the backing attached until the panel is positioned, then press from the center outward with a squeegee or soft applicator.
A bedroom mural can tolerate more visual variation than a large geometric pattern. With a strict grid, a small error at the first seam can compound across the wall, so stop and correct early instead of hoping the pattern will disappear.
Wood slats, shiplap, and fluted panels
Find and mark the studs before you install battens, boards, or heavy panels. Set the first piece plumb and level, because every following piece inherits that reference. Use a brad nailer or finish fastener where appropriate, but don't rely on adhesive alone for large or weighty components unless the product and substrate specifically allow it.
For a television wall, plan the outlet openings and cable paths before fixing the material. Cut openings carefully with the correct tool, test-fit each panel, and allow access to equipment that may need service later. If the installation includes stone-look or exterior cladding products, review guidance on stone selection for exterior walls to understand how material weight, format, and intended application affect selection.
Tile, veneer, and gallery walls
Tile installation begins with a dry layout. Center the composition around the fireplace, vanity, television, or artwork rather than automatically starting at the nearest corner. Use the correct substrate, adhesive, spacers, grout, and movement details for the product and room. Heavy veneer may require mechanical support, not just a bead of adhesive.
For a gallery wall, lay the arrangement on the floor first. Measure the overall footprint, mark the centerline on the wall, and use templates to test spacing before drilling. A picture ledge can simplify future changes, but it still needs secure attachment and a load rating suited to the objects displayed.
Pro tip: Install the finish around the room's permanent features. Don't force the fireplace, outlet, or television to look centered after the wall is already built.
For masonry and stone features, use a documented fastening plan rather than guessing at the wall's capacity. Detailed stone wall installation guidance can help when the treatment extends beyond a lightweight decorative surface.
Finish by caulking suitable joints, filling exposed fastener holes, reinstalling trim and outlet covers, and cleaning the surface according to the material manufacturer's instructions. Keep heavy furniture and mounted equipment away until adhesives, grout, paint, or texture have cured as specified.
Common Pitfalls and Room Specific Installation Challenges to Avoid
A feature wall can look finished on installation day and still fail weeks later. The usual causes are a contaminated or unstable substrate, unsuitable materials, and mounting details that ignore the room's use. Dust, grease, mildew, loose paint, and moisture must be removed or corrected before covering the wall. A premium coating cannot compensate for a surface that is moving, damp, or poorly bonded.
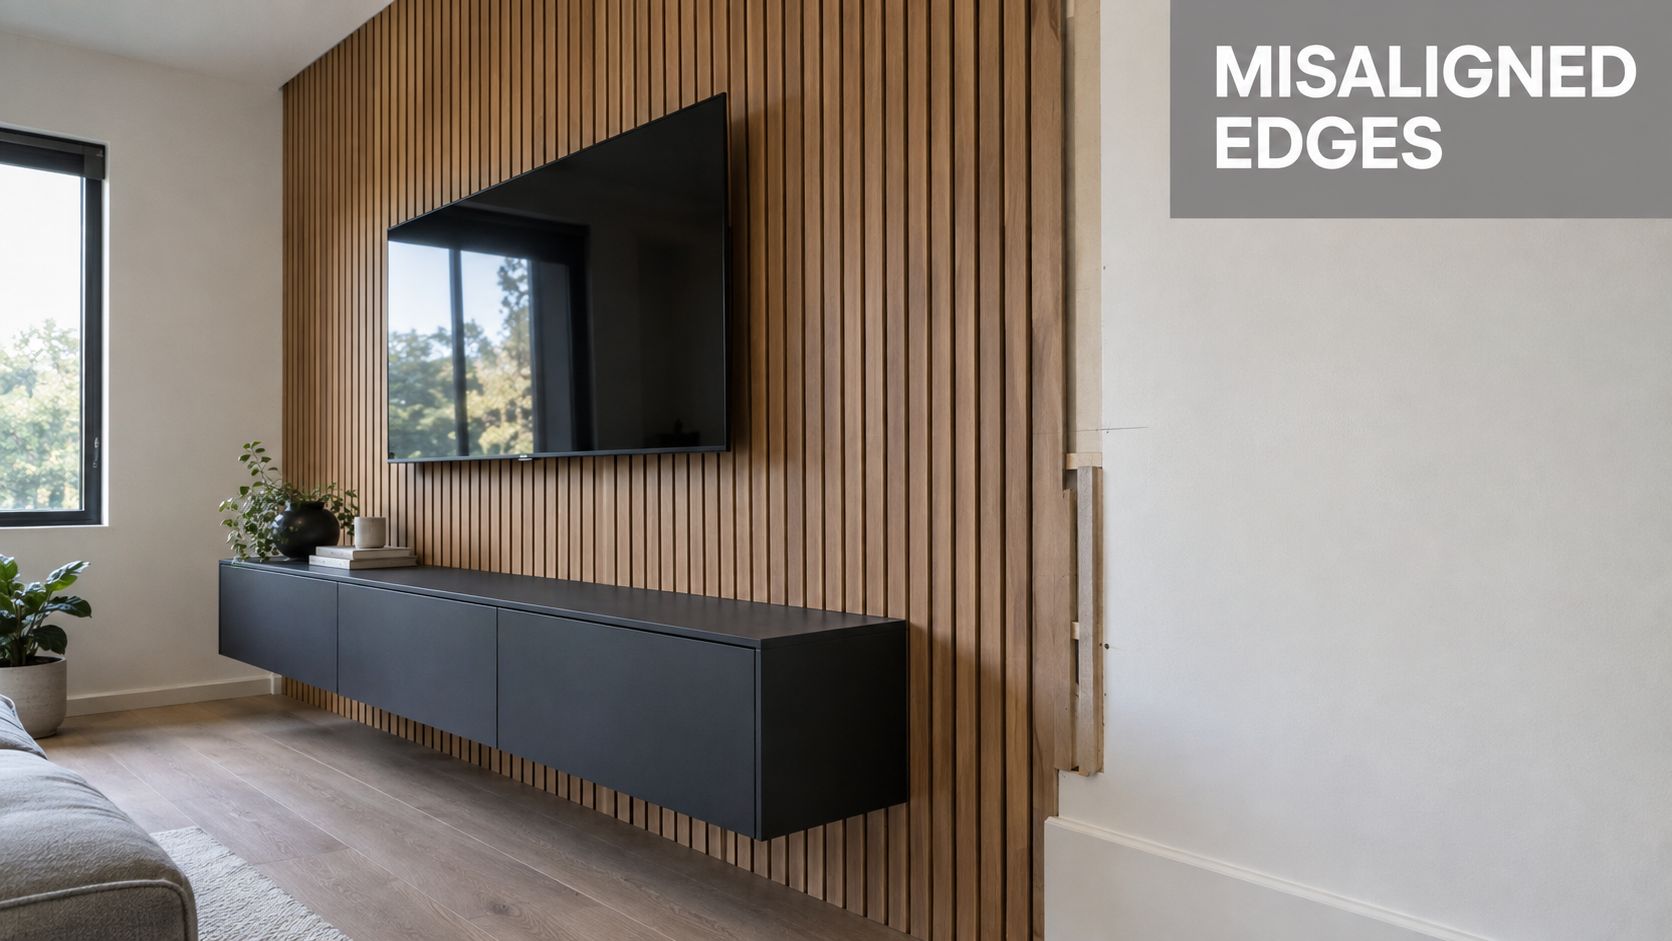
Failures that show up after the finish
Dark paint exposes roller lines, patch halos, and waviness. High-sheen finishes reflect defects that a flat finish may hide, while textured panels cast shadows across uneven backing. Check the wall with a straightedge and correct the substrate when the selected material needs a flatter plane. If flattening is impractical, choose a finish that can tolerate the existing profile.
Adhesive failure commonly begins with contamination or an incompatible coating. Panel edges lift when installers skip cleaning, use the wrong adhesive, or bond directly to glossy paint without abrasion and primer. Existing paint can peel beneath a new finish, so perform a tape test during preparation and remove weak material before mounting.
A visible gap, exposed frame edge, or unsupported panel is usually a layout or fastening error, not a minor cosmetic defect. Dry-fit the installation, locate studs or suitable anchors, and confirm that trims will cover the perimeter without concealing movement or service access.
Match the wall to the room
A television wall needs cable management, equipment clearance, controlled glare, and secure support for the screen and accessories. Slats and deep textures can create distracting shadows or make cable access difficult. Plan removable panels, chase routes, or access points before closing the assembly.
Home offices need manageable acoustics, useful lighting, and a surface that can be cleaned around a desk. Hard tile and stone reflect sound, while deep grooves collect dust. Commercial spaces face heavier traffic, frequent cleaning, accessibility requirements, and liability concerns. A treatment suitable for a quiet lounge may not withstand carts, bags, chairs, or regular maintenance.
Bathrooms and other wet areas require moisture-appropriate materials and installation systems. MDF-based products and unsealed porous finishes perform poorly where water can reach the surface. Confirm splash exposure, ventilation, and the manufacturer's limitations before installation, including in a powder room.
Recent trend coverage highlights placements behind televisions, fireplaces, entryways, stair landings, and flex spaces, while also drawing attention to load-bearing, moisture, acoustics, cable management, glare, and maintenance. (Faux Stone Sheets on accent-wall performance)
Maintenance test: Before choosing a textured wall, run your hand through the cleaning routine. If you cannot reach the grooves, replace a damaged section, or access a cable without dismantling the design, choose a less permanent finish.
When to DIY and When to Hire Professional Art Installers
DIY makes sense when the wall is accessible, the substrate is sound, the material is manageable, and the installation can be corrected without creating a safety issue. A single painted wall, straightforward removable wallpaper, or lightweight molding project suits a careful homeowner who can measure accurately, maintain a level reference, and allow proper drying time.
Bring in a qualified installer when the project involves heavy stone, large panels, high placements, electrical obstacles, complex trim, or valuable artwork. The same applies to a gallery wall that needs precise balance across a broad surface, especially when mirrors, sculpture, or oversized pieces are involved. The mounting system must match the item's weight, the wall construction, and the consequences of failure.
Use this decision check before buying materials:
Wall condition: Can you repair, flatten, clean, and prime the substrate properly?
Material behavior: Does it react to moisture, humidity, movement, heat, or impact?
Mounting demand: Will the wall carry a television, cabinets, stone, mirrors, or art?
Service access: Can outlets, cables, fasteners, and damaged sections remain accessible?
Finish tolerance: Will the design expose every seam, bow, patch, or uneven edge?
Future plans: Can you remove or update the treatment without extensive wall repair?
Painted accent walls are also being reconsidered as designers move toward limewash, Roman clay, wood slats, fluted panels, stone veneer, integrated lighting, and room-wide tonal materiality. (Accent Walls Ceiling's trend coverage) The durable choice isn't automatically the trendiest one. It's the treatment that fits the room's structure, use, maintenance demands, and likely future changes.
Colorado Art Services provides residential and commercial art installation, gallery wall planning, heavy-piece mounting, mirror and sculpture hanging, and secure placement around lighting and wall conditions. If your accent wall will carry valuable or oversized artwork, visit Colorado Art Services to discuss a precise layout and safe installation plan for your space.
Comments