


Mirror Hanging Decoration Done Right at Home
You're standing in the hallway with a mirror in one hand and a drill in the other. The wall looks suitable, the mirror looks heavier than expected, and the obvious question is where to start. The right answer isn't “find the centre.” A successful mirror hanging decoration project requires three decisions: where the mirror belongs, how the wall will support it, and what the reflection will do to the room.
Those decisions are connected. A beautiful position is useless if the fixing pulls out of drywall, and secure hardware can still produce a poor result if the mirror throws window glare across a television or reflects an empty wall. This guide treats the mirror as both a design element and a load-bearing installation, with practical direction on wall identification, hardware selection, hanging technique, lighting, room-by-room placement, and final safety checks.
Why Mirror Hanging Decoration Is Worth Getting Right
A mirror often becomes the largest and heaviest decorative object in a home. Unlike framed art, it carries a dense glass panel, a frame or backing system, and hanging hardware. That's why a small picture anchor that performs perfectly with lightweight artwork may be a poor choice for a substantial mirror.
The decorative role of mirrors has changed over time. In Renaissance Italy, a mirror reportedly cost three times more than a Raphael portrait, and a medium-sized mirror could be priced comparably to a fine country home. By 1650, mirrors appeared in two out of three urban French households, showing how mirrored surfaces had moved from elite luxury toward widely used interior decoration. The University of Amsterdam's historical record helps explain why mirrors remain so central to interiors today: they developed from status objects into practical decor that reflects light, enlarges perceived space, and anchors a wall composition.
Three questions to answer first
Before drilling, look at the project through three lenses:
Position: Does the mirror suit the furniture, sightline, room function, and available wall area?
Support: Can the wall and selected hardware carry the finished weight without relying on guesswork?
Reflection: Will the glass return useful light or a pleasing view, rather than glare, clutter, or an awkward doorway?
Most failed installations skip at least one of those questions. A homeowner may centre a mirror perfectly over a console but attach it to an unsuitable anchor. Another may choose a strong cleat, then place the mirror where it reflects a blank wall. Good mirror hanging decoration combines visual judgement with careful attachment.
The process becomes much calmer once you separate those decisions. Identify the substrate first, weigh the finished mirror, choose hardware that suits both, then mark the position based on what you want the mirror to reflect. If the piece is substantial or the wall is uncertain, conservative installation is cheaper than repairing a damaged mirror, wall, floor, or piece of furniture.
Know Your Wall Before You Pick Hardware
Wall identification comes before hardware selection. Drywall, plaster, brick, concrete, and hollow block don't hold fasteners in the same way, so an anchor that sounds appropriate on the package may fail in the actual wall.
Start with a discreet inspection point, preferably behind furniture or near an existing fixing. Tap the surface with your knuckles. A hollow sound often indicates drywall or a cavity, while a dense, hard response may suggest masonry. A thin nail can help distinguish surfaces, but use light pressure. Drywall usually accepts a sharp puncture cleanly, whereas plaster may feel harder at the surface and then crumble behind it. Older lath-and-plaster walls can also resist the first contact before giving way around the wooden keys behind the plaster.
Four wall conditions to distinguish
Drywall over wood studs gives you the strongest straightforward fixing when the screw reaches a stud. Locate the stud with a stud finder, magnet, or a sequence of small exploratory checks, then drive a suitable wood screw into the structural timber. If the desired position falls between studs, use an anchor specifically rated for the mirror's load and the drywall thickness.
Lath-and-plaster needs more care. The brittle plaster face can break around a rotating anchor, and shallow hardware may never reach a reliable structural point. Use a fixing designed for plaster or locate a stud. Don't treat plaster as thick drywall because both walls may look painted and smooth.
Solid brick or concrete requires masonry drilling and anchors rated for that substrate. Sleeve anchors and wedge-style systems can work when their specifications match the material and load. Use the correct masonry bit, clear dust from the hole, and avoid assuming that a general-purpose plug has the same holding power in every masonry type.
Hollow concrete block has voids that change how an anchor engages. Select hardware designed for hollow masonry rather than blindly using a fixing intended for solid concrete. If the mirror is heavy, a professional may choose a fixing location and method that spreads the load across more reliable material.
For a useful substrate-by-substrate reference before buying supplies, consult this anchor selection guide.
Wall Type | How to Identify | Recommended Hardware | Avoid |
|---|---|---|---|
Drywall over a stud | Hollow surface, stud detected behind it | Wood screw into the stud | Relying on a light picture anchor for a heavy mirror |
Drywall between studs | Hollow sound and no structural timber at the mark | Load-rated drywall anchor matched to the wall | Using a fixing without checking its stated capacity |
Lath-and-plaster | Hard surface, brittle puncture, possible crumbling behind the face | Plaster-rated anchor or stud fixing | Treating plaster like ordinary drywall |
Solid brick or concrete | Dense sound and hard drilling surface | Substrate-rated sleeve or wedge anchor | Using a drywall plug or the wrong drill bit |
Hollow concrete block | Masonry surface with cavities behind the face | Hollow-masonry-rated fixing | Selecting an anchor intended only for solid concrete |
The Hanging Process From Mark to Proof Load
Begin with the mirror on a padded surface, face protected. Measure the actual hanging hardware, not just the frame. With two D-rings, measure the distance between the rings and their vertical relationship to the top edge. With a French cleat or Z-bar, measure the height from the mirror's top edge to the point where the wall-mounted section will engage.
Transfer those measurements to the wall with a pencil and a level. Frames can be slightly out of square, so never assume the top edge is a reliable reference. Mark both fixing points, step back, and check the spread against the mirror before drilling. If you're working alone, a temporary, level ledger or support strip taped or lightly fixed below the intended position can help you hold the piece while you align it, but it must not be treated as the permanent support.
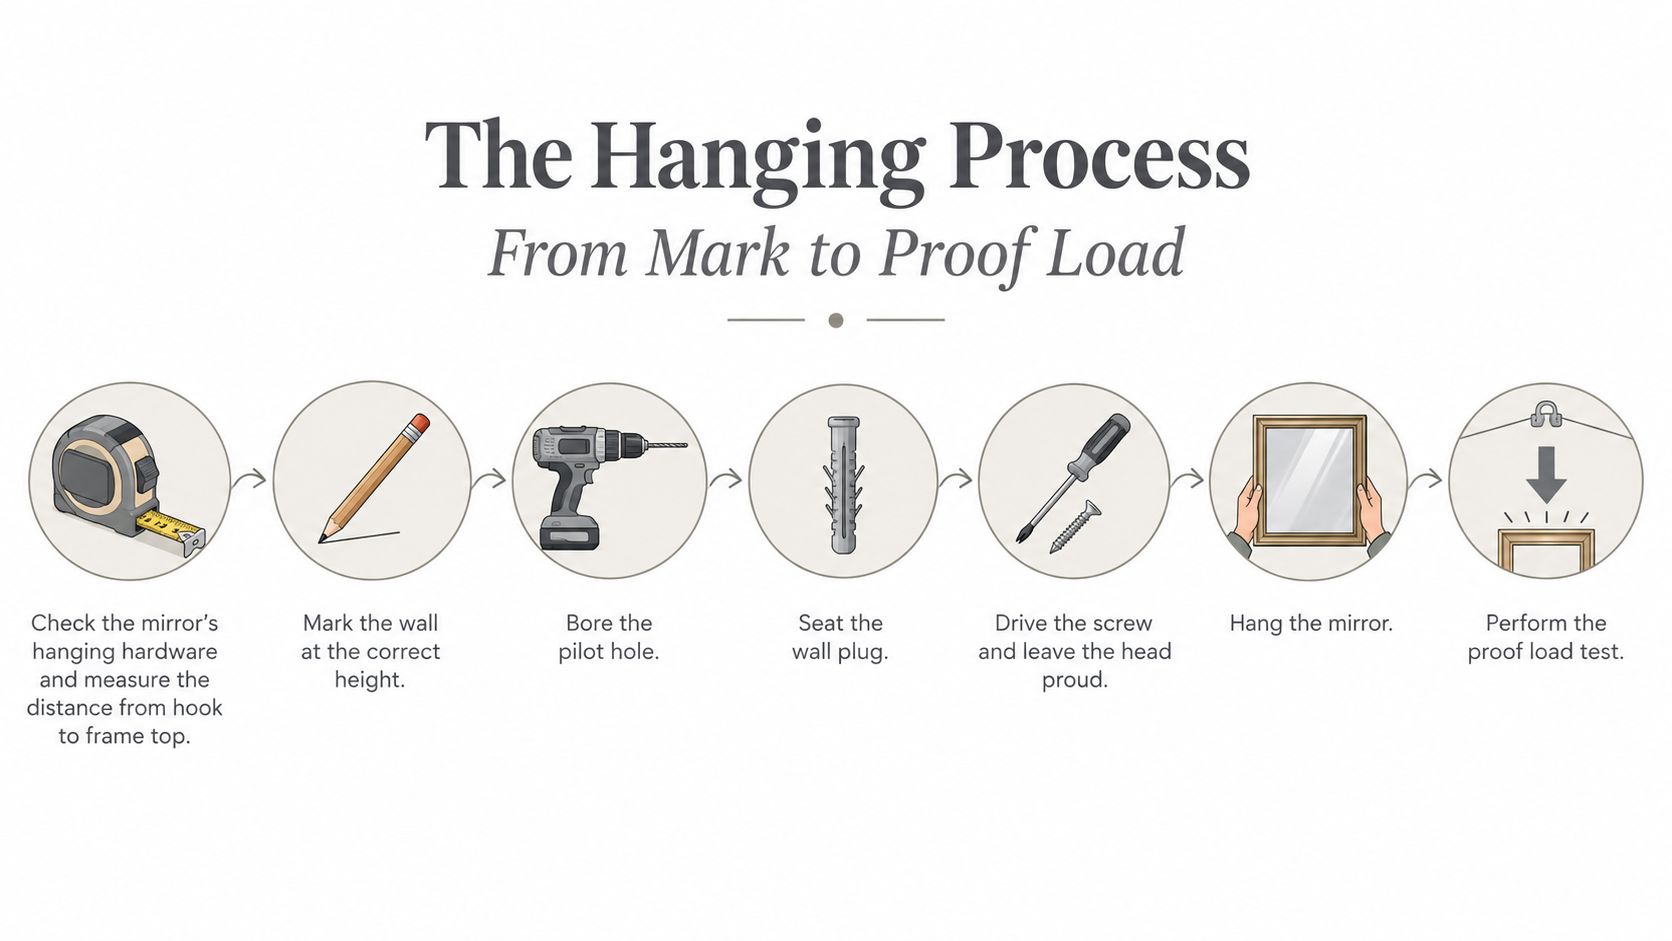
Drill the pilot hole to the diameter specified for the chosen anchor and wall type. A hole that's too large leaves the fixing loose, while one that's too small can deform the anchor or prevent it from seating correctly. Tap the anchor flush where the instructions call for it, then drive the screw while leaving the head proud by the gap required by the D-ring, clip, or cleat.
Lift, engage, and test
Anything heavier than a light decorative piece deserves a second person during the lift. One person should guide the mirror while the other watches the hardware engage. For a cleat, confirm that the wall section and mirror section interlock fully across their working length. For two D-rings, make sure both rings are seated on their own fixings. A single wire or hook may look tidy, but it can introduce uneven loading and unwanted tilt.
After the mirror is in place, check it with the level and inspect the frame from both sides. Apply a gentle, steady load to the lower edge, mainly downward and slightly outward, while watching the anchors and frame. This proof-load check should reveal movement, anchor creep, or twisting before you release the mirror completely.
Practical rule: If an anchor shifts during the proof-load check, don't drive the same anchor back in and hope for better results. Upsize the fixing, move to a sound structural point, or change the mounting system.
For broader guidance on the same sequence, see this heavy mirror hanging guide. If the project follows a move and several pieces need positioning, a resource on hanging picture frames after a move can also help with planning the layout before you make holes.
Matching Heavy Mirror Hardware to Weight and Wall
Hardware selection should begin with the finished mirror weight and wall construction, not with whichever hook is already in the toolbox. Conservative professional guidance recommends choosing hardware rated for at least twice the object's weight, as explained in this safe mirror and picture hanging guide. Mirrors above about 10 kg benefit from two-point support, and by 15 kg, two wall fixings are recommended as mandatory in the heavy-mirror guidance from Centennial Glass. Mirrors over 50 lb should be anchored into studs or masonry and ideally mounted with a French cleat or Z-bar, which distributes force across multiple fixing points.
Hardware | Weight Range | Best Wall Type | Common Failure | Key Trade-off |
|---|---|---|---|---|
D-rings with picture wire | Light to moderate framed mirrors, with capacity confirmed for the specific system | Stud-backed drywall or suitable masonry fixings | Kinked wire, loose ring, or uneven tension | Flexible layout, but wire can sag and tilt |
French cleat or Z-bar | Heavy mirrors, especially substantial framed pieces | Studs, solid masonry, or correctly rated structural points | Poor levelling or incomplete interlock | Strong load distribution, but layout must be precise |
Keyhole slots | Moderate pieces when directly secured to structure | Wood studs or solid masonry | Slot slips off a poorly placed screw | Clean appearance, but little tolerance for inaccurate marking |
Mirror clips and J-channels | Frameless mirrors, particularly fixed installations | Stud-backed drywall, masonry, tile, or suitable backing | Clip spacing or fastener choice doesn't suit the load | Clean and practical, but less forgiving during repositioning |
Construction adhesive or hybrid tape | Limited applications on compatible, stable surfaces | Suitable tile or masonry under manufacturer limits | Bond failure, unsuitable surface, or excessive load | Nearly invisible, but difficult to reposition and unsuitable for unsupported heavy loads |
D-rings with wire are convenient for smaller framed mirrors, but the wire creates a flexible suspension point. It can kink, stretch, or distribute weight unevenly. Two independent D-rings mounted to two wall fixings provide a more controlled arrangement than a single hook, particularly as the mirror becomes heavier.
French cleats and Z-bars are the more serious option for large pieces because they spread the load. Their weakness is installation accuracy. The wall bar must be level, attached to appropriate structure, and engaged along its intended length. One guide recommends cleat fasteners at no more than 150 mm centres to reduce flex under load. Colorado Art Services' safety guidance explains why fastener spacing and substrate choice matter together.
Adhesive can be useful where drilling is undesirable, but its limits are unforgiving. Tile and concrete may provide a suitable surface under the adhesive manufacturer's conditions. Bare drywall, dusty plaster, painted surfaces with poor adhesion, and heavy unsupported mirrors are not equivalent. If you can't verify the surface, cure time, and load rating, choose mechanical support instead.
Placement That Works With Light and Room Function
The old habit of using one universal hanging height creates awkward results because rooms serve different purposes. A hallway, dining room, bathroom, and office ask different questions of the same mirror. Start with function, then study the available light, and finally decide what the glass should reflect.
Above a console, the mirror needs breathing room from the tallest object placed below it. A useful starting point is 4 to 6 inches above the furniture, provided the composition still feels balanced and the mirror isn't forced too high for people to use comfortably. In an entryway, the centre should relate to the eye level of the people who will check their appearance, not to an arbitrary measurement that ignores the console, bench, or ceiling.
Let the reflection choose the wall
Light changes the practical value of mirror hanging decoration. Positioning a mirror perpendicular to a bright natural source can redirect daylight deeper into the room, but the angle must be checked from the main seating and standing positions. A direct reflection toward a television, desk monitor, or sofa can create glare that makes the room less comfortable.
In a room with one dominant window, the opposite wall often deserves consideration, but don't stop at “opposite.” Look at the reflection target. Art, a pendant, greenery, architectural detail, or an outdoor view gives the mirror something useful to return. A blank wall, open doorway, or pile of household clutter can make a large mirror feel visually noisy rather than expansive.
Walk through the room at different times of day. Stand where people sit, work, eat, and enter. A mirror that looks excellent from the doorway may reflect a harsh window directly into a seated guest's eyes. Another that seems too quiet in daylight may become effective once it catches a lamp or pendant in the evening.
For additional placement guidance around height and furniture relationships, use this mirror hanging height guide.
Corridors offer a particularly strong design opportunity. A mirror at the end of a hallway can return light and make a long run feel visually shorter, but it still needs secure attachment and a reflection that doesn't create confusion near doors or steps. Tape the mirror's outline on the wall before committing. That simple test reveals whether the scale and sightline work better than a last-minute adjustment after drilling.
Styling Mirrors Room by Room
Room function should control the shape, orientation, and reflection target. A mirror can widen a narrow wall, support an entry routine, bounce decorative lighting, or solve a dark corner. It shouldn't be placed by habit.
Entryway and living room
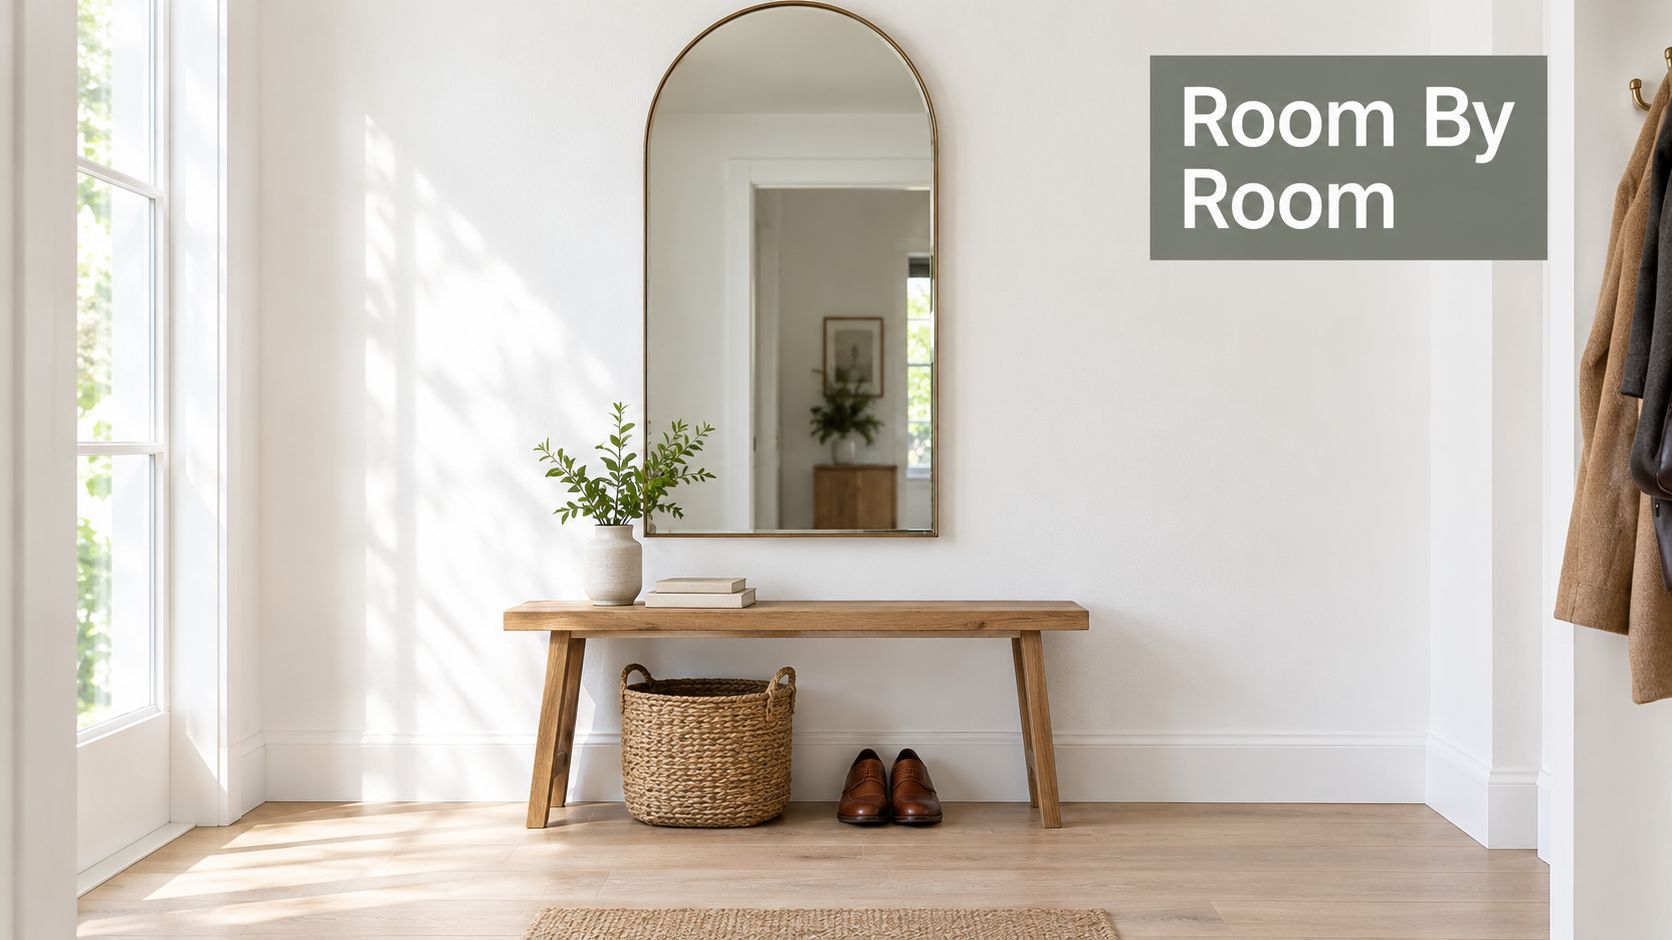
In an entryway, use a statement mirror around the eye level of the tallest regular user, centred over a console or bench. A proportion near two-thirds of the furniture's width often creates a calm visual relationship, but the wall and frame thickness still matter. A sconce or pendant can give the mirror a useful light source to reflect, while also making the arrival area feel layered. For more inspiration around exterior-facing entry spaces, these front door ideas for desert homes offer a related look at how light, materials, and arrival zones work together.
In a living room, a tall mirror can sit behind a reading lamp to create depth, provided the reflection doesn't expose the lamp bulb or catch glare. A wide horizontal mirror above a sofa can make a narrow room feel broader. Keep the lower edge comfortably above the back cushion and inspect the relationship from the main seating, not just while standing against the opposite wall.
Dining room and bathroom
A dining-room mirror should be judged from the seated sightline. Place its centre slightly below the typical standing centre so it catches candlelight or chandelier glow without shining directly into diners' eyes. Avoid reflecting a busy service area if the goal is a composed setting.
In the bathroom, centre the mirror on the vanity and coordinate its width with the basin, lighting, and wall clearances. A lower edge 4 to 6 inches above the backsplash can work when the vanity and splash arrangement allow it, but leave enough room for taps, cleaning, and the actual mounting hardware.
Bedroom and office
A vertical mirror beside or inside a closet door is often more useful than one directly opposite the bed. It supports dressing without making the sleeping area feel visually restless. In a home office, check the mirror from the camera's position and the desk chair. Keep the monitor and your face out of an unwanted reflected sightline, especially if video calls are part of the room's regular use.
Quick Safety Checklist Before You Walk Away
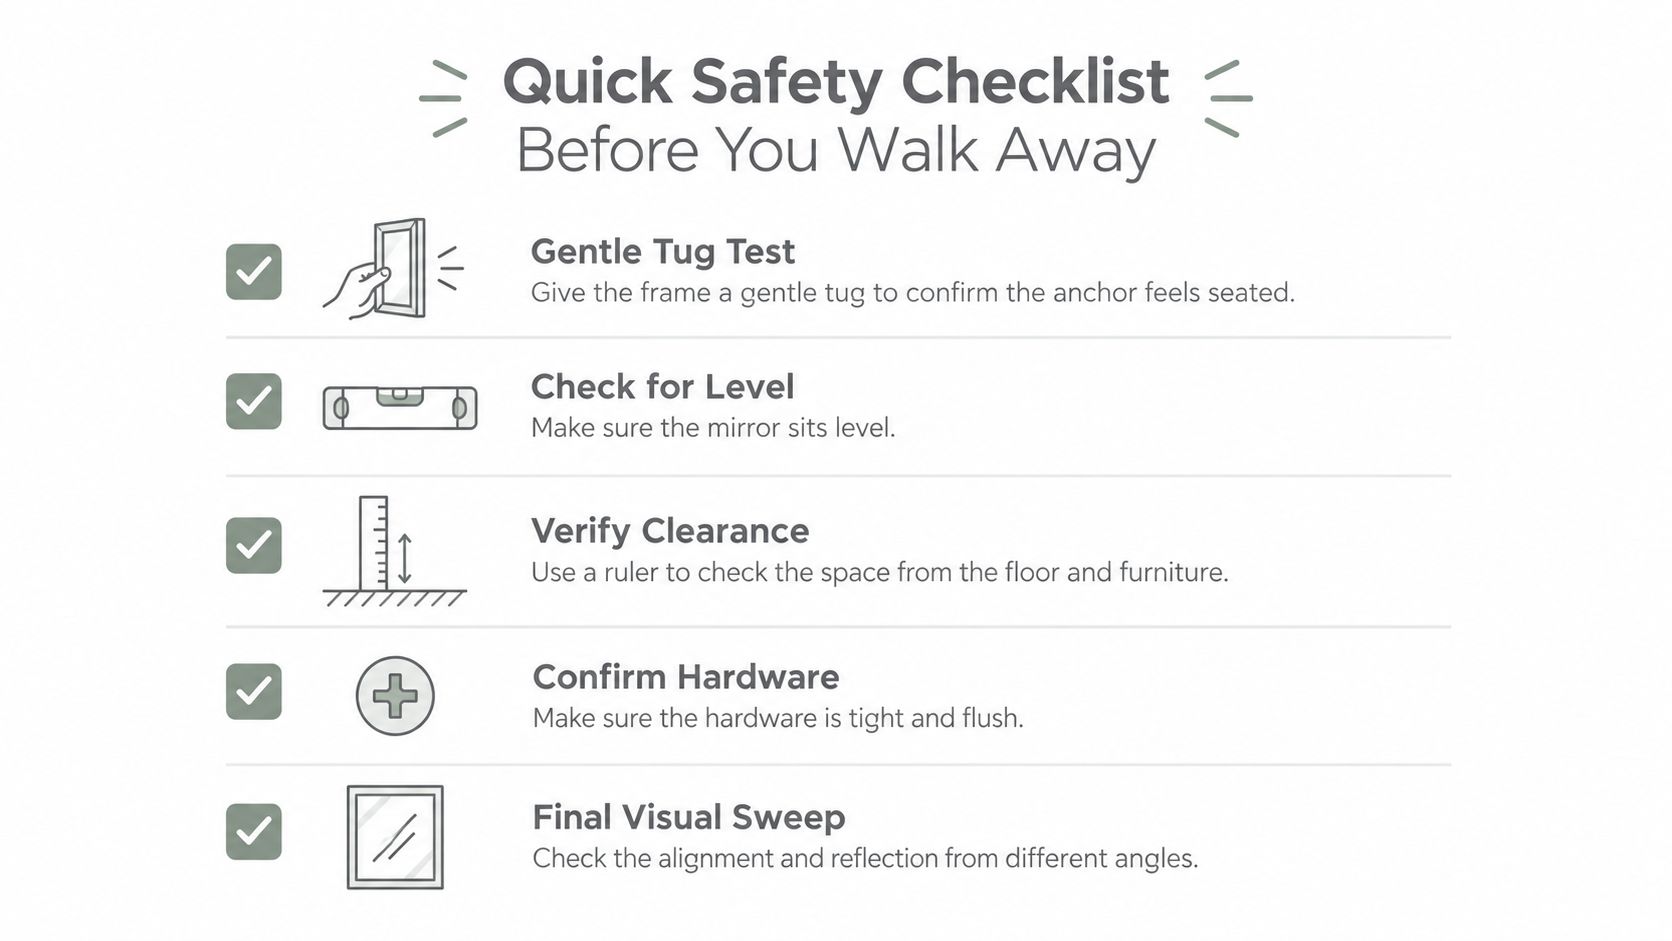
The installation isn't finished when the mirror first appears level. It's finished after the wall, hardware, frame, clearance, and reflection have all passed a final inspection.
Run the final checks
Test stability: Apply a gentle tug and watch whether the anchor remains seated or spins in the wall.
Confirm level: Place a spirit level along the frame or mounting bar, then check the bottom edge for drift.
Inspect clearance: Verify the intended gap above furniture, trim, backsplash, or floor remains consistent.
Check engagement: Make sure both D-rings sit fully on their fixings, the wire is correctly seated, or the cleat is interlocked across its support.
Review alignment: Walk through the room and examine the reflection from standing, seated, and entry positions.
A mirror can be perfectly centred and still be badly installed. Appearance is the last check, not the first.
Don't accept a drywall-only picture anchor as a permanent answer for a heavy mirror because it held during the first minute. A French cleat on plaster still needs a fixing strategy suited to plaster, a stud, or masonry. Adhesive strips should remain limited to the weight and surface conditions stated by the manufacturer, not treated as a substitute for structural support.
If the glass is already damaged, stabilise the area and avoid moving it casually. A specialist resource on an easy mirror fix for homeowners can help you assess whether the damage is suitable for repair or requires replacement. Don't hang a cracked or structurally compromised mirror until its condition has been evaluated.
Your next action is simple. Confirm the wall type and stud locations, weigh the finished mirror, select hardware with a rating at least twice that weight where appropriate, and decide whether the installation exceeds your tools or lifting ability. For large, high, ornate, or uncertain installations, Colorado Art Services provides residential and commercial mirror hanging, heavy-piece mounting, precise placement, and secure anchoring across the Denver Metro area and Front Range. Visit Colorado Art Services to discuss the mirror, wall condition, and placement before you drill.
Comments