


8 Gallery Wall Layouts to Inspire Your Space
A great gallery wall starts with the room and the art you want to display. Consider the wall’s size, nearby furniture, and where people will view the collection. Then choose a layout that gives the pieces a clear relationship.
1. Grid Layout
A grid uses matching frames arranged in even rows and columns. It creates a clean, orderly look that works well for photography, coordinated prints, and office displays. Consistent spacing is essential: even a slightly crooked frame can stand out. Lay out the full grid on the floor before marking the wall.
2. Salon Style
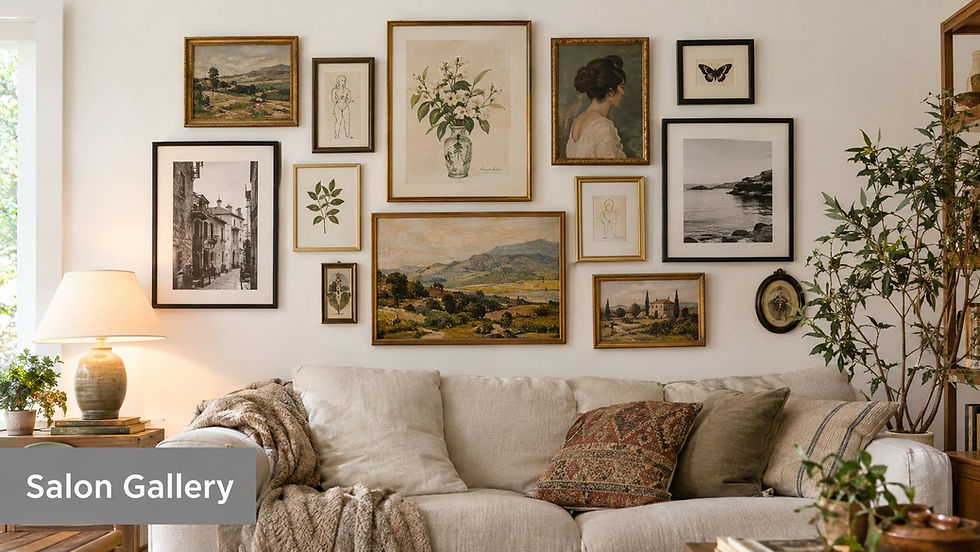
A salon wall brings together art of different sizes, styles, and frame finishes. Start with a favorite piece and build around it, distributing larger or darker works throughout the arrangement so one side doesn’t feel too heavy. A repeated color, material, or subject can help varied pieces feel connected.
3. Horizontal Line
A single row of art works especially well above a sofa, bed, or console, or along a hallway. Align the centers of the frames and keep the gaps consistent. If the display sits above furniture, plan its width in relation to the piece below it so the art feels anchored in the room.
4. Vertical Column
A vertical arrangement draws the eye upward and makes use of narrow walls, stairwells, and tall entryways. Mark a centerline before hanging and check the view from different angles. Larger frames often feel most balanced toward the bottom. In busy walkways, keep frames secure and avoid pieces that protrude too far.
5. Mixed Media and 3D
Combine framed art with mirrors, textiles, ceramics, or sculpture for a display with depth and texture. Give each standout object enough space to be seen. Before installation, account for every piece’s weight and depth, the wall type, and any glare or shadows. Heavy or fragile objects may need specialized mounting.
6. Thematic or Color-Based
Build a wall around a shared idea, such as family memories, Colorado landscapes, black-and-white photography, or a limited color palette. The pieces don’t need identical frames, but a recurring finish, mat color, or visual theme will tie them together. Leave room around the group so its boundaries remain clear.
7. Statement Piece
One large artwork can anchor a wall, with smaller pieces added only if they strengthen the composition. Test the placement from the room’s main viewing spots and give the focal piece breathing room. Check its weight and use mounting hardware suited to both the artwork and the wall.
8. Floating Shelves and Art
Shelves let you mix framed art with books, plants, and collected objects. Decide where the shelves belong before arranging the artwork, since their horizontal lines shape the whole display. Mount them for the weight they will actually hold, then style them with varied heights and some open space.
Plan Before You Hang
Measure each piece, including its frame and hanging points. Arrange the collection on the floor or mark its outline on the wall with painter’s tape, then photograph it from across the room. Check spacing, sightlines, and lighting before making holes.
The best layout is one that fits your collection and your space. For large, valuable, or complex installations, Colorado Art Services can help plan and securely install gallery walls throughout the Denver Metro area and Front Range.

Comments